I haven't made a lot of obvious progress in the last few days. One of the more important things I have learned so far is how much time is really spent in parts search, parts ordering and waiting for parts to come in. The major parts are relatively easy, but getting the exact options and exact part number is a little more complicated than I thought. So most of the last week was spent ordering parts.
I also want to spend a couple of minutes whining about fasteners. Fasteners are expensive! Especially when you want large and high grade bolts. Since I am working on the chassis most of the bolts are either grade 8 SAE or grade 10.9 Metric. I have been able to get the majority of fasteners I need at McMaster-Carr, and since the warehouse is in Atlanta, I get them in a couple of days.
Two particular fastener problems were the bolts and spacers attaching the upper control arms to the frame (these are special carriage bolts with machined spacers for alignment) and the front differential attachment bolts.
I looked on eBay, and used control arm bolts were going for over $50 per set, and the spacers were selling for about $30 each and there are 8 of them. Fortunately, Coastal Corvette only charged me $25 total for all 4 bolts and all 8 spacers! I also picked up the large differential attachment bolts between the rear end and the pinion mount. They are Grade 10.9 M14 bolts 205 mm long. At McMaster-Carr these bolts were $27 each, fortunately used ones at Coastal Corvette were only $5 for both. I learned my lesson and will now pay more attention to attaching hardware, especially on used parts.
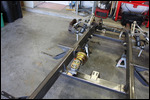
The Strange Coilovers (the coilovers are not strange, Strange is the brand name) from Summit Racing came in and they look really great. They are S-5204 single adjustable with a 10" collapsed length and a 13.84 extended length. I used QA1 10" springs with 350 lb rate on the front and 175 lb rate on the rear. These were Darrell's recommendations, and the beauty is that if they are too strong or too weak, it's only $100 to buy an updated pair.
The rear ones fit fine at the top, and the lower attachment bolts are back at Darrell's getting modified. The front coilover upper mount was fine, but the lower had no place to attach. I'll have to get back to Darrell.
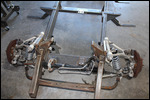
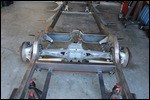
The rest of the fasteners connected fine, though I had a bit of a problem connecting the rear sway bar. It turns out that I needed to flip the sway bar over, and swap the connecting links side to side since the bar is not in the original Corvette orientation. It fits perfectly now. The front sway bar was a bit more of a problem. The bar mounted to the frame just fine, but no way were the links going to work.
I called Darrell at Rockabilly Fabrication, and he explained that he had to make a new plate for the lower control arm that would provide both attaching points for the lower coilover mount, and connection point for the sway bar link. Problem solved! Evidently this mount is slightly different depending on the exact year of the front suspension. Darrell is working on a new design, and expects to finish up the new parts, and the modified rear lower coilover mounts by the end of the week.
No additional charge, of course.
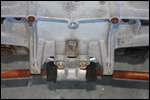
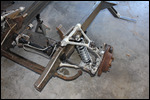
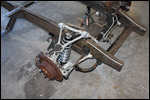
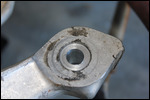
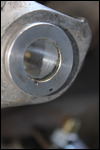
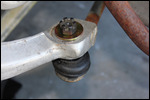
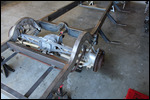
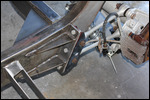
The flip kit installation was very straightforward. It basically moves the rear tie rod center mount down to the leaf spring attachment points and swaps the rear tie rod ends from being installed above the rear spindle to below. It's basically just a bracket and 2 bushings. The bracket provides a bolt attachment point to the leaf spring mounting points and it's just a bolt on. The bushings are a way to swap the tapered hole for the tie rod ends. This meant I needed to drill a 7/8' hole in the aluminum casting.
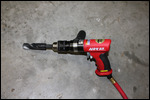
I had to buy a BIG drill bit. 7/8" is a BIG hole! While I was at it, I went ahead and bought a 1/2" air drill. Drilling the hole was fairly easy, as aluminum is easy to drill. I just had to pay attention to be sure the hole was straight since I was drilling free-hand on the chassis. It came out fine, and the bushings fit perfectly. I'm not sure I agree with the bushing design, as they also install from the bottom, so I needed a large washer on the top to hold it all in place.
It would have been much simpler to reverse the taper and install it from the top so the bushing flange would hold it all in place. Oh well, it works!
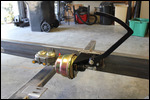
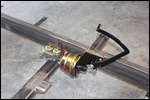
I also installed the brake pedal and master cylinder assembly (CP632BB-MC from Classic Performance). I wanted this specific pedal assembly, as there are 4 mounting nuts welded into the frame to attach it. Pedal assemblies are available from several vendors, and they may all be the exact same part, but I didn't want to take that chance. Darrell warned me that these guys were really slow, and they were. But the price was right, even with the exorbitant shipping cost. I probably should have called them before I ordered as their website was confusing. It seems you could order the master cylinder and pedals, or the master cylinder and proportioning valve but not the master cylinder and pedals and proportioning valve as an assembly. Now that I see the part, it was obvious what proportioning valve assembly I needed so I ordered it today.
I think the only other part I will need from them are the adjustable motor mounts, so I went ahead and ordered them too.
The next task will be installation of the brake and fuel lines. This means learning how to flare and bend tubing. After a bunch of research, there turns out to be 3 choices: steel, stainless steel, and a new material cunifer. Steel is the most common, but it rusts. Stainless is better, but it is hard to bend, and even harder to flare. Cunifer is the name for a 90% copper, 10% nickel alloy, and has been approved for brake lines by DOT. It's a little more expensive, but since it is a little softer, it is easy to bend and easy to flare. We'll see, so I went ahead and ordered brake and fuel lines (3/16 for brakes, 3/8 for fuel, and 5/16 for fuel return).
Now comes the tricky part as I need to do the actual line designs. The Corvette stuff is metric "bubble" flare, the master cylinder is SAE double flare, and the chassis feed-through is AN-3. Luckily I found a tool set that would handle all three.
I ordered the appropriate nuts, clamps and fittings and have most of the design figured out.
Since I'm doing the fuel lines, I also needed to order the fuel tank. The frame is set up for a Tanks, Inc universal fuel injected tank, but the inlet is on the top, meaning cutting a hole in the wood bed for a fuel filler. This is common on these kind of trucks, but I just don't like it. I had Darrell raise the tank a few inches to butt up against the wood floor of the bed, so I could install a side filler neck to the tank between the frame and the bed floor. This will allow me to run a rubber tank filler hose to a fuel door cut into the rear fender. Much nicer!
I also ordered the Corvette style fuel pressure regulator/ filter and will mount it on the frame near the tank. This allows for a short return line to the tank and a single 3/8' fuel line to the engine. The later model Chevy Vortec engines us a returnless fuel rail and this should work out fine.
So, at this point, I'm just waiting for parts to come in.
I went ahead and ordered some of the other brake/ caliper/ rotors/ flex hoses I will need so they will be available when I need them.
I did have an interesting time with the rack and pinion steering rack. The front suspension came with a steering rack, but it's used and of unknown condition, so I thought it would be a good idea to install a brand new rebuilt rack as I went along. This is just a replacement part, so the local auto parts stores should be a good source. Unfortunately, none of the local stores have a 1986 Corvette rack and pinion available. There are a few online sources, but since this is a rebuildable part, there is a substantial core charge.
So today, I was looking around and noticed that Ecklers had the rack and pinion on sale marked down from $219 to $164. I went online to order it and it was $164, plus a $300 refundable core charge, plus $30 in tax (evidently a core charge is taxable) plus an additional $50 for oversize shipping. In addition, I was expected to ship back the core at my expense (probably another $50) before I would get a refund on the core. That's like $500-$600 tied up in a rack and pinion! Luckily, there is an Ecklers showroom down the road in Titusville, so I called them up and will have them ship the rack and pinion to Titusville at no cost and I will bring in the core when I pick the part up at the showroom. Crisis averted!
Well, I'm going back to my brake line design and waiting for parts to arrive. I'm sure there's some fitting or fastener I've forgotten about.

 Orlando, Florida, United States

2025-05-22