 Orlando, Florida, United States
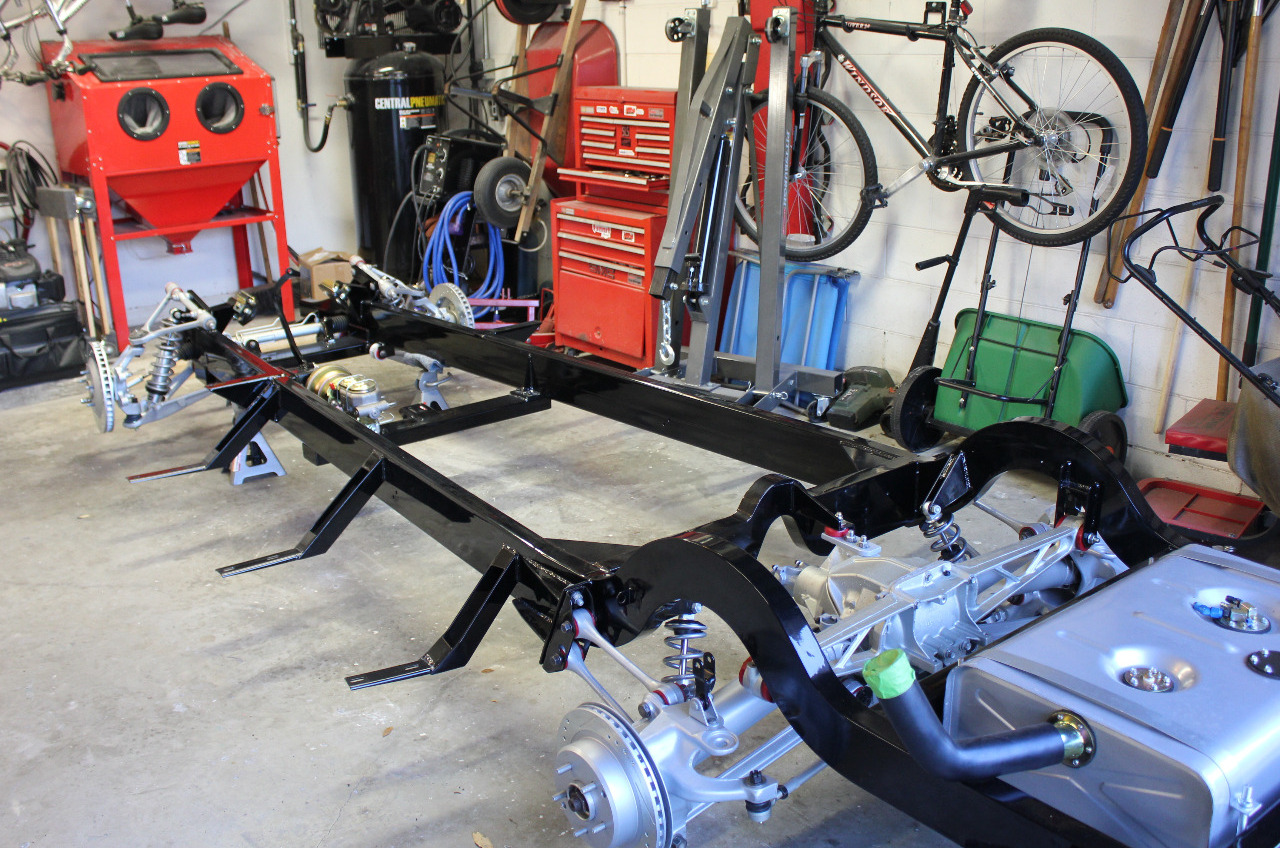
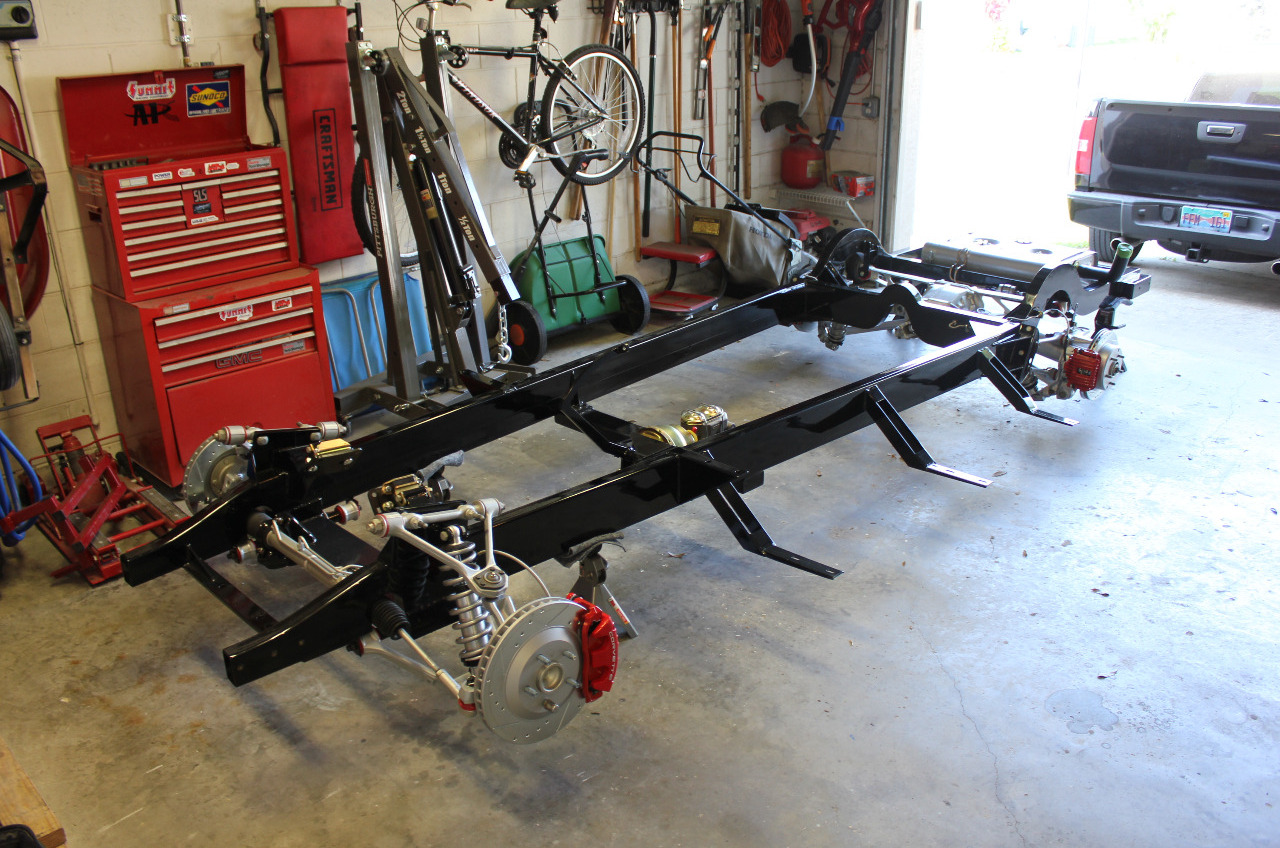
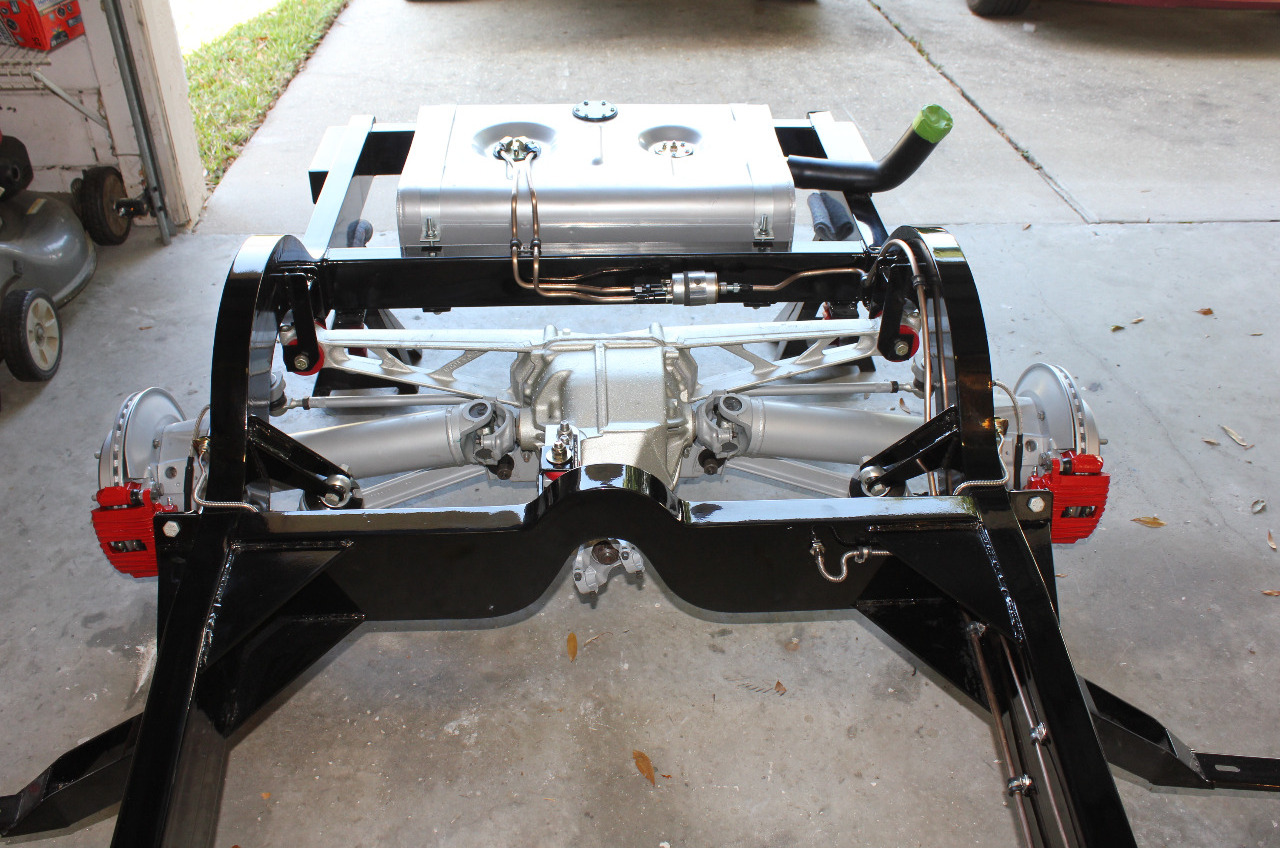
Well, the frame has returned from the powder coater and it looks magnificent! I can't say enough good things about Advanced Powder Coat of Longwood. They really did an outstanding job. It did cost slightly more than they had quoted, but in talking with them, the original quote assumed that it would take 1 hour to sandblast the frame as it was all new metal. It actually took them 4 hours, but they only charged me for 2 hours. Sounded more than fair to me.
When it came to loading it on the trailer, they really took the extra time to make sure it was loaded without any scratches. They even lent me a tie down strap because they didn't like my rope. When I got it home, I was able to unload it myself with the help of my Harbor Freight shop crane. I just took my time and unloaded without a single scratch.
Unfortunately, they finished powder coating the frame before I was able to finish powder coating the remaining suspension pieces, so it mostly just sat for the next few days while I finished the rest of the pieces.
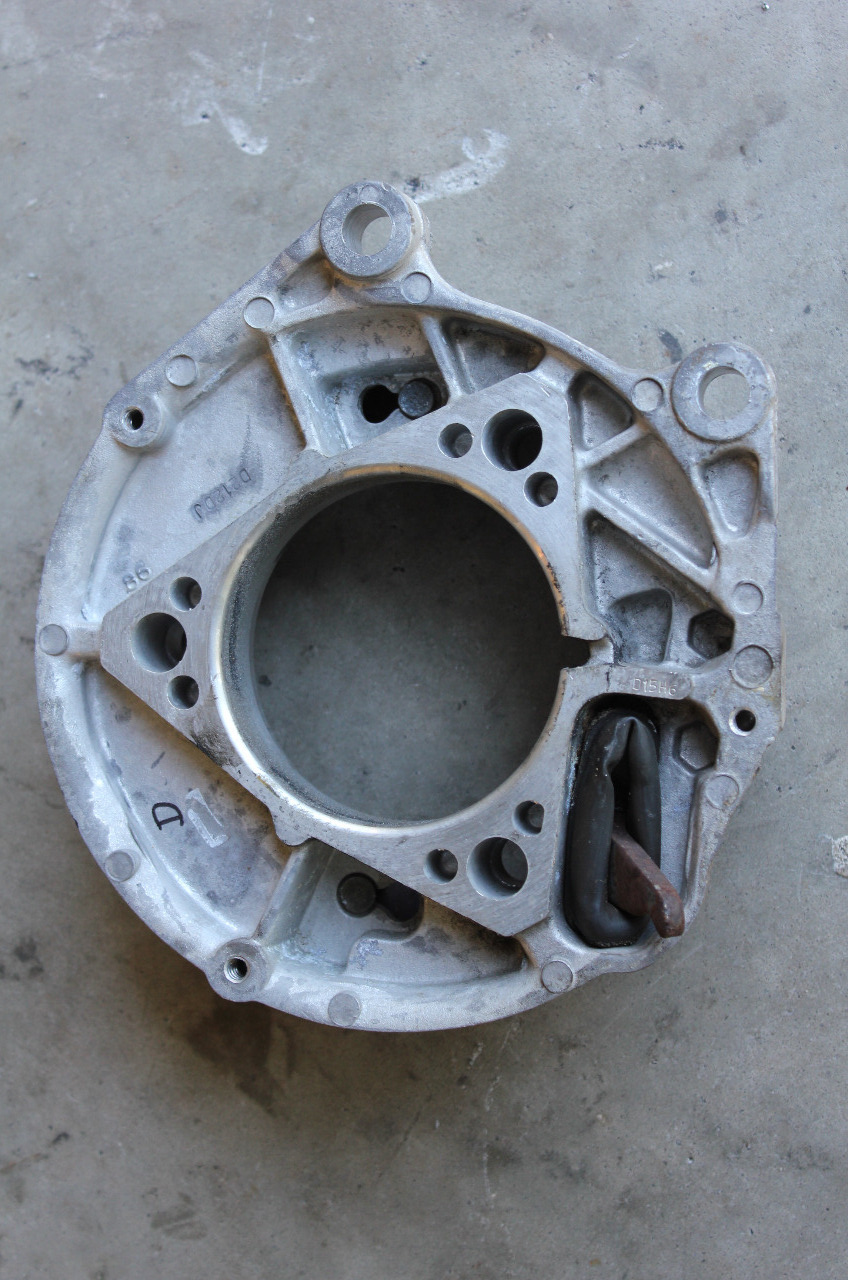
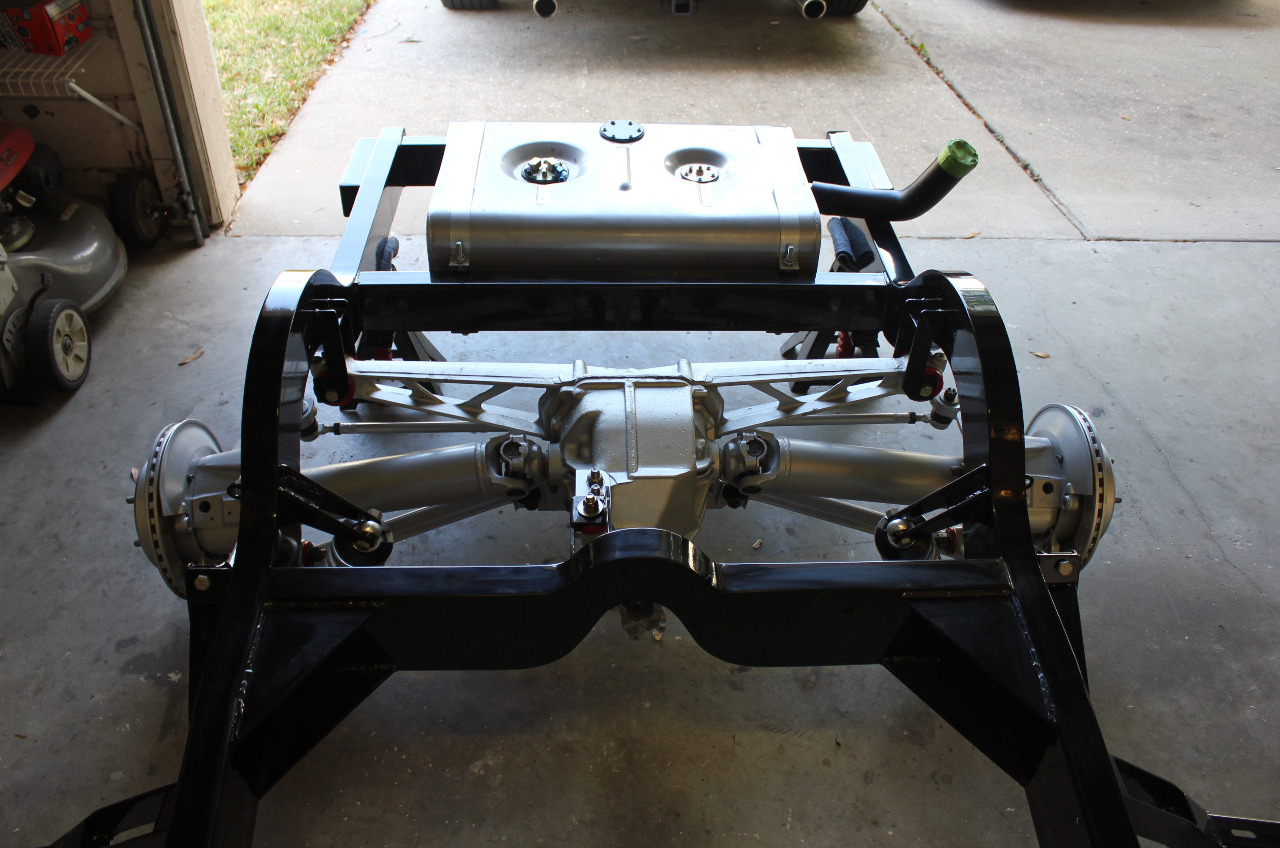
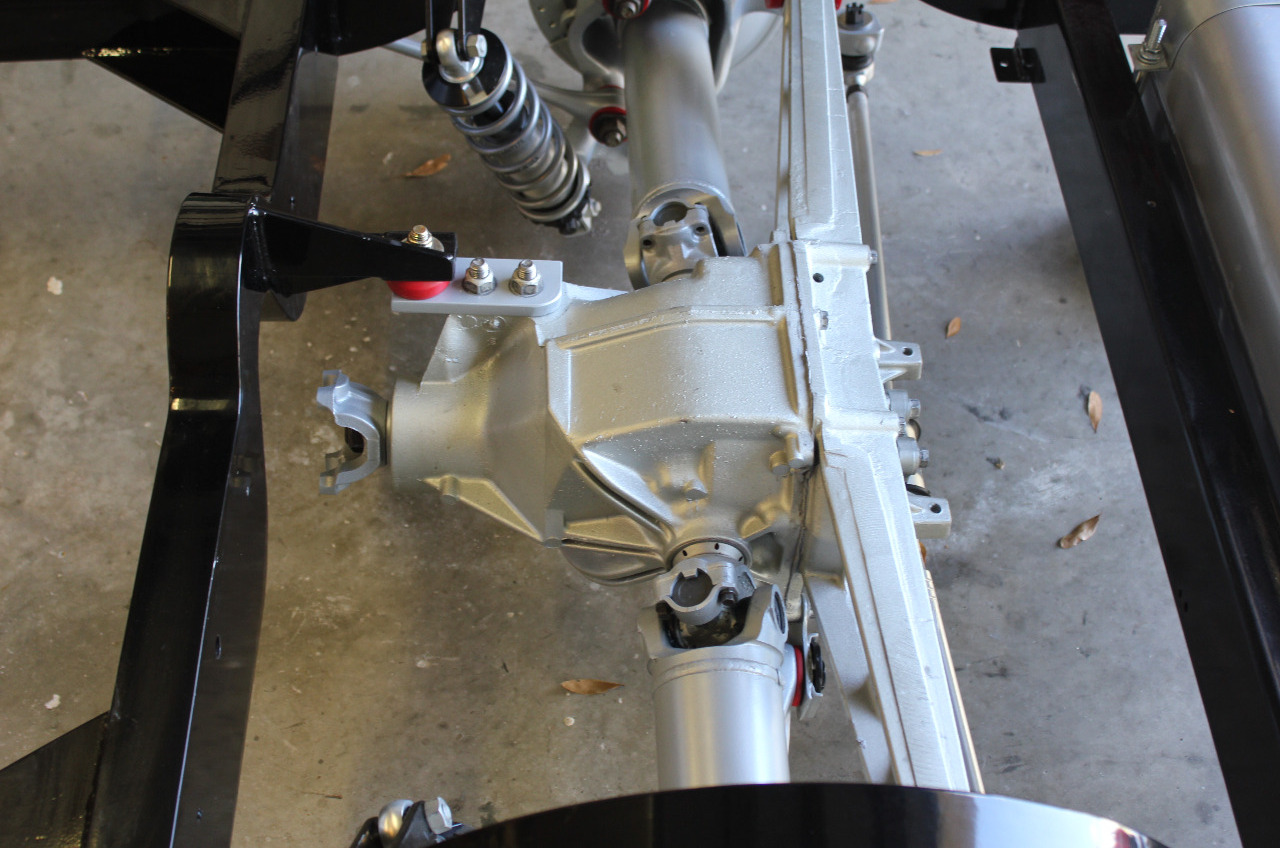
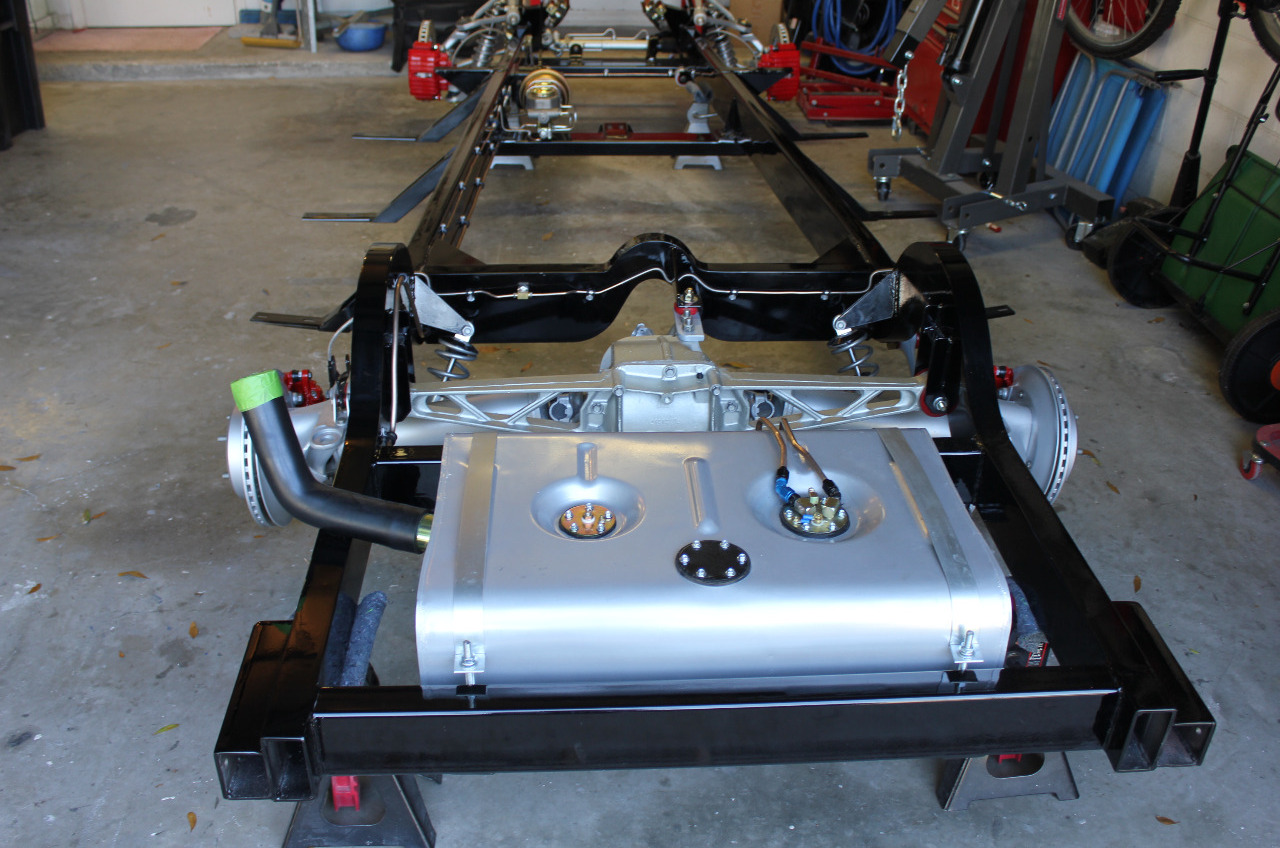
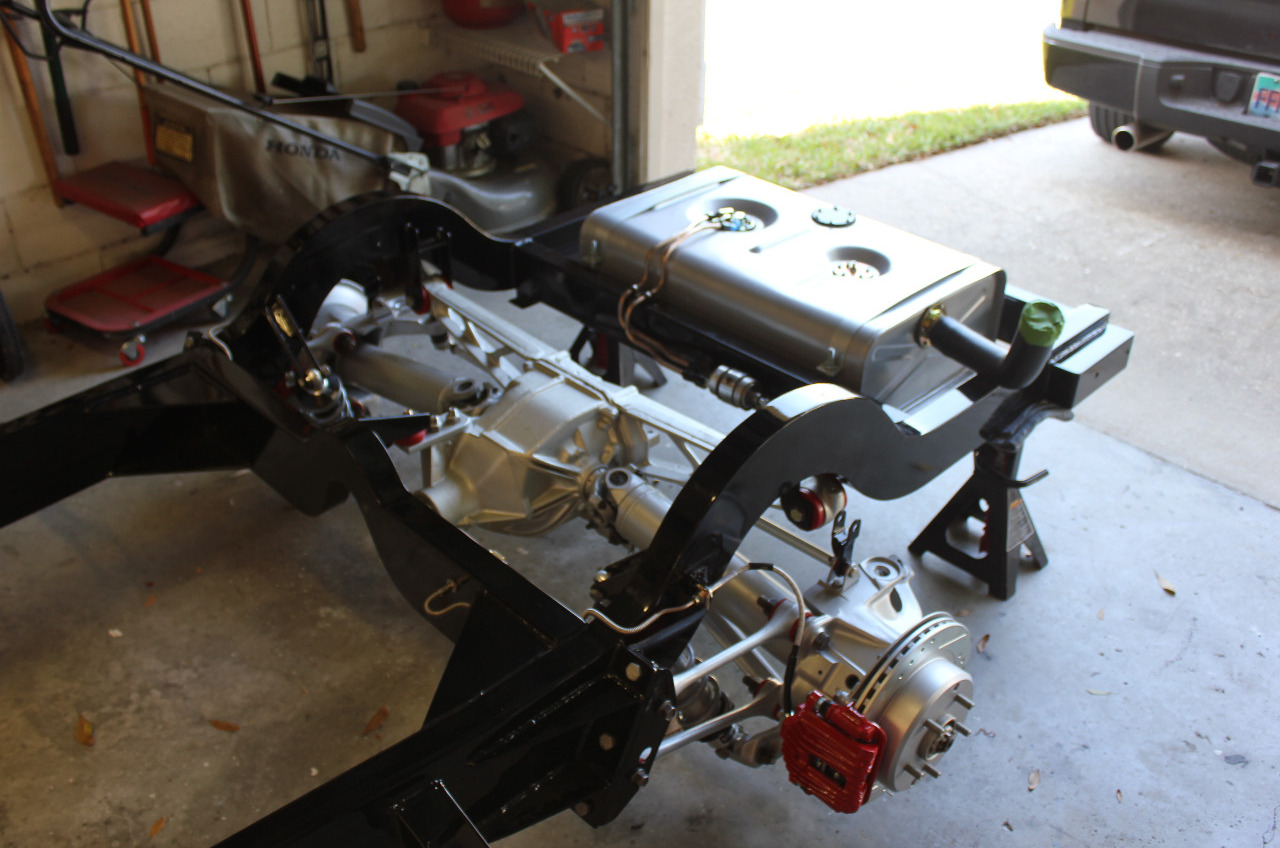
I was concerned that I wouldn't be able to fit everything into my Eastwood powder coat oven, but everything fit! The only things I couldn't powder coat were the "batwing" as it was too big and the differential as I didn't want to totally disassemble the bearings and gears and didn't want to subject them to the 400 degree temperature.
I painted these pieces with Eastwood self-etching gray primer, aluma-blast paint and diamond clear coat. They look good, but a slightly different shade of silver from the powder coat parts. Close enough! Also painted the new tie rod ends, rebuilt steering rack, and a couple of other small parts that couldn't be disassembled to meet the temperature. Everything looks good, so now it's time to begin the actual assembly.
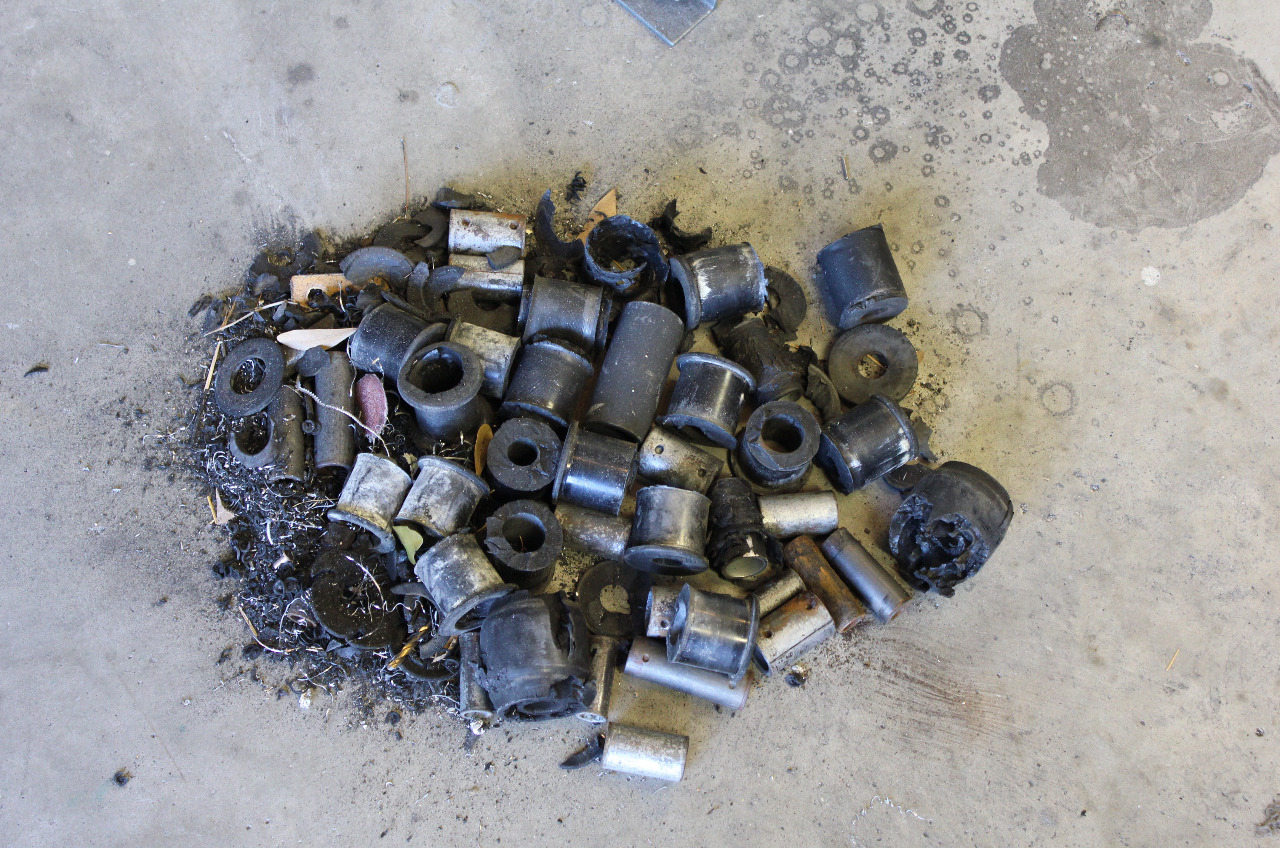
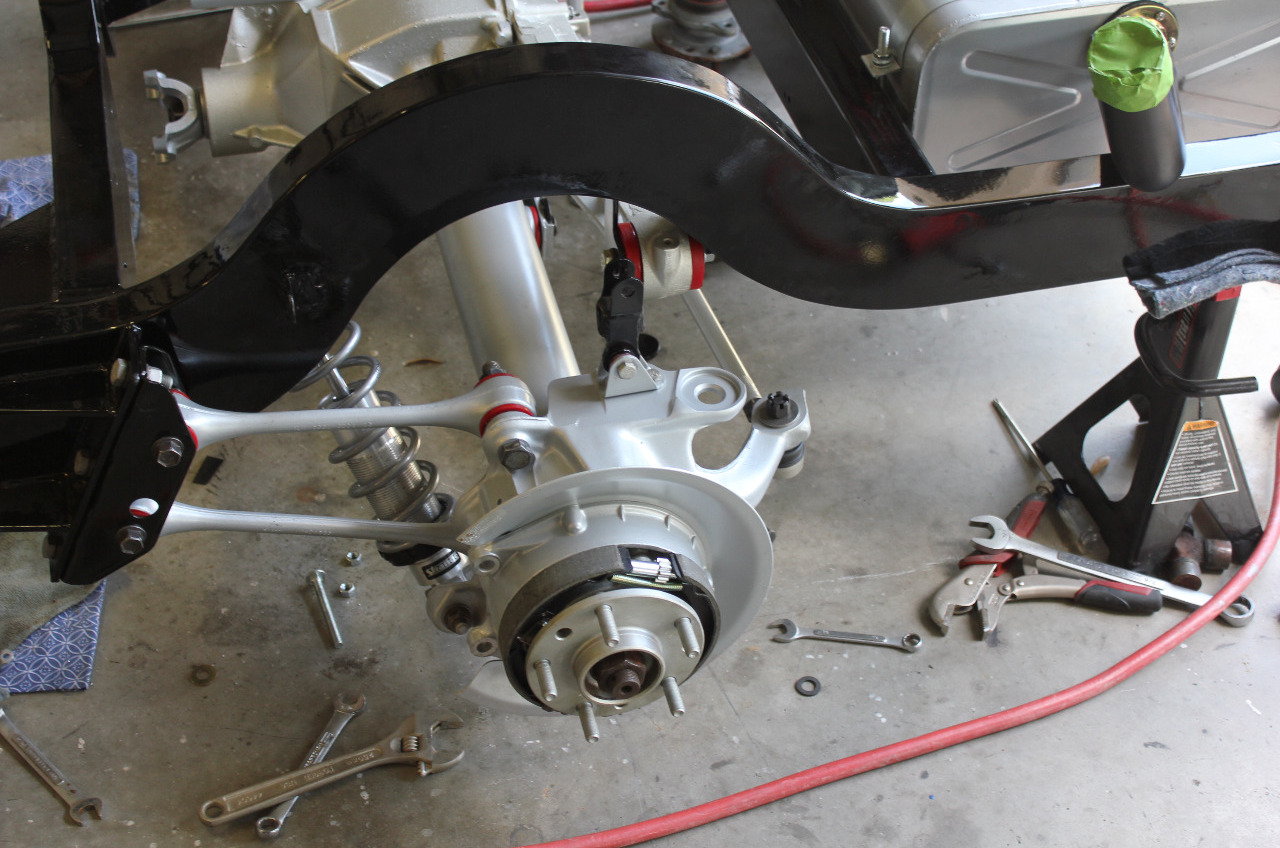
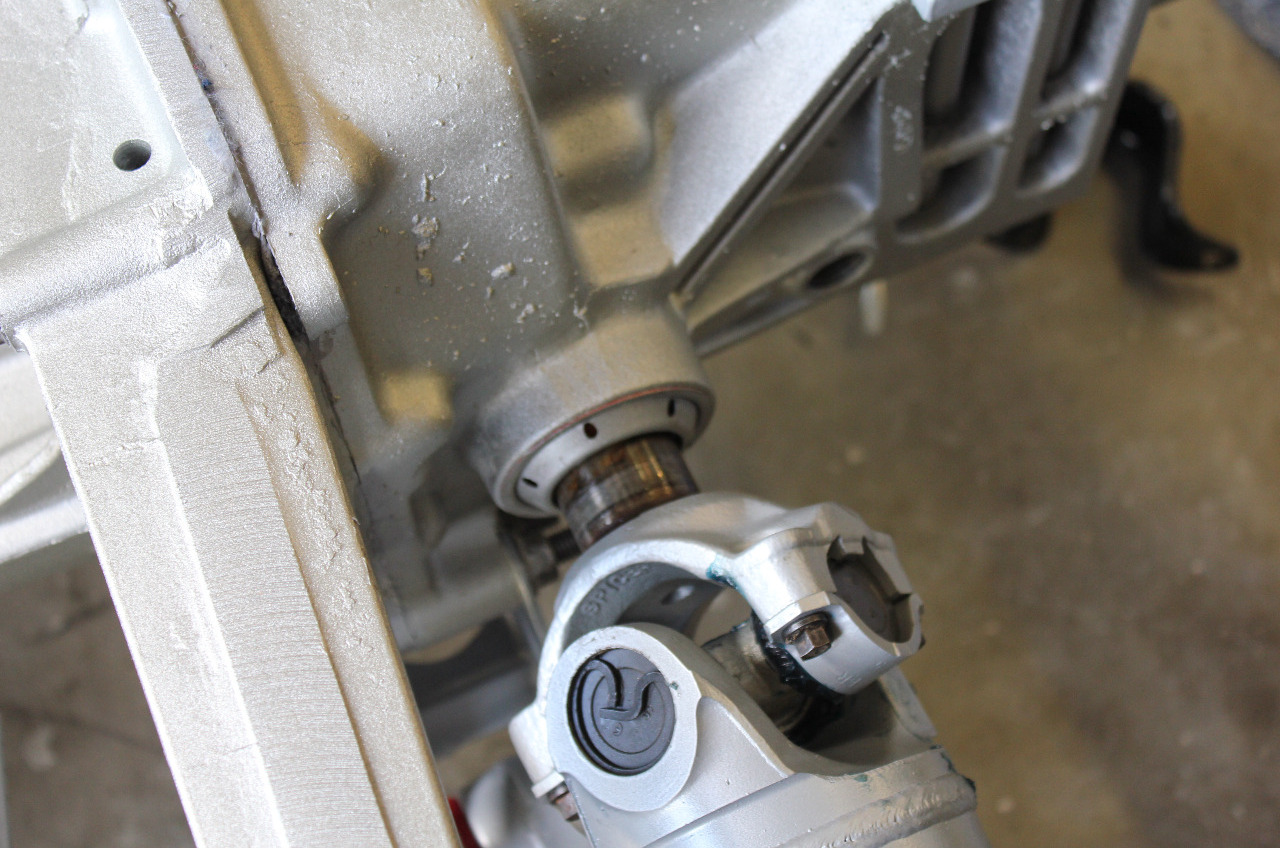
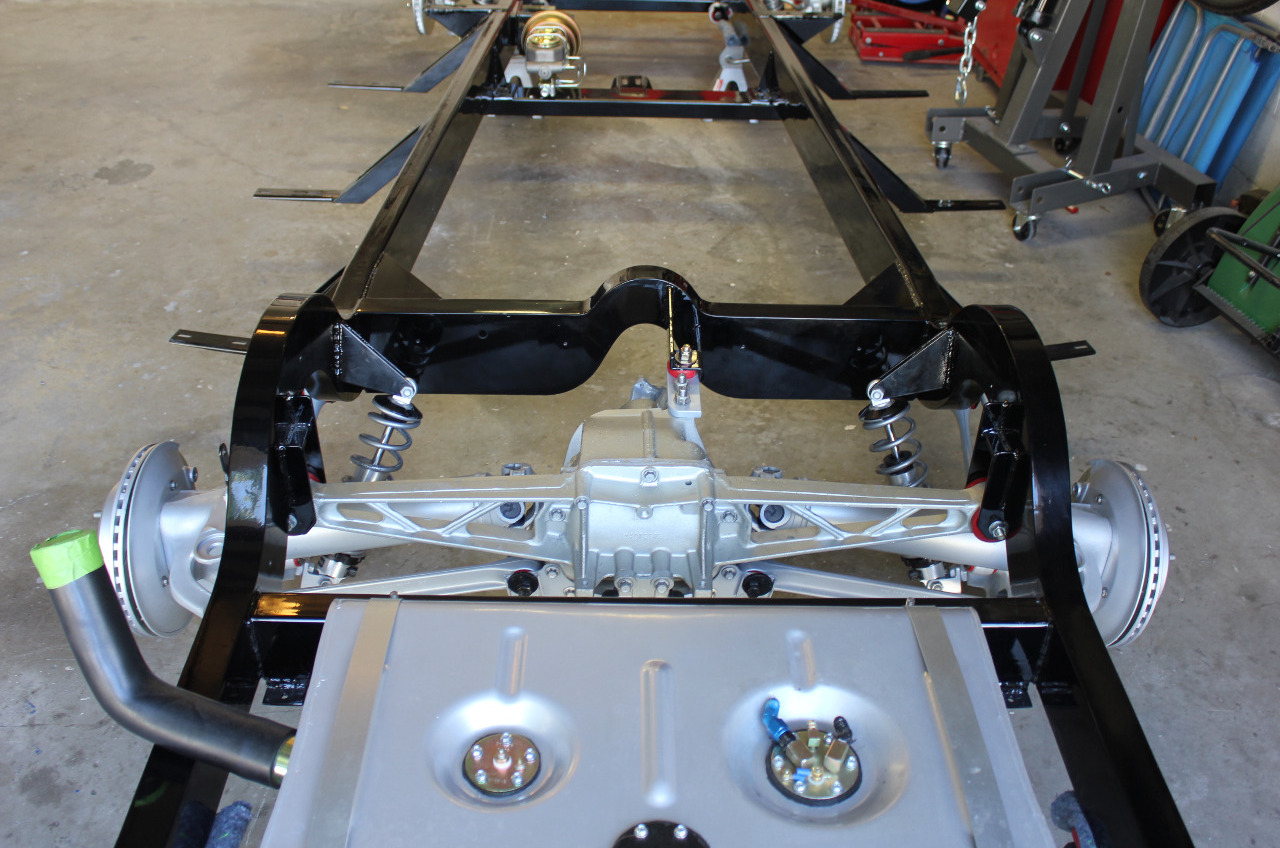
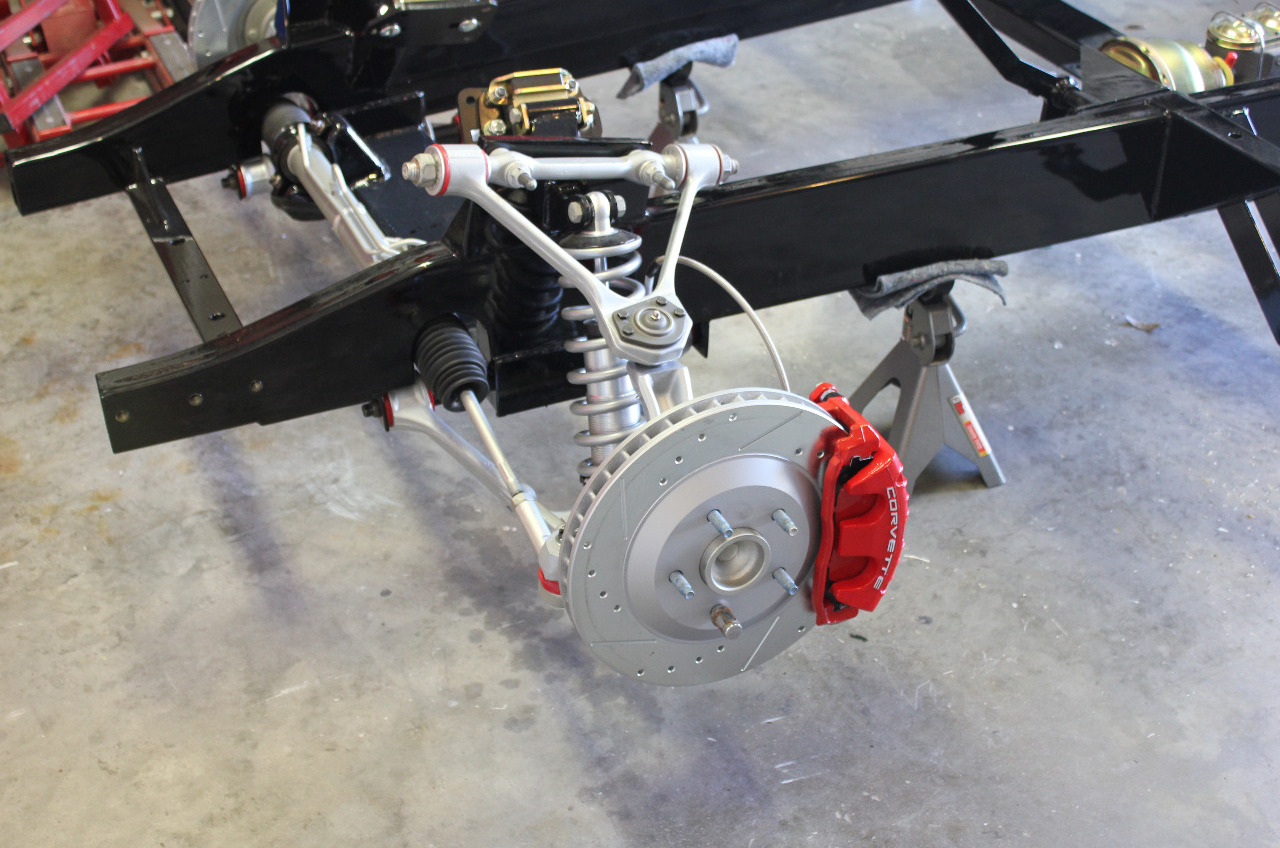
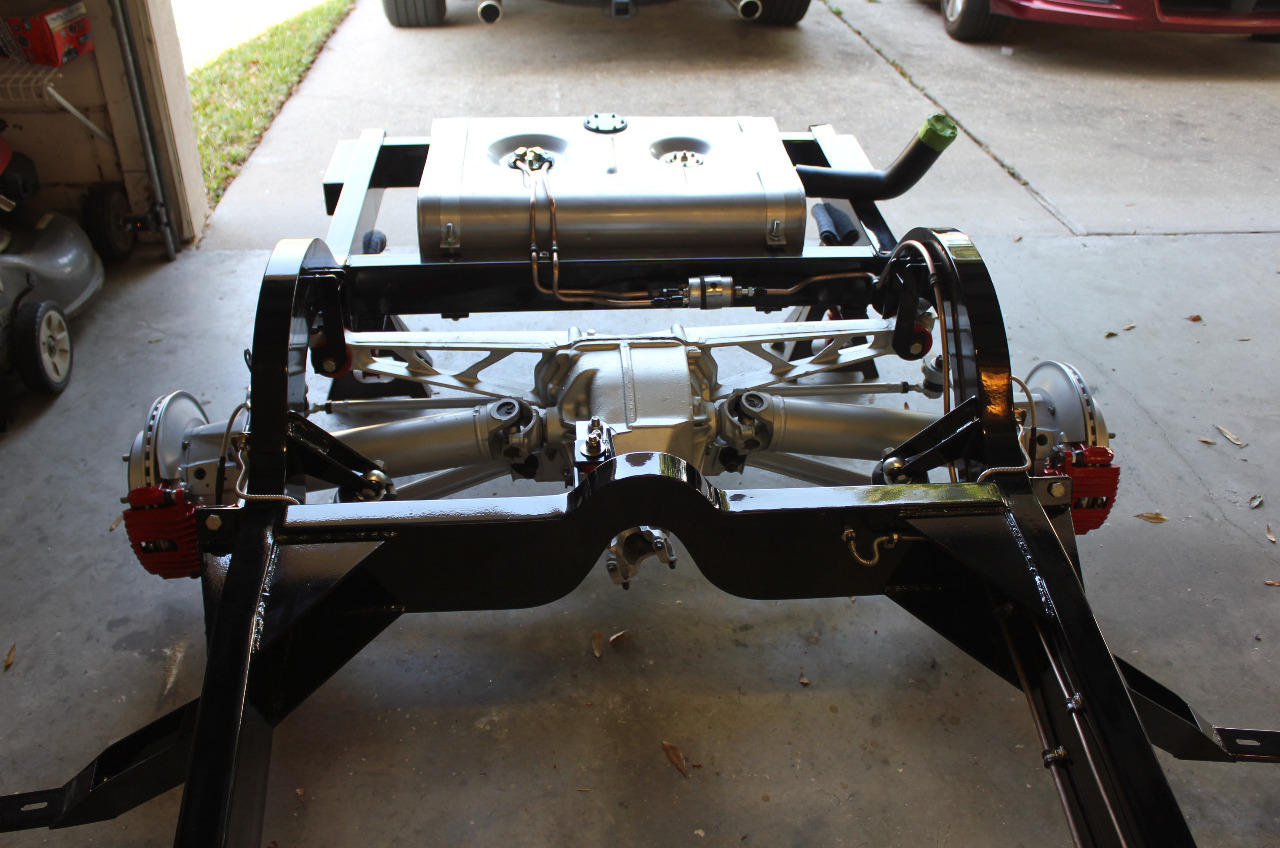
The differential was reassembled with all new seals, and the differential yoke had a couple of broken bolts and rust around the seal surface, so I just installed a new one. I'm also replacing all the rubber bushings with Prothane Red polyurethane bushings.
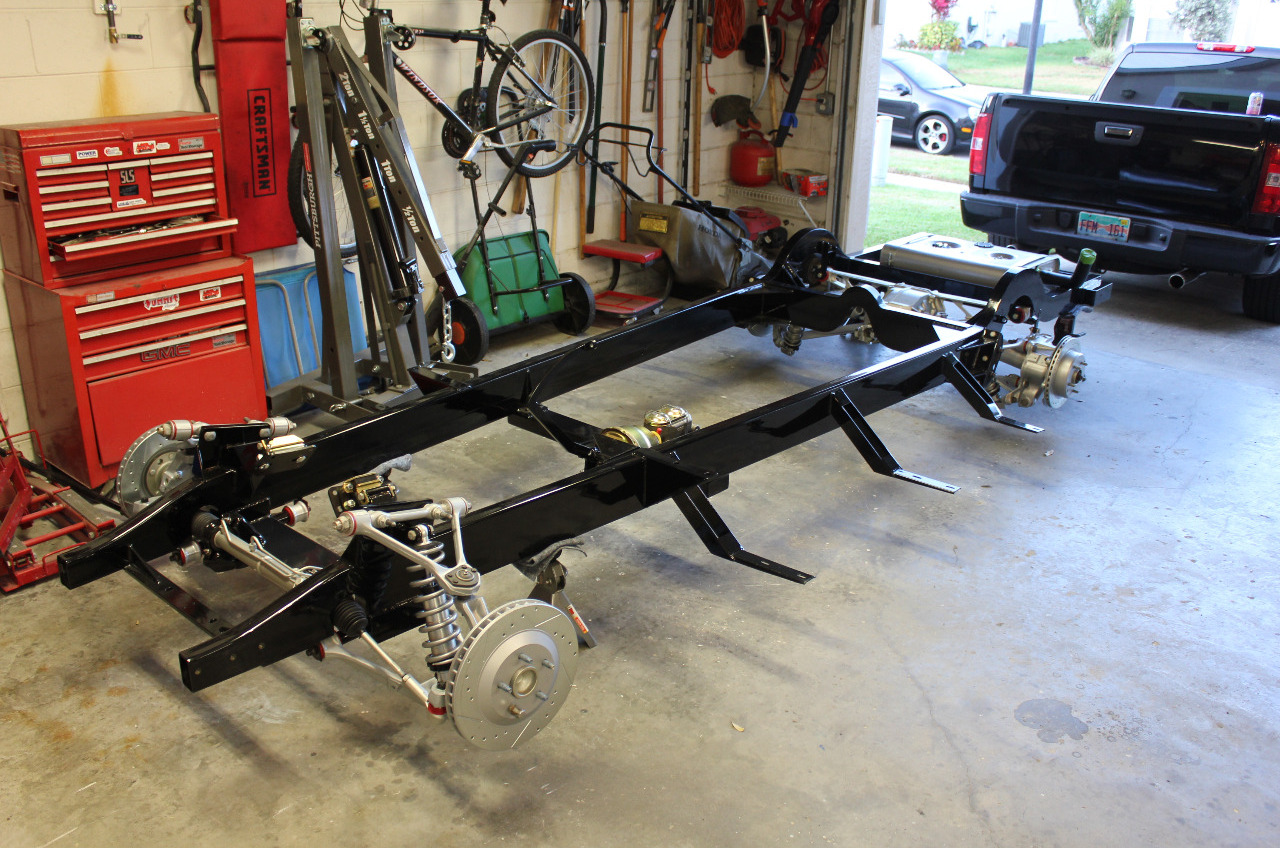
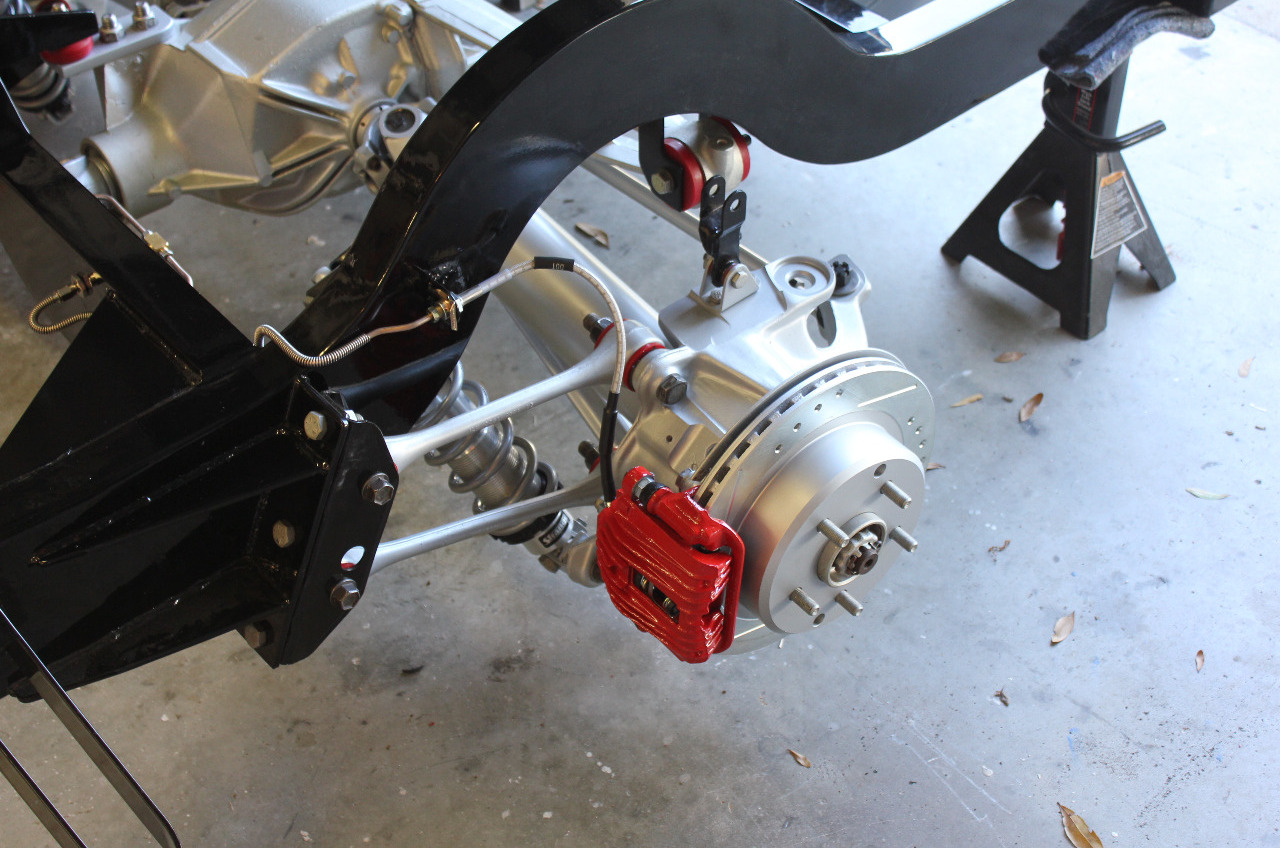
Everything is tight and looks good! I also replaced the half-shaft universal joints and the rear wheel bearing assemblies. All these were replaced with Moog parts. The rear tie rod ends are also new. Darrel's new lower coil over mounts work great, and I've been torquing everything to specification as I go, along with a liberal use of locktite where necessary.

Unfortunately, after the drivers side was done, and as I was tightening the last bolts on the passenger side, the axle half shaft popped out of the differential. What a pain! I had to tear the entire differential back apart, when I looked inside and found the the c-clip had popped off. After struggling for a while to get the c-clip to snap in place, I took them both out and measured the thickness with a micrometer. Turns out they were different thicknesses! One was .05" and the other was .06". I don't know if this is intentional, or if they are just selected at initial assembly. In any case, I had installed the thinner .05" clip into the wider groove, and the .
06" clip would not fit fully into the narrower groove. Swapping both clips,and it all went back together perfectly.
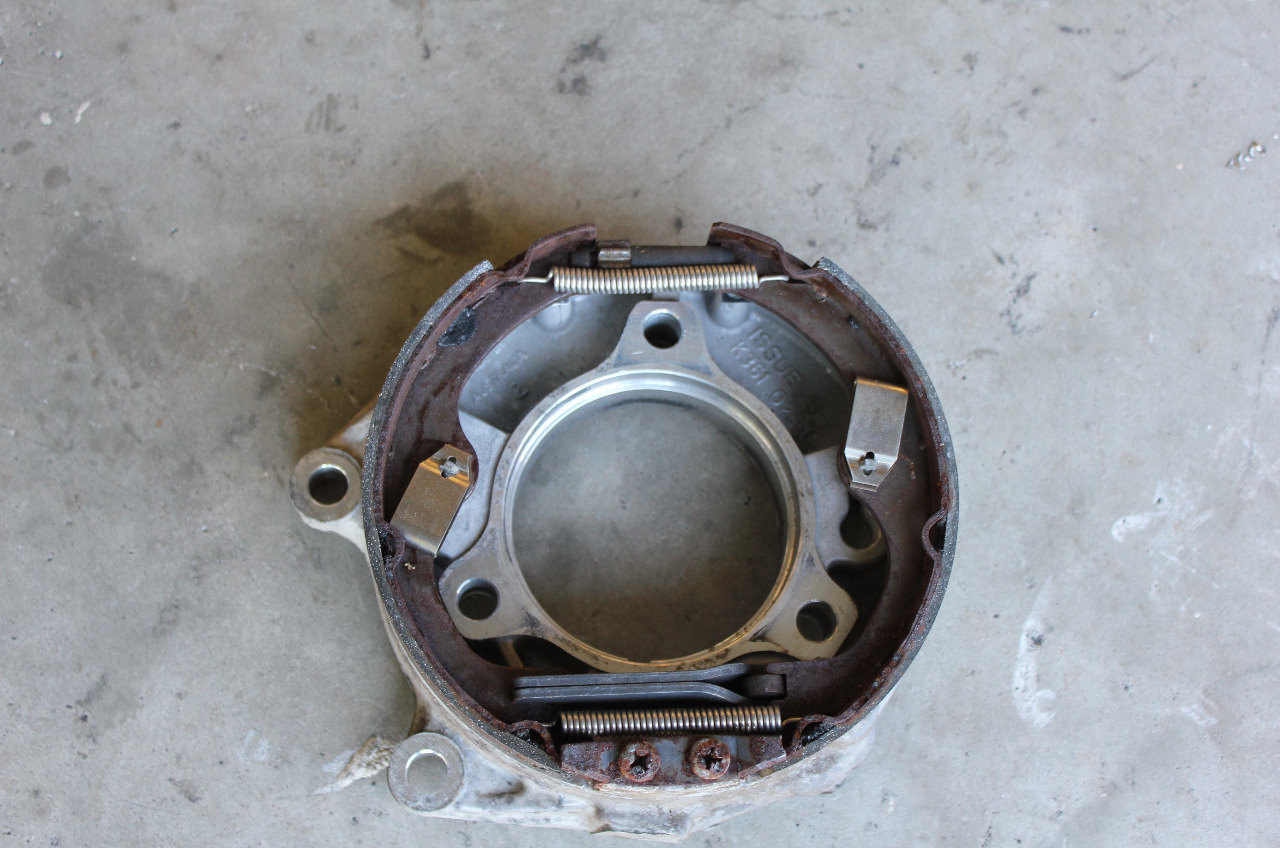
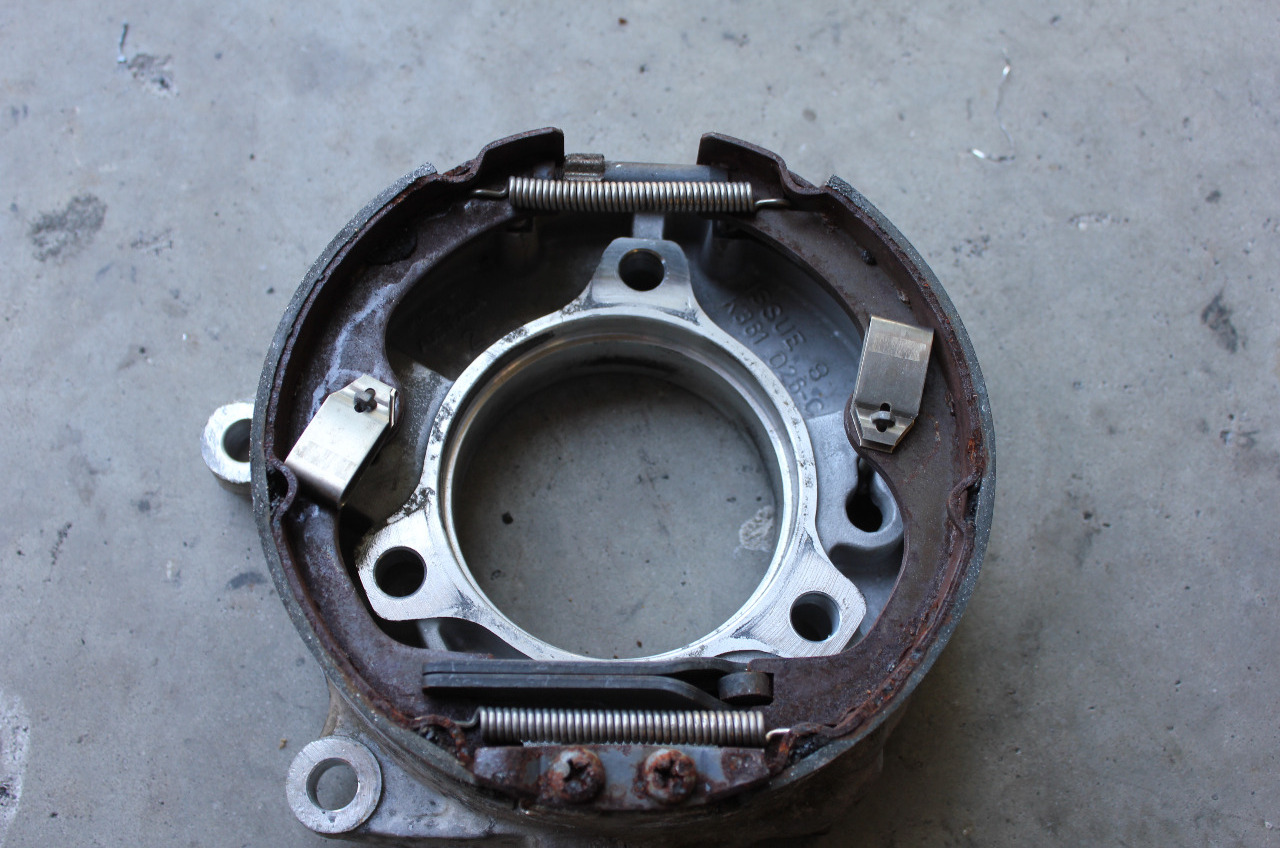
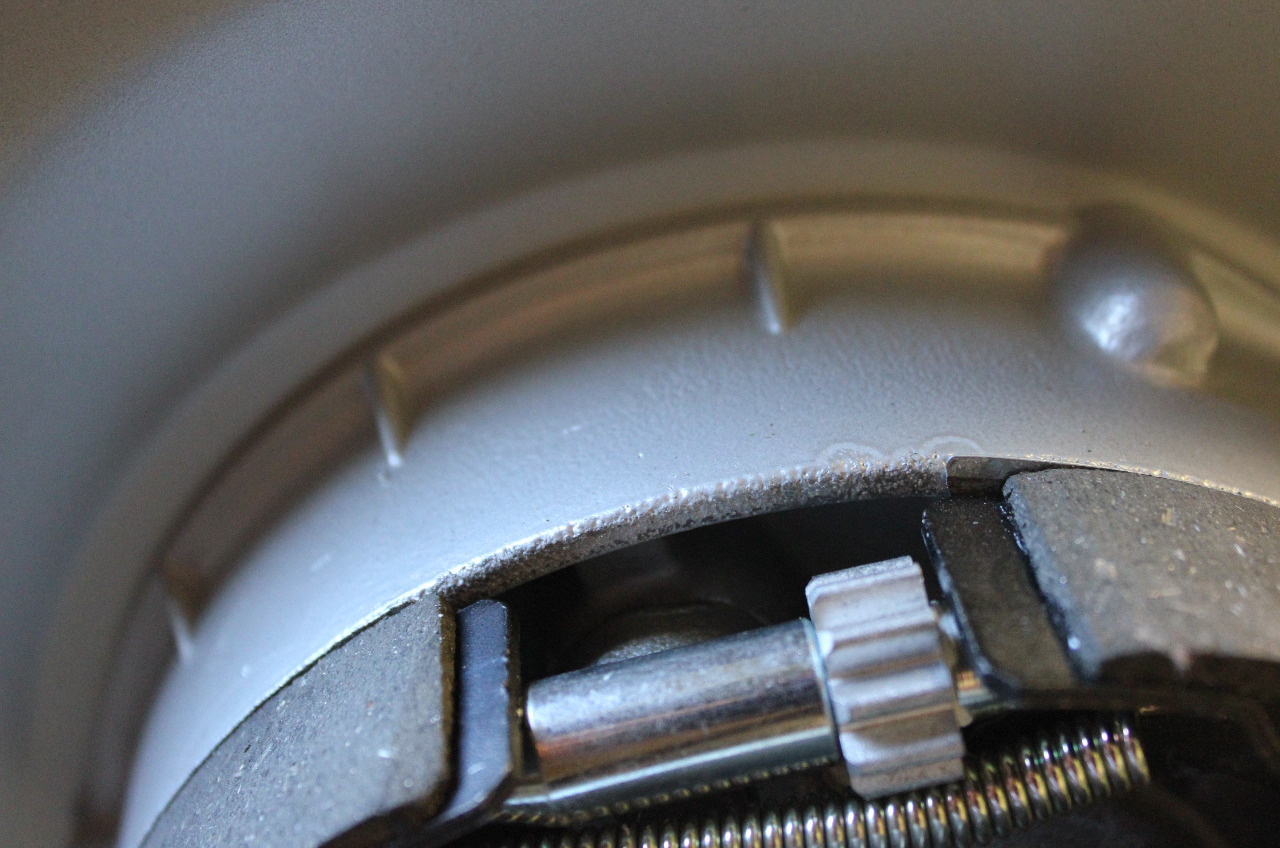
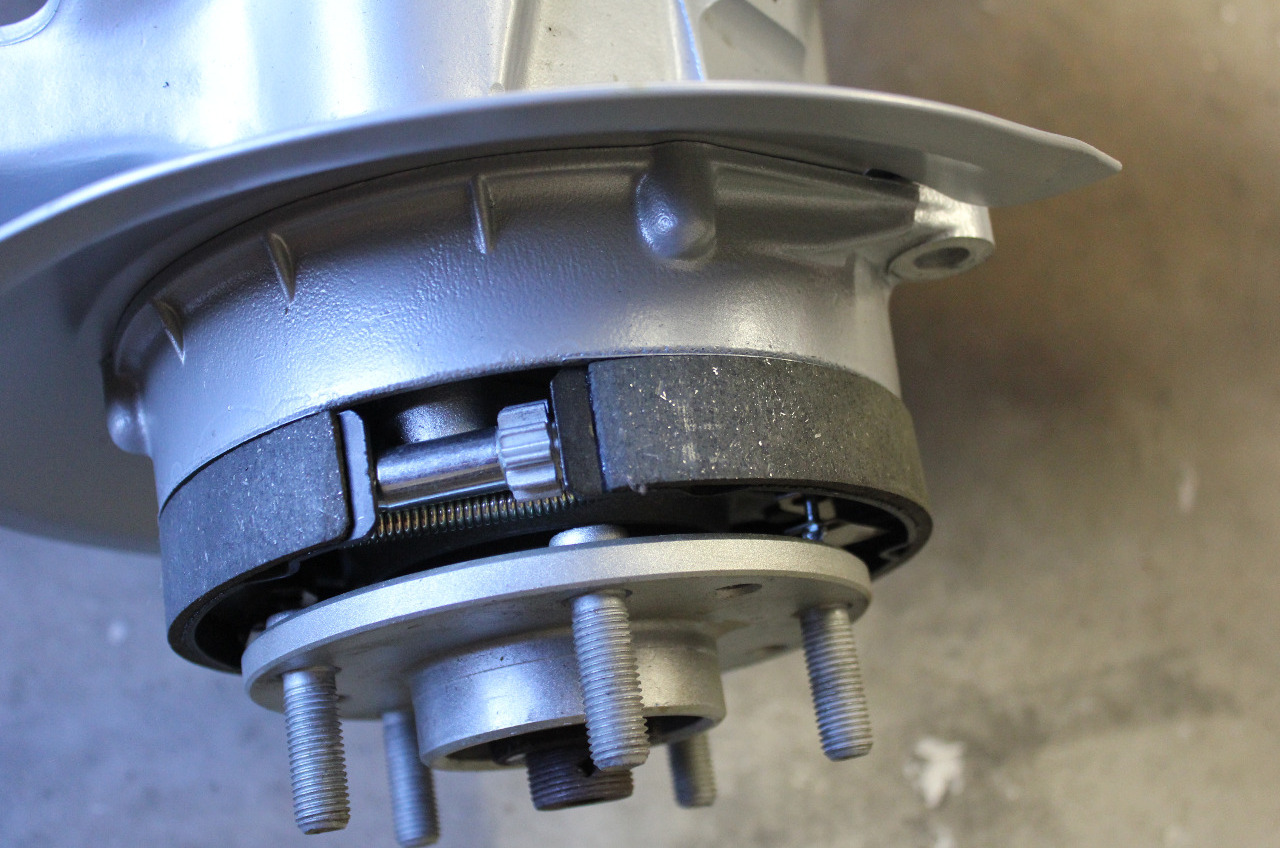
A few hours later, it was all back reassembled to where I was when the axle shaft popped out. Live and learn! In the course of reassembly of the rear, I also had to rebuild the parking brakes. On the 84-87 Corvette, the parking brake is basically a miniature version of drum brakes located in the dome portion of the rear disk. The original parts were all old and rusty, so I cleaned them up and replaced the shoes and springs with new.
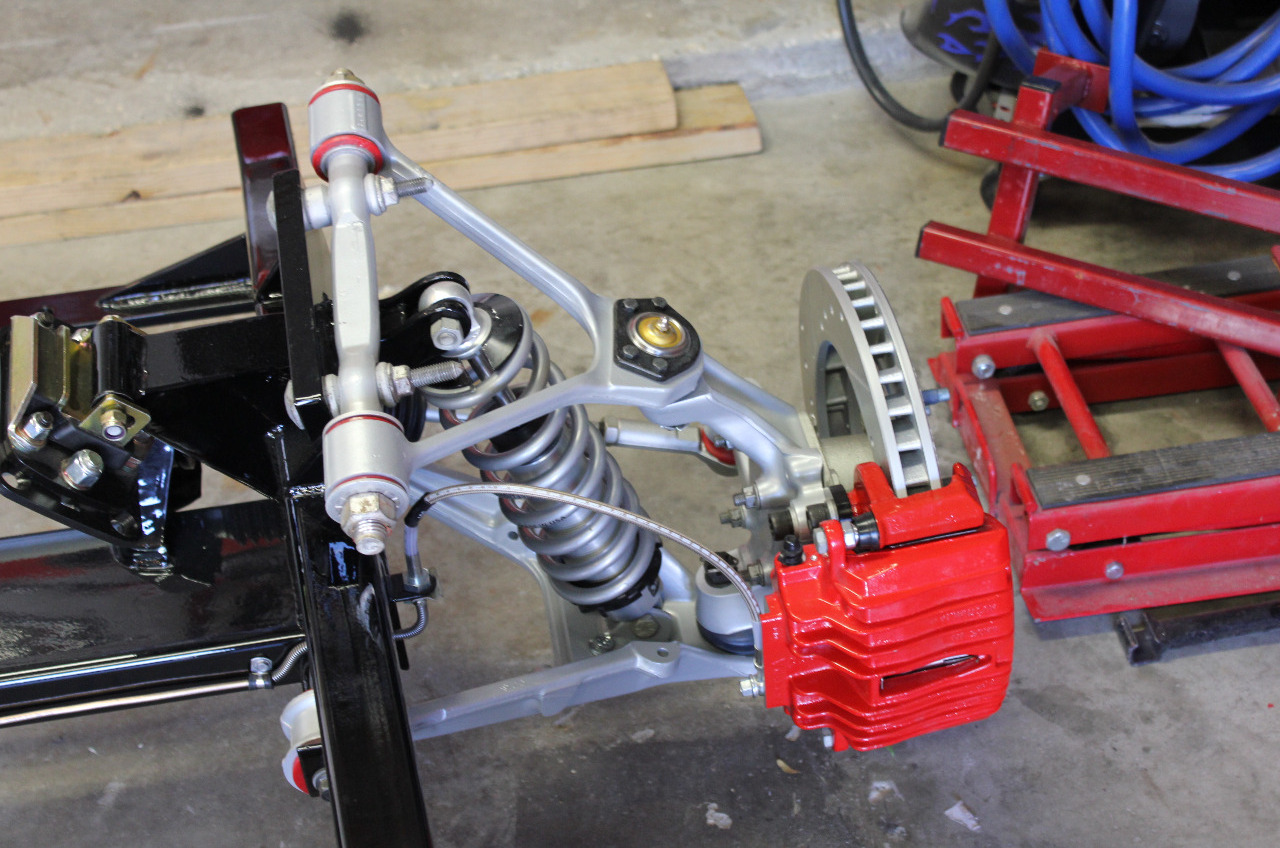
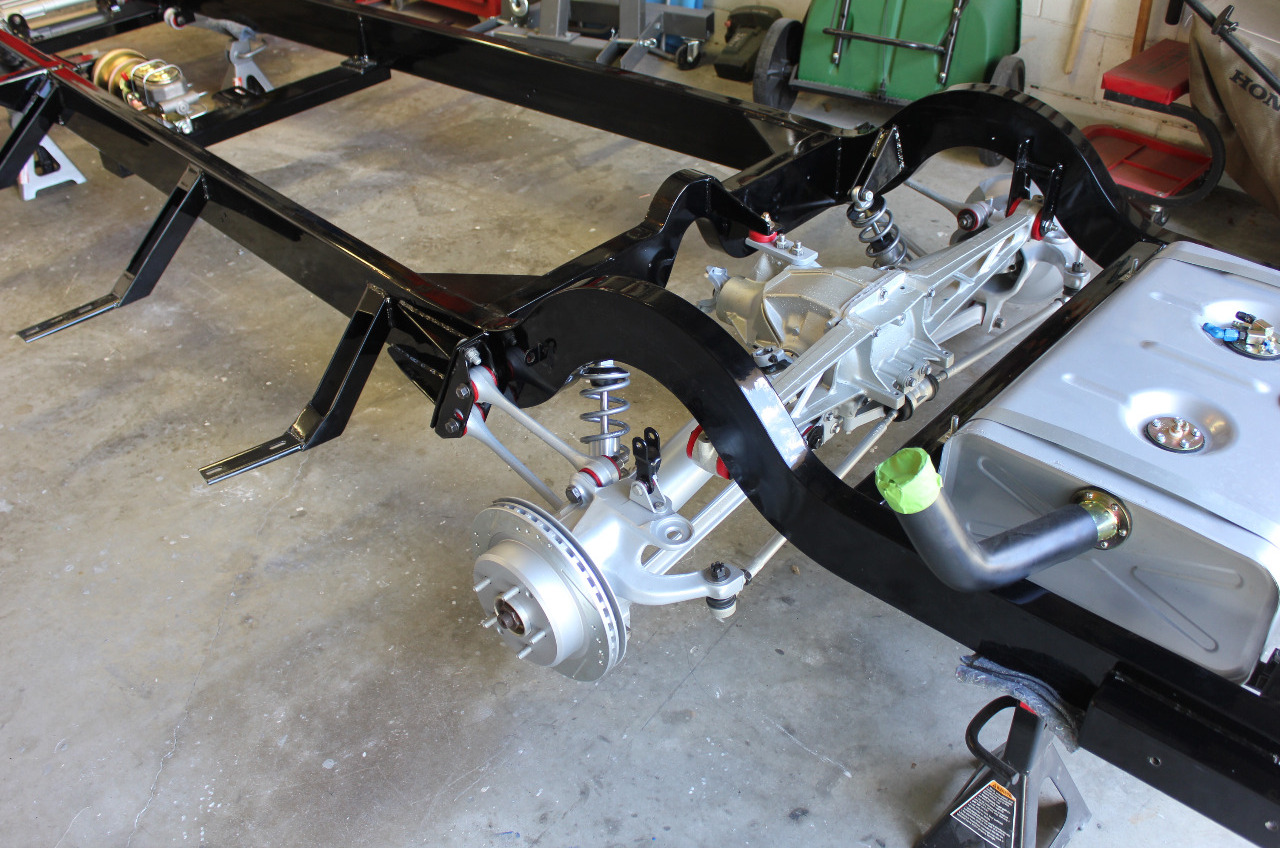
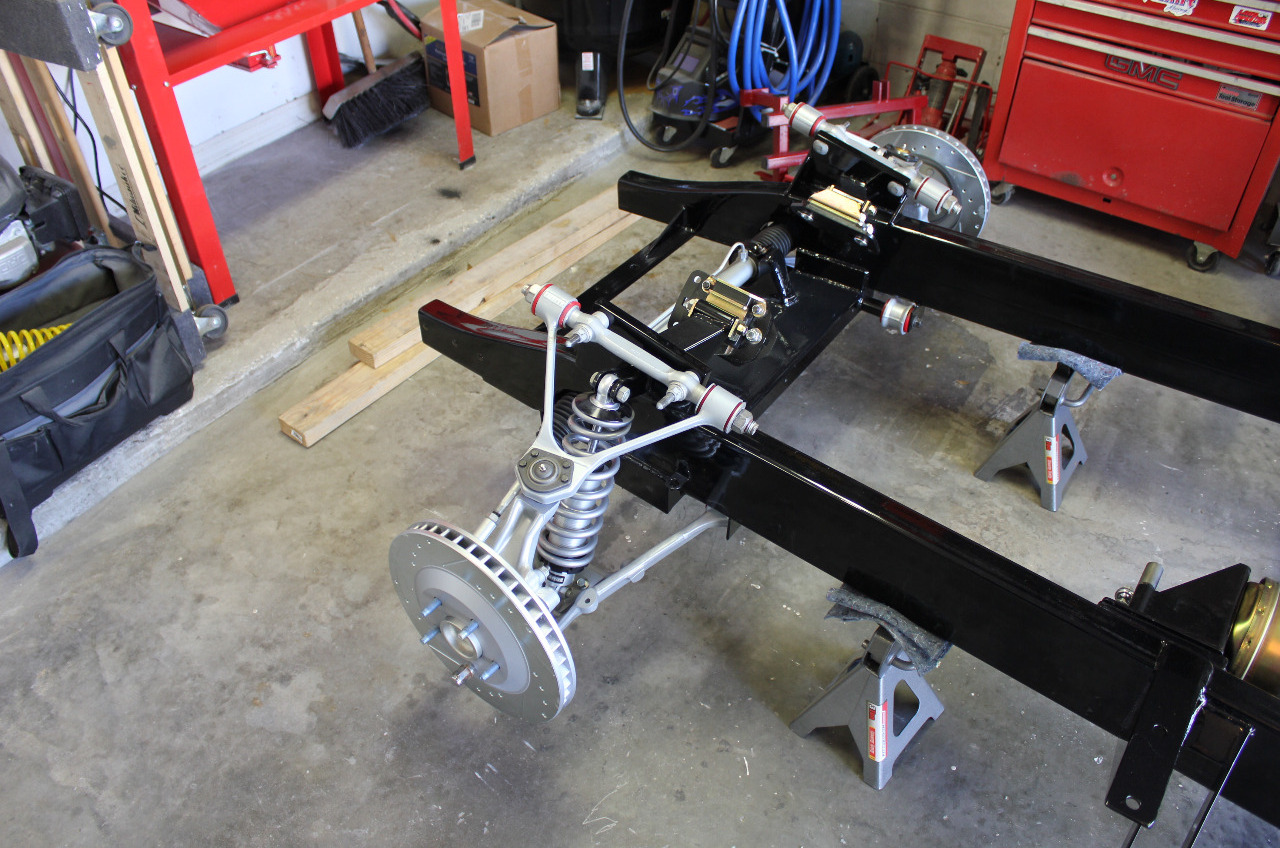
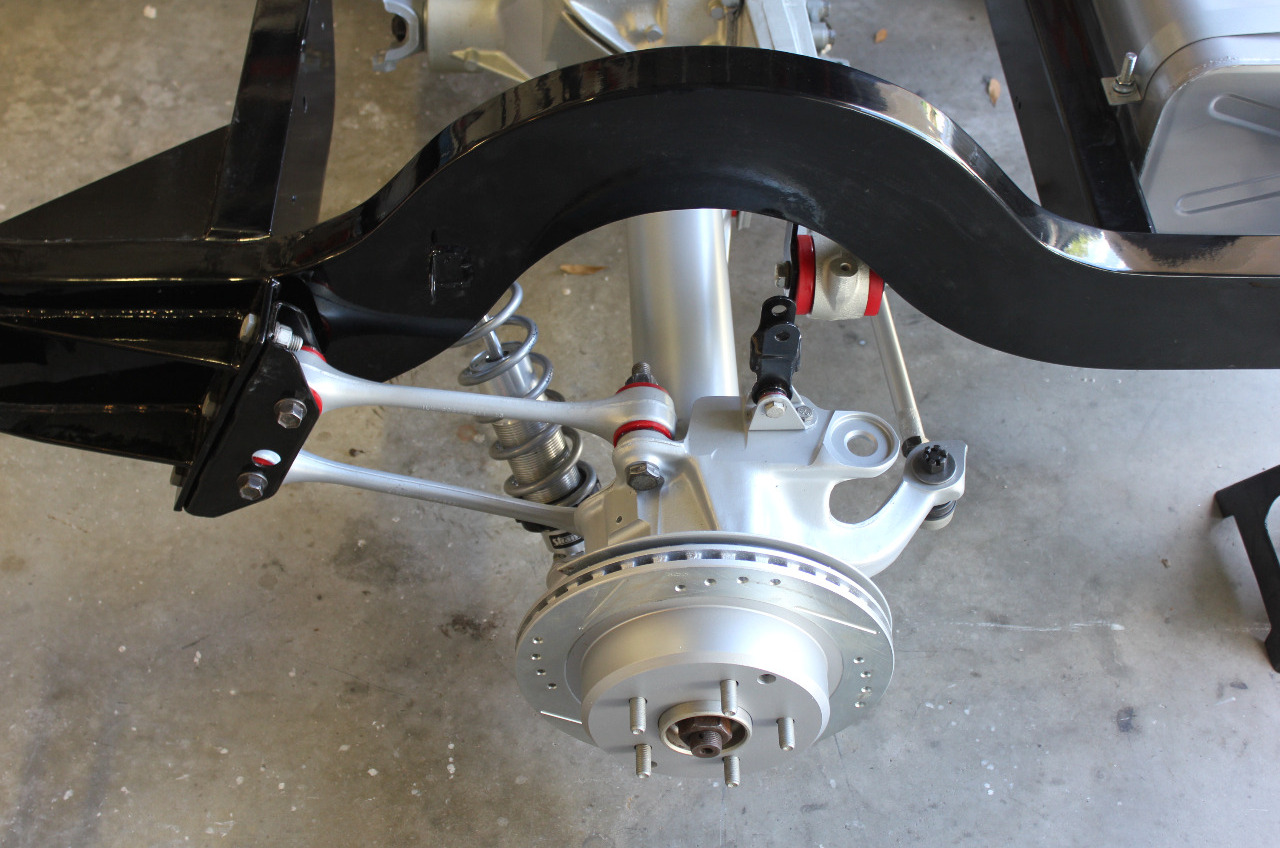
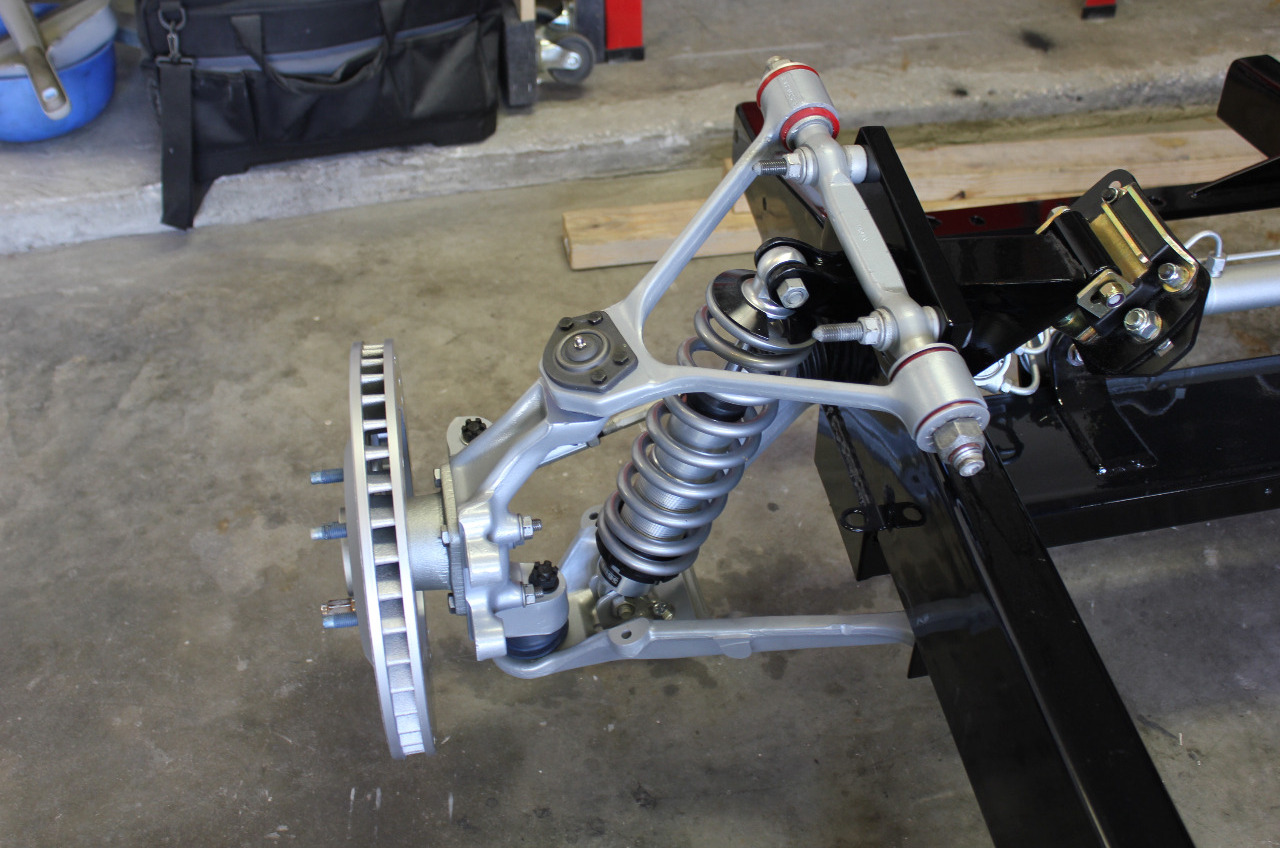
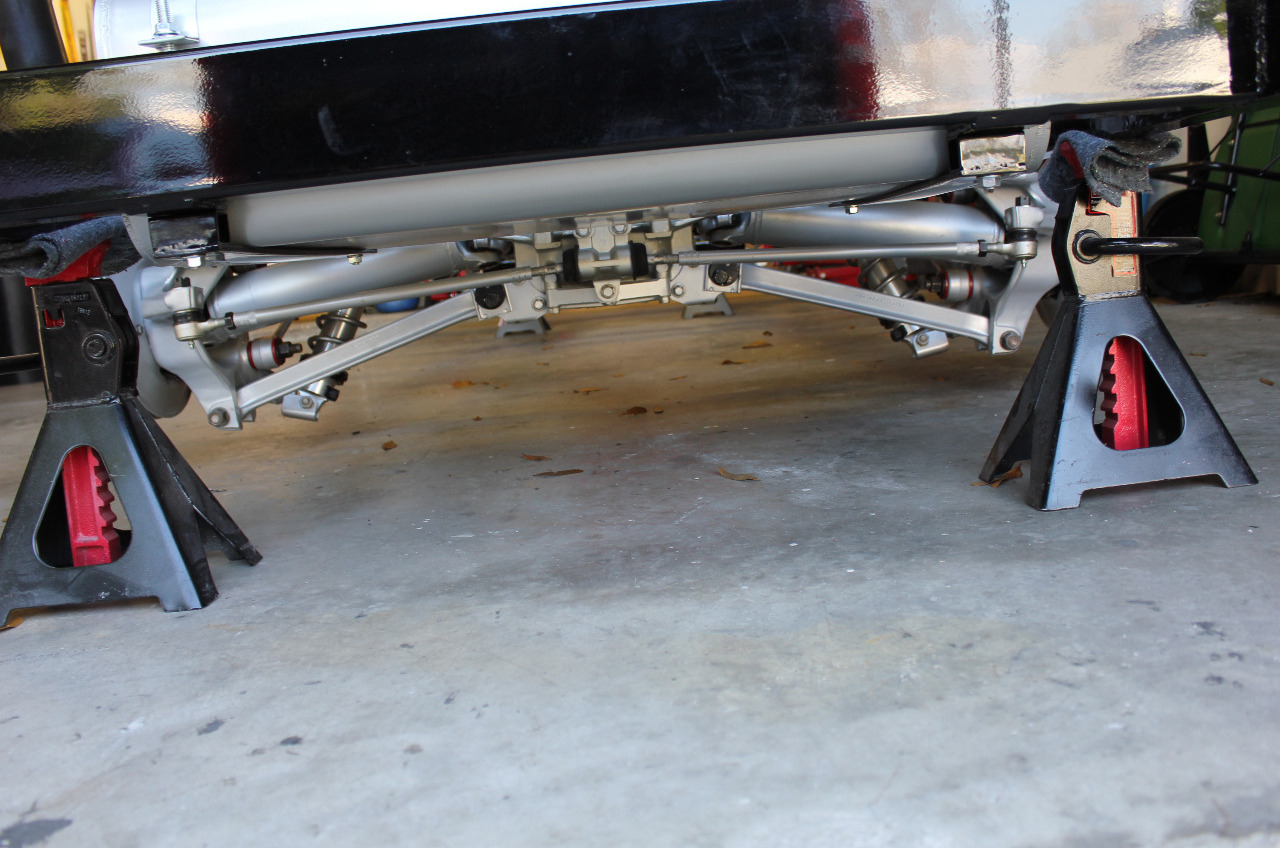
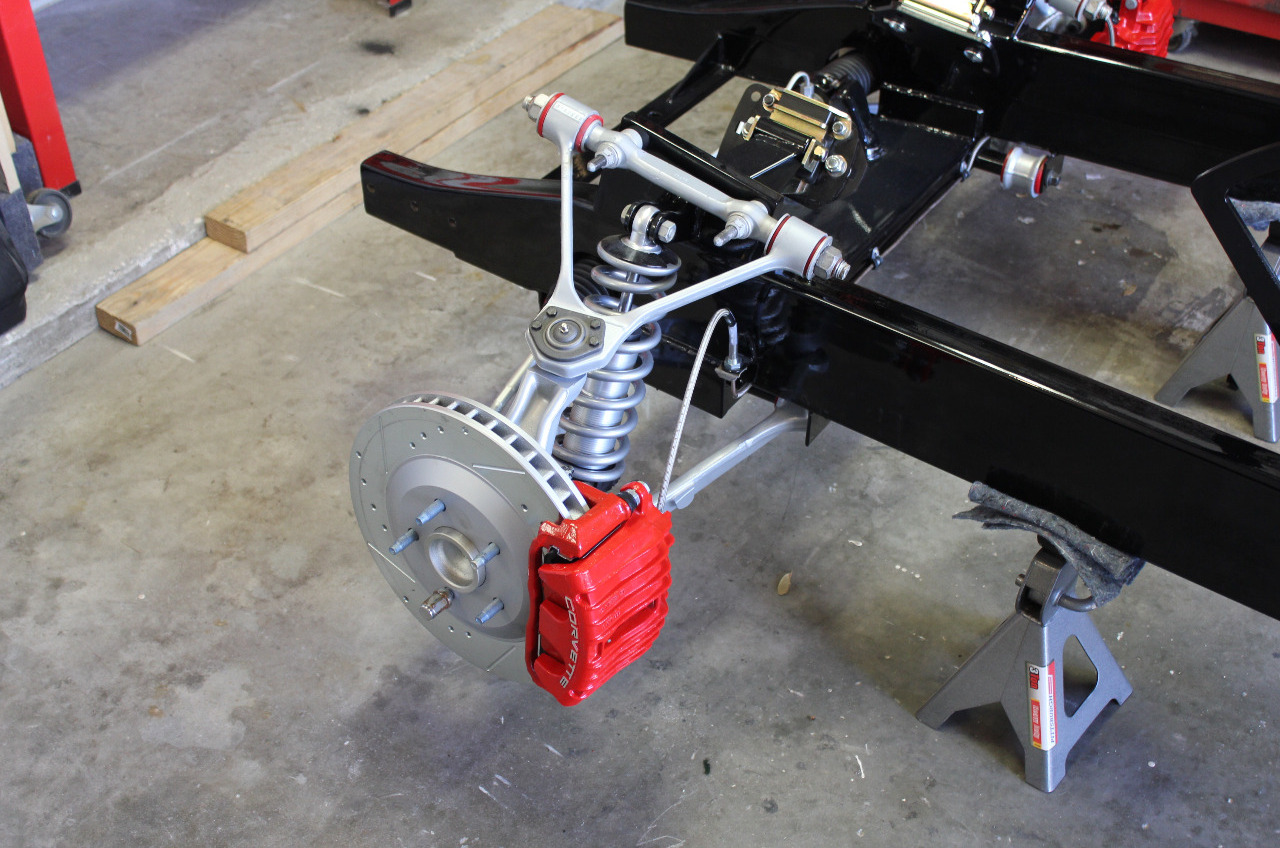
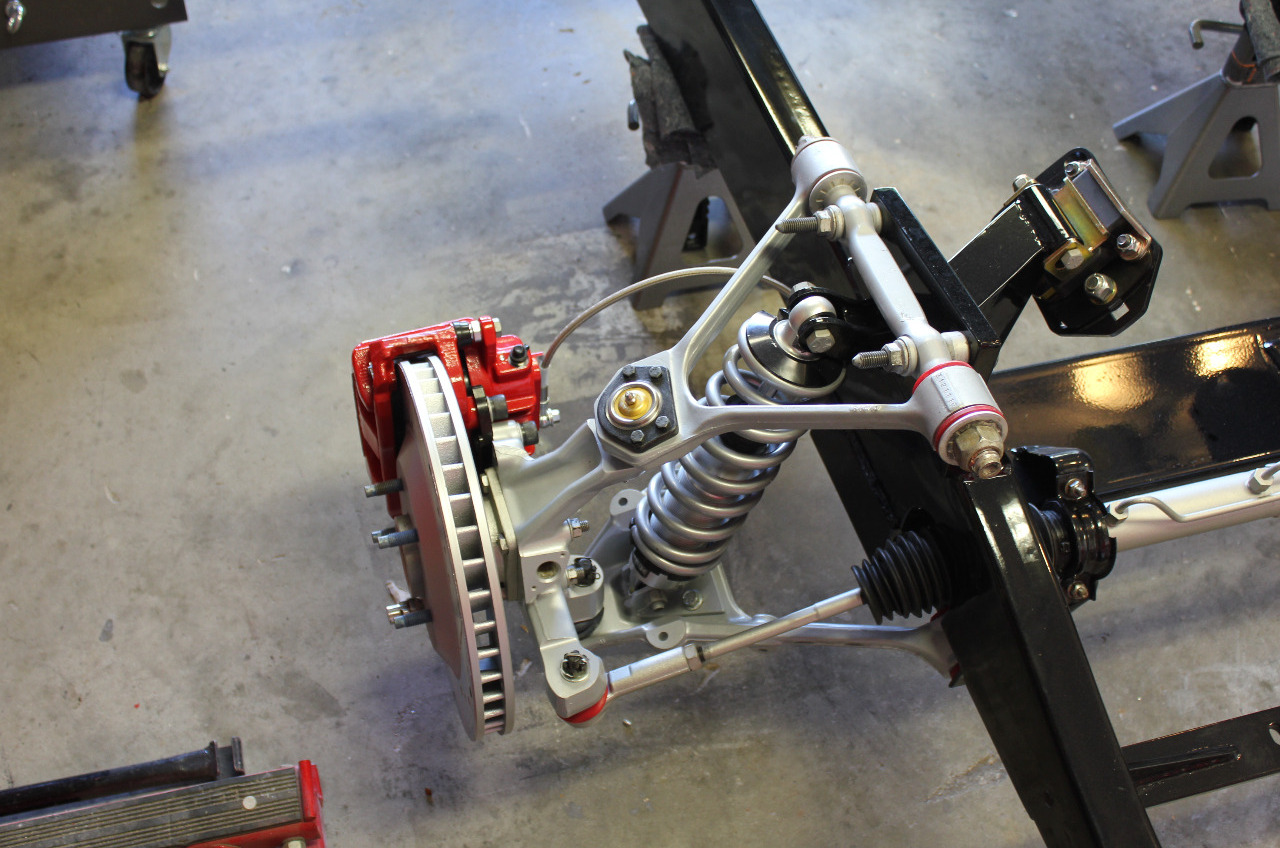
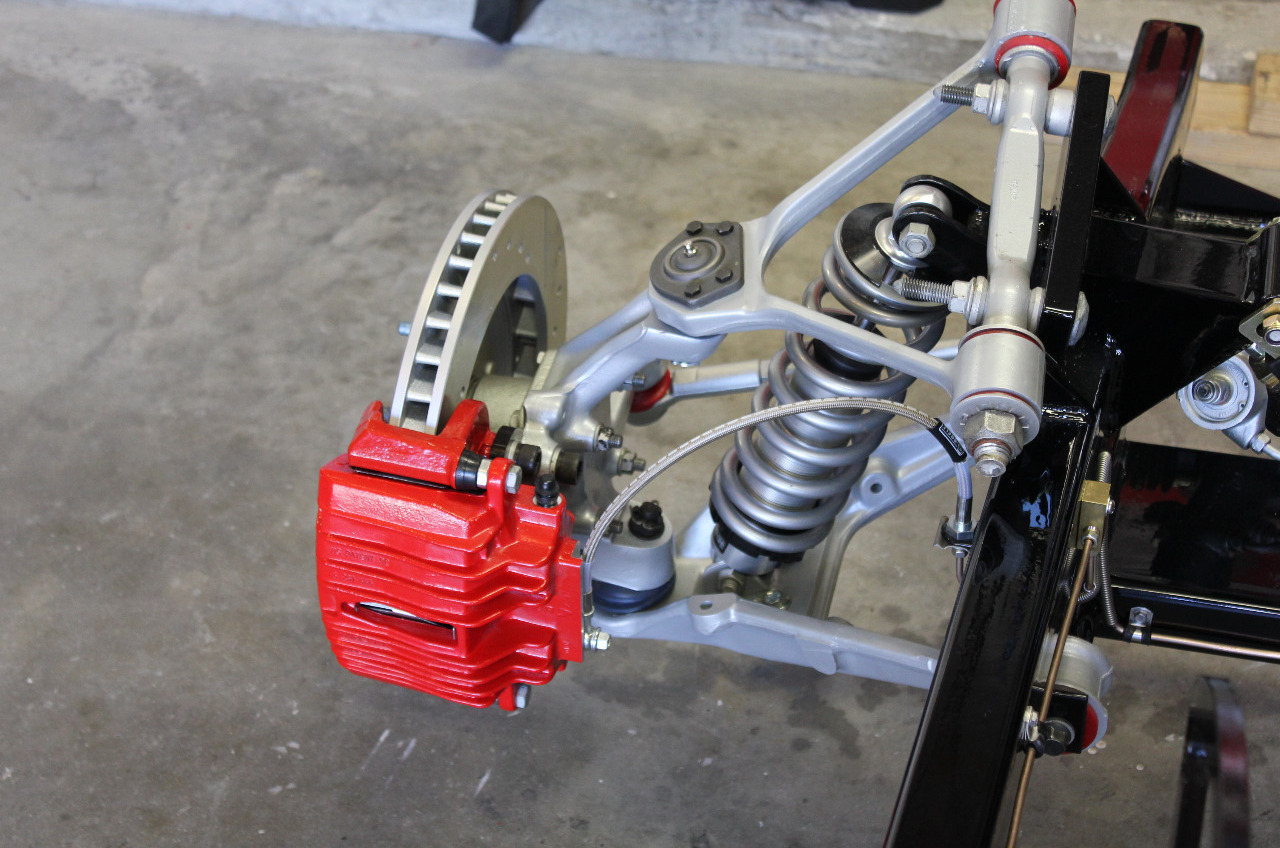
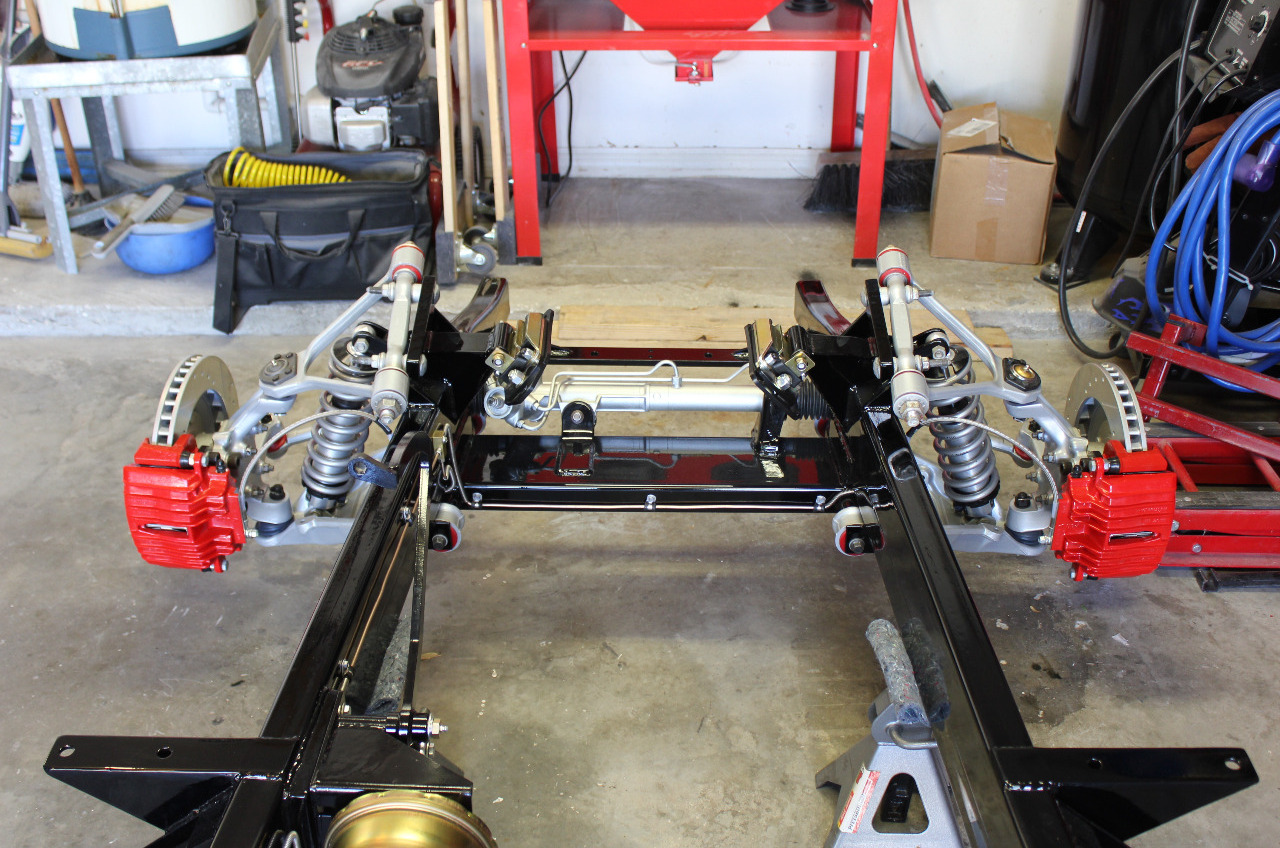
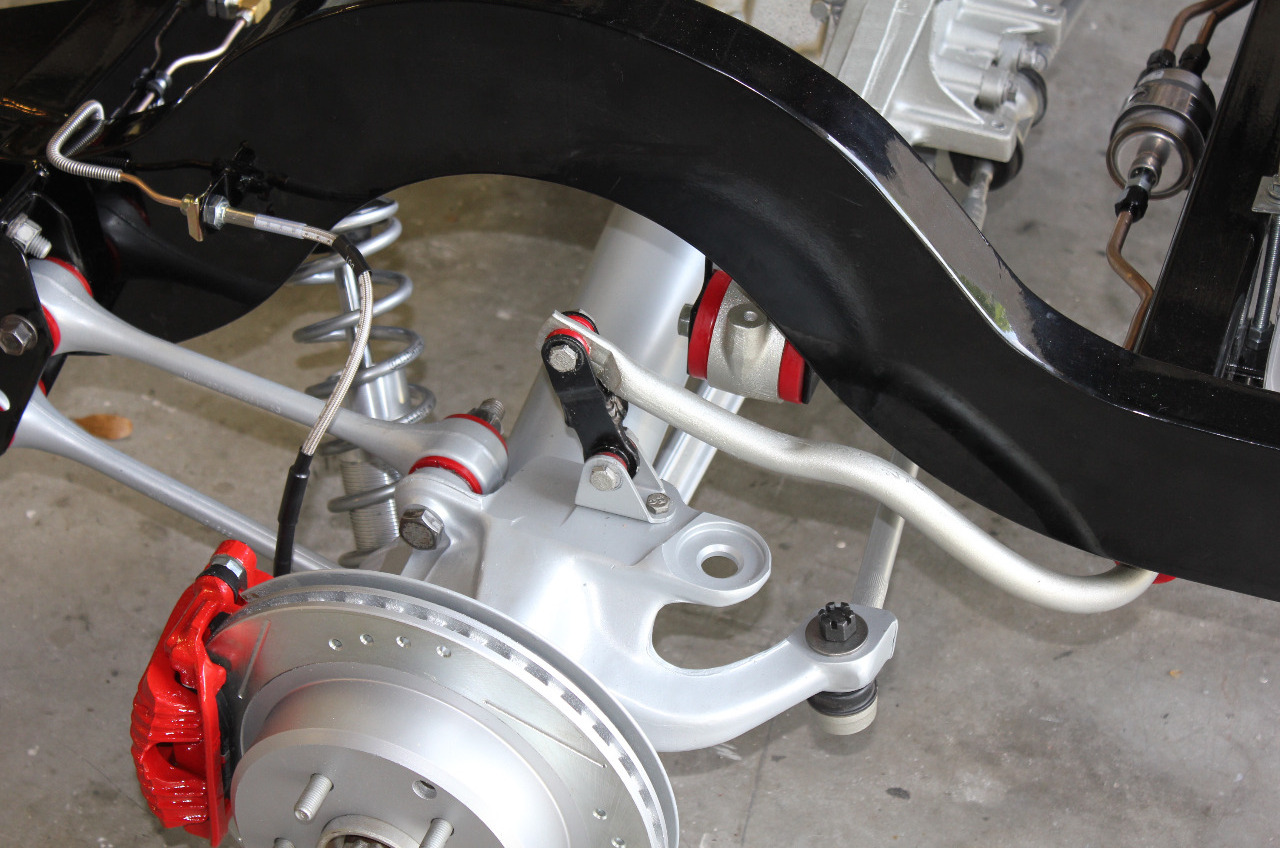
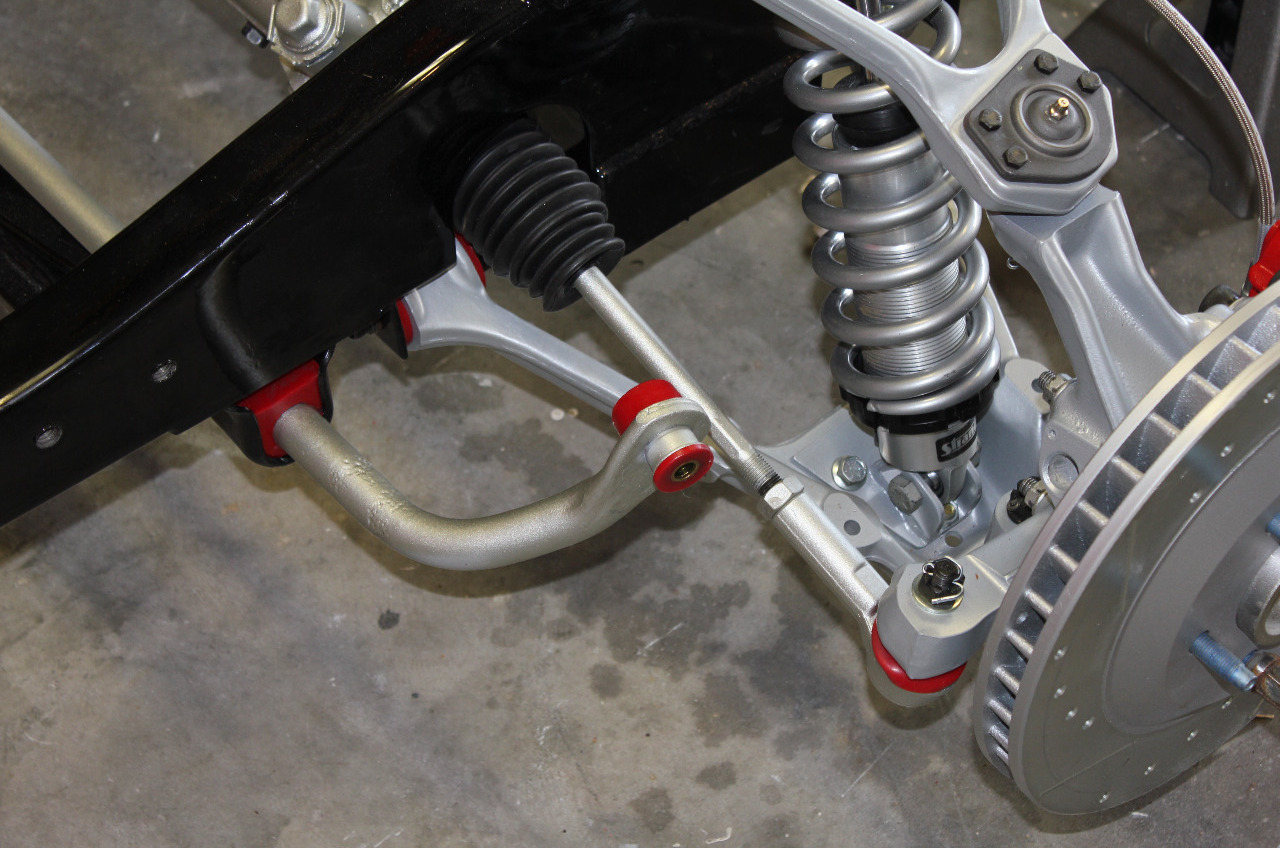
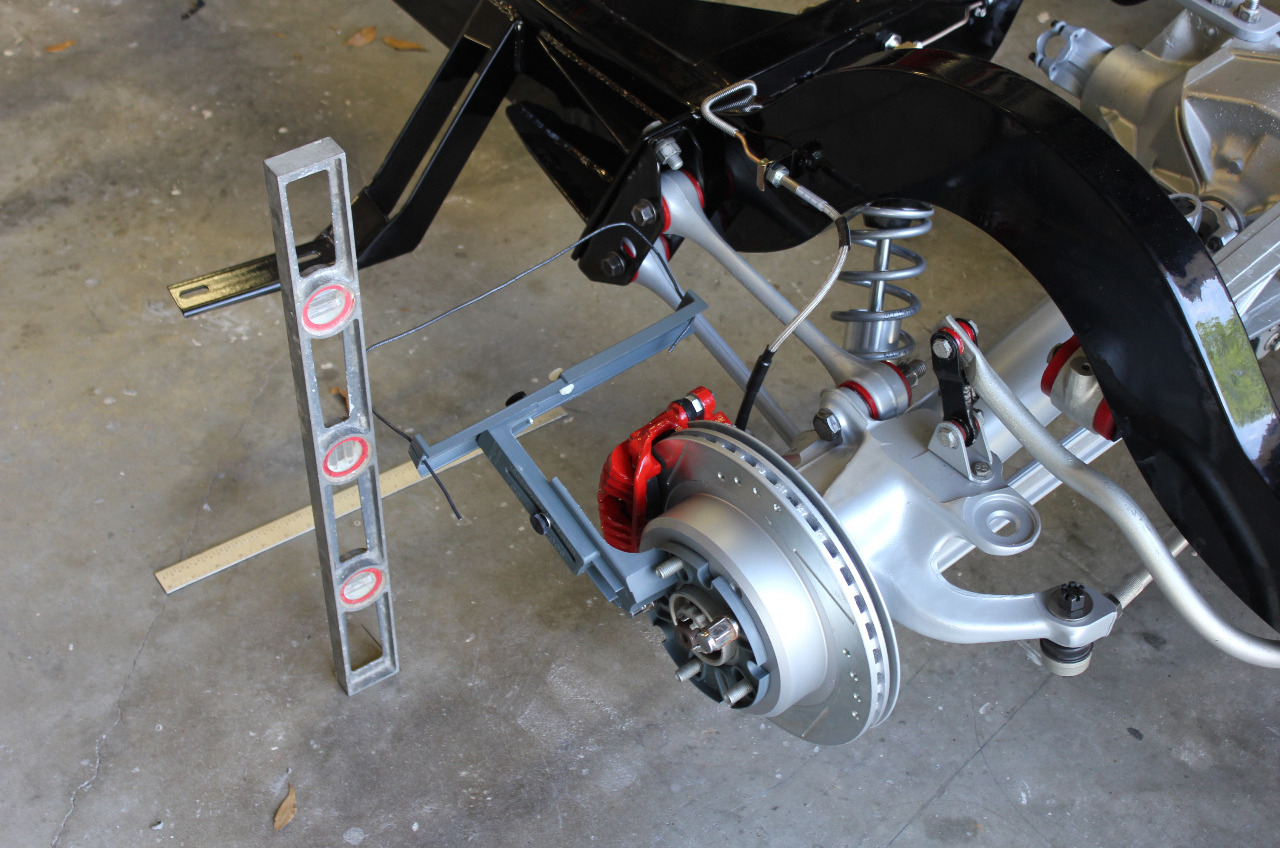
Moving on to the front suspension, again it was all new Prothane red control arm bushings, along with new AC-Delco ball joints and Moog front wheel bearing assemblies. I was going to use Moog ball joints, but saw too many online complaints about some new design on the grease boots that sometimes doesn't work, so I went with the AC-Delco, Also I replaced the tie rod ends and replaced the steering rack with a rebuilt. The suspension all looks great, so it's time to tackle the brakes.

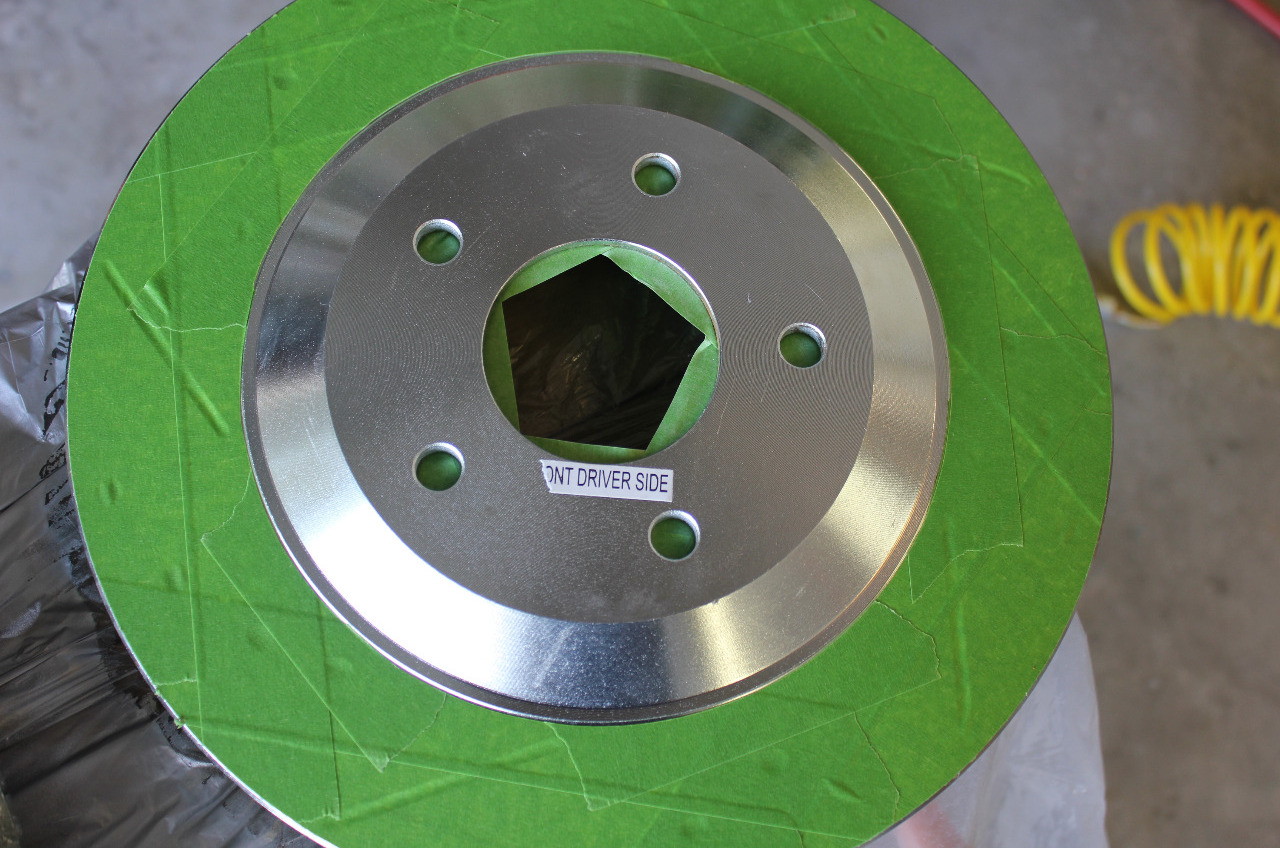
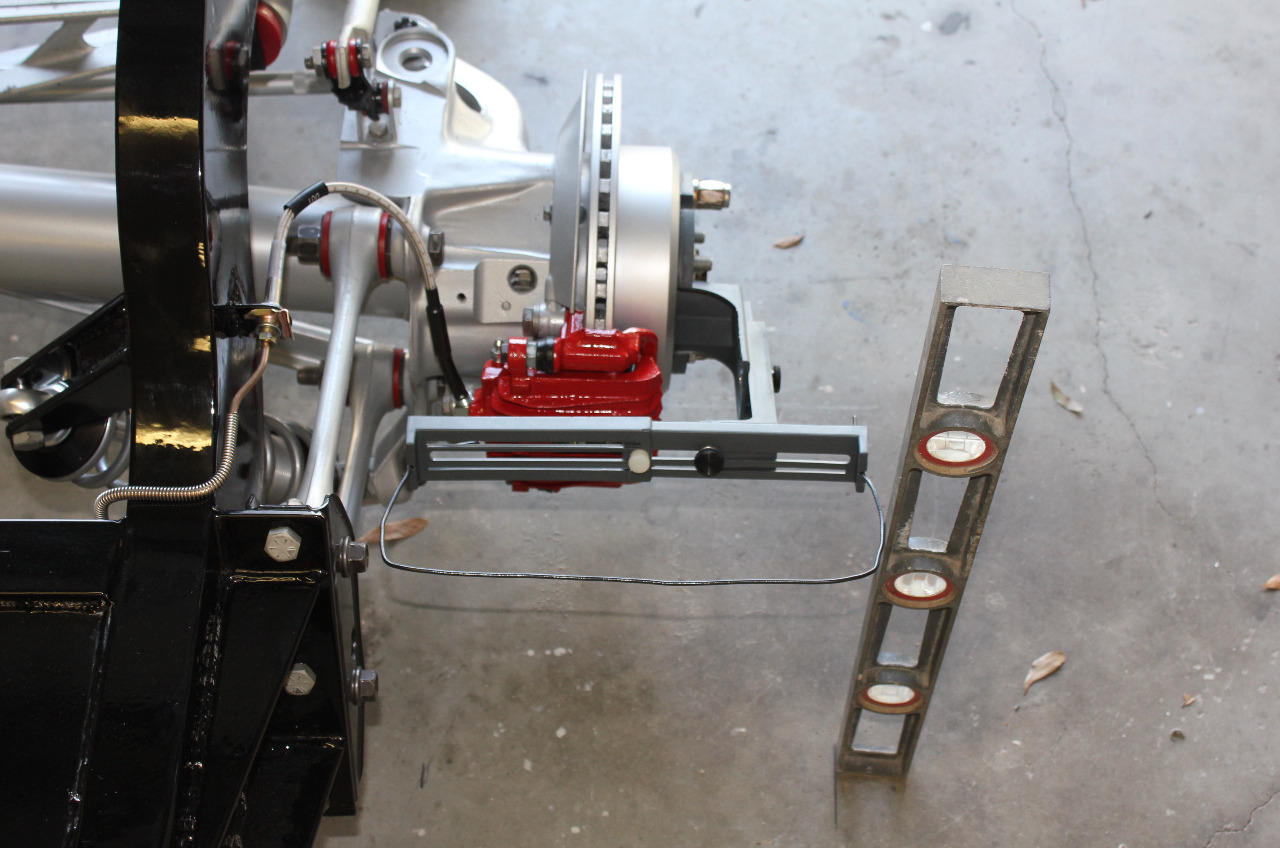
I have all new Power-Stop rotors which are all zinc plated in silver. This zinc coating does ok to prevent rust during assembly, but doesn't really hold up to the elements. So I masked off the disc surfaces and painted the rest of the disc with VHT silver caliper paint. They don't look much different, but should hold up better over time. When I went to install the rear discs, I realized that I had installed the parking brake adjuster backwards. Luckily it was fairly easy to swap the adjuster around and install it correctly. There's so many of these little details to keep straight that I hope I haven't missed many more.
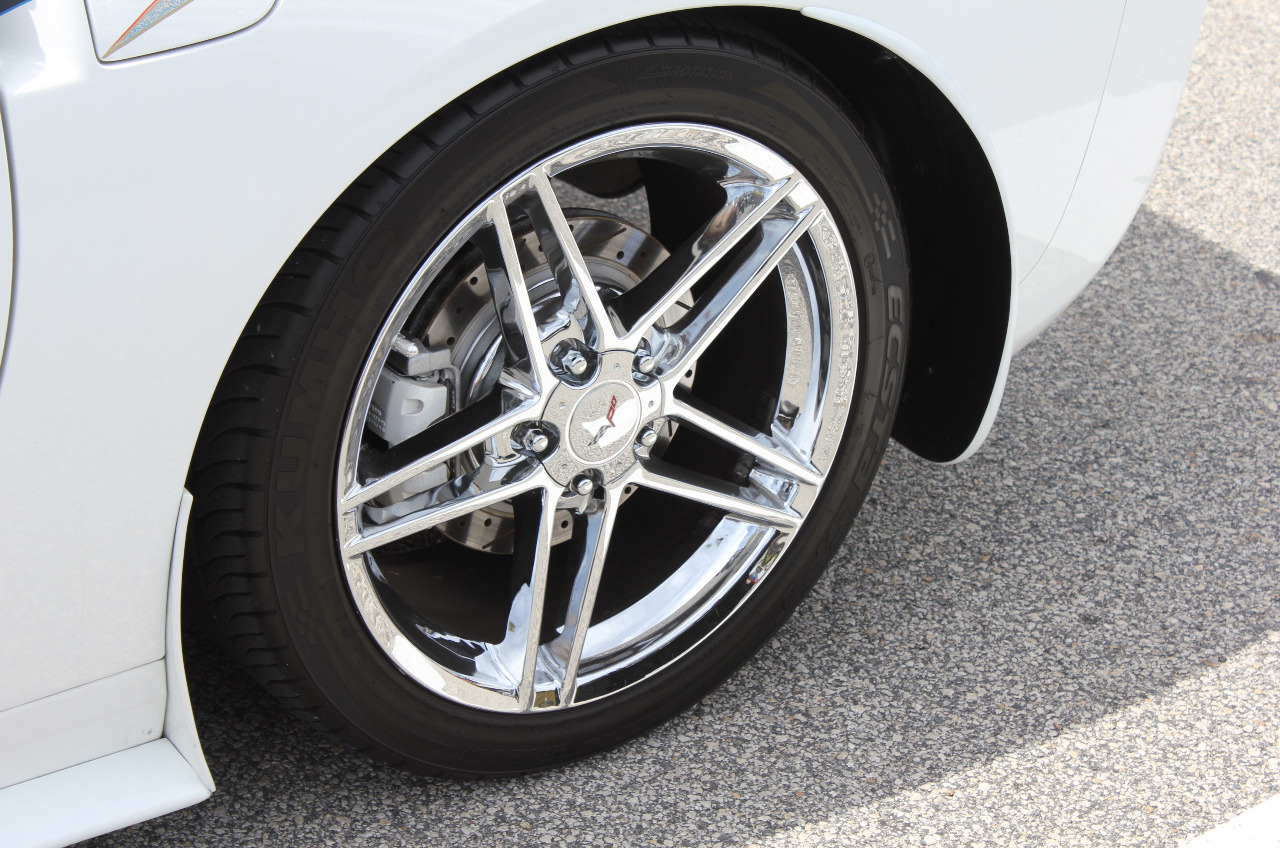
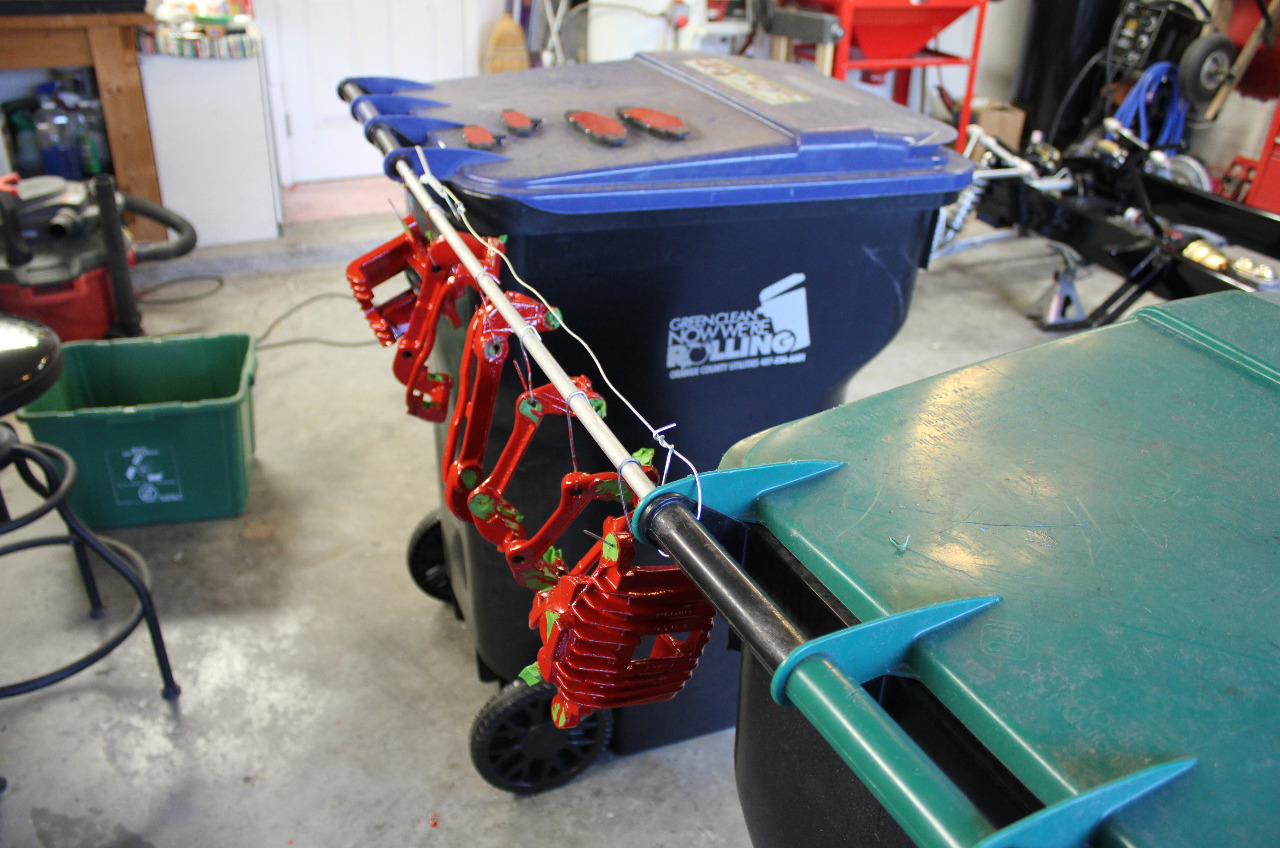
When it came to caliper selection, the 84-87 C4 Corvette front calipers are only single piston and the disc is only 11.8" diameter. While I could upgrade to the later 88-96 C4 Corvette dual piston calipers, I decided to make the leap to the C5 Corvette Z06 red calipers and the larger 13" C5 disc. For the rear, it just wasn't worth the change as the C4 84-87 Corvette caliper is a single piston on an 11.
8" disc. The C5 Corvette also uses a single piston caliper and the disc is only a 12" disc. But changing to C5 leaves problems for a parking brake as it is completely different. It's just not worth the hassle to upgrade the rear brakes. So I just used rebuilt calipers, new pads and rotors, and rebuilt the parking brake. I also used a G2 Red high temp caliper paint kit to paint the rear calipers and both the front and rear brackets. The front calipers were already red and the color match is close enough to not be noticeable. This is a 2-part epoxy paint, brushed on. I had great luck with this kit when I used it before on my old 2001 GMC Jimmy.
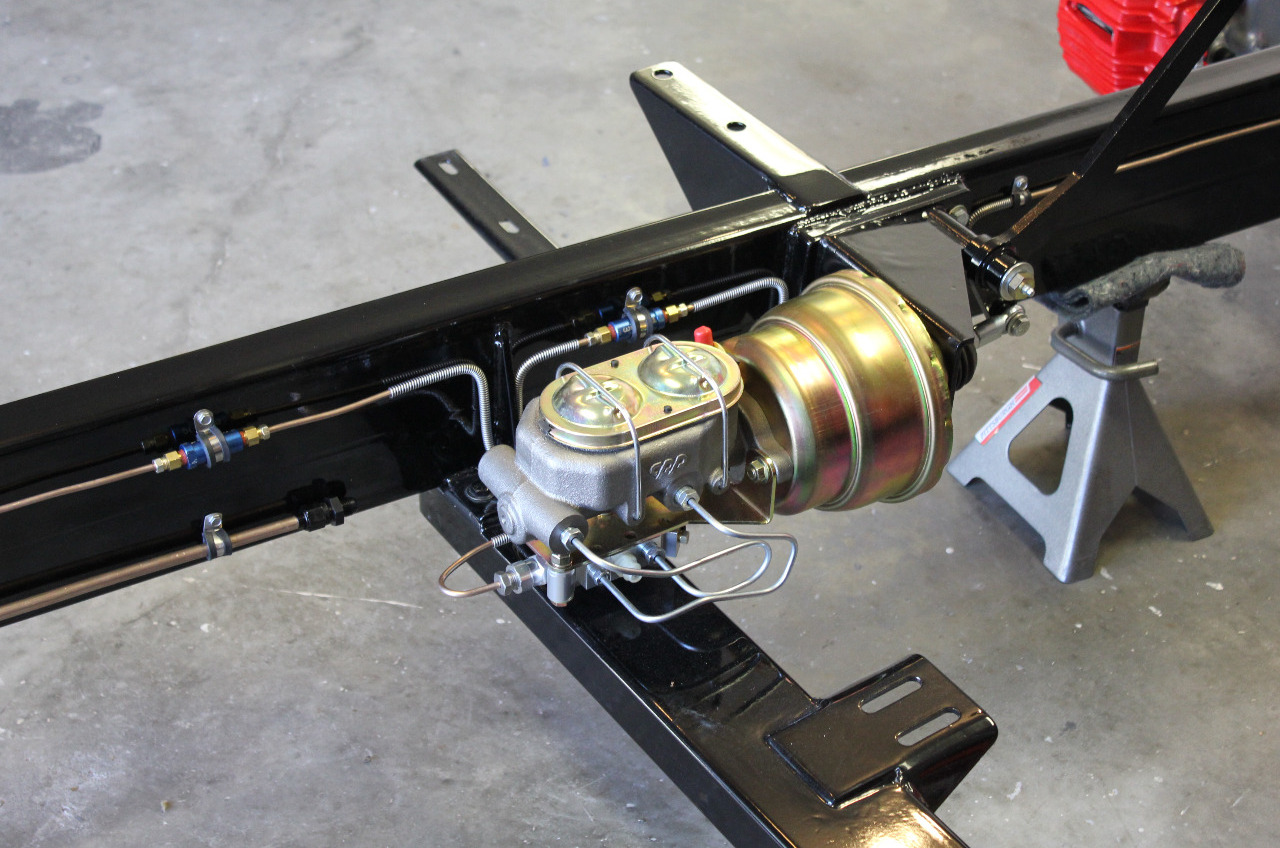
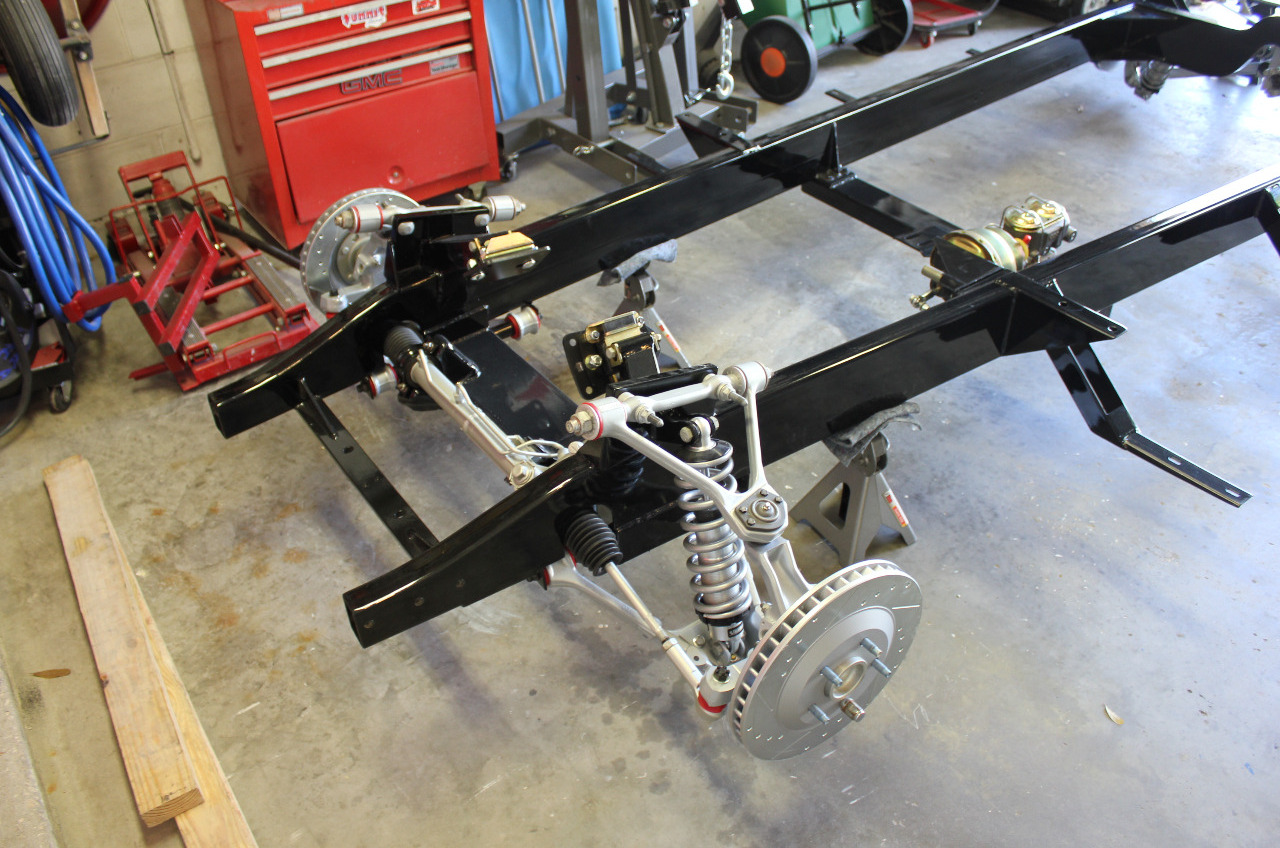
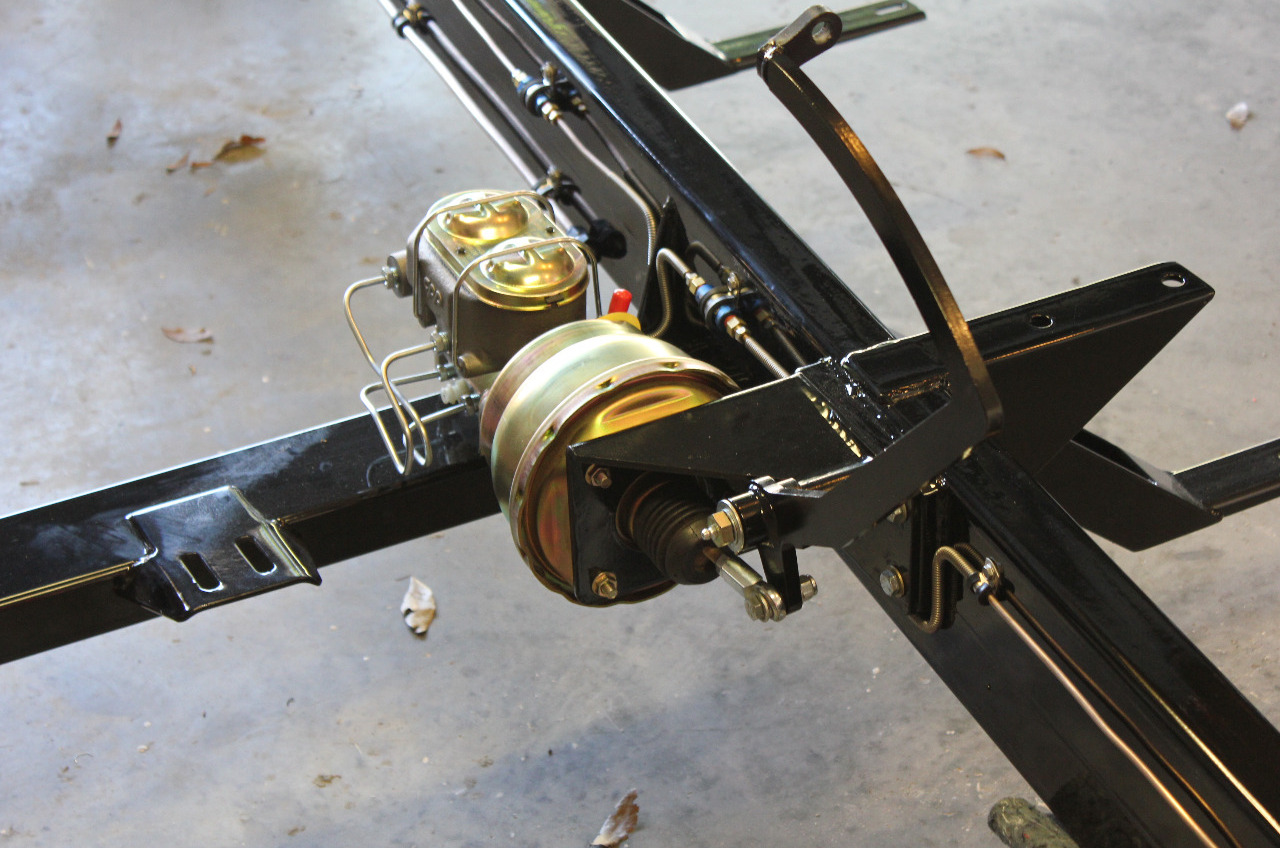
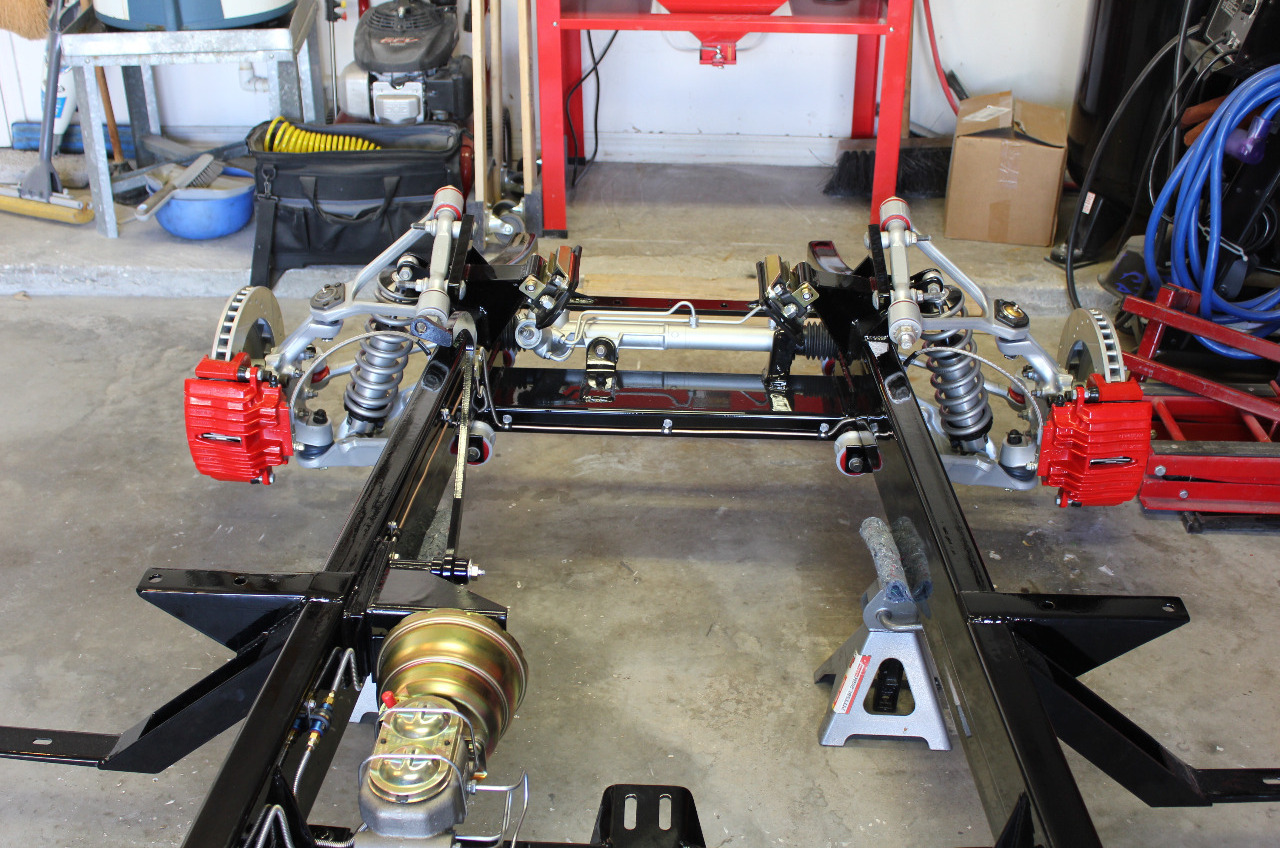
Next came the re-installation of the brake and fuel lines. This all went surprisingly easy. Time spent bending and forming of these lines before powder coat must have been good, as all the parts just fit perfectly and bolted right back up without incident. The final piece of fuel line from the center frame to near the engine had not yet been made as I had run out of fuel line.
I went to bend up the new one and found that I still needed a couple of AN-6 fittings. So I ordered the fittings and moved on to the sway bars.
Now, I would have loved to powder coat the sway bars, but they just wouldn't fit in my oven. So it will just have to be the same primer, aluma-blast, clear process as the other painted parts. The sway bars were also very rusty and were too big to fit in the blasting cabinet. So I just used a coarse wire wheel on my bench grinder and wire brushed the sway bars back to bare metal. I started at the rear, and had some trouble getting the bolts to line up at the rear links. It turns out that while it fit with all the old worn bushings, by replacing the sway bar bushings with Prothane Red polyurethane bushings tightened everything up enough that an interference between the sway bar and the link occurred. I might have been able to grind some relief into the link, but since the limk is powder coated and the sway bar itself is painted, I decided it would be easier to grind relief onto the sway bar itself.
It worked out great! I just repainted the sway bar where I had ground the relief and it all fits fine now.
The front sway bar is only attached to the frame as I still don't have the updated links from Darrell. Just as I finished installing the front sway bar, almost on queue, I got a call from Darrell that the new link bracket is in the mail. So the chassis is almost completed with just a couple of minor tasks to finish up. Yesterday, I fabricated a couple of cover plates for the front ABS sensors. Since I'm not using ABS, I was concerned that the open sensor hole might fill up with water and road debris and mess up the front wheel bearing assembly. The rear ABS sensor holes are open on both sides and should not be a problem to leave open. These covers need to be powder coated, but I'll wait for Darrell's front sway bar link brackets and do them both at the same time.
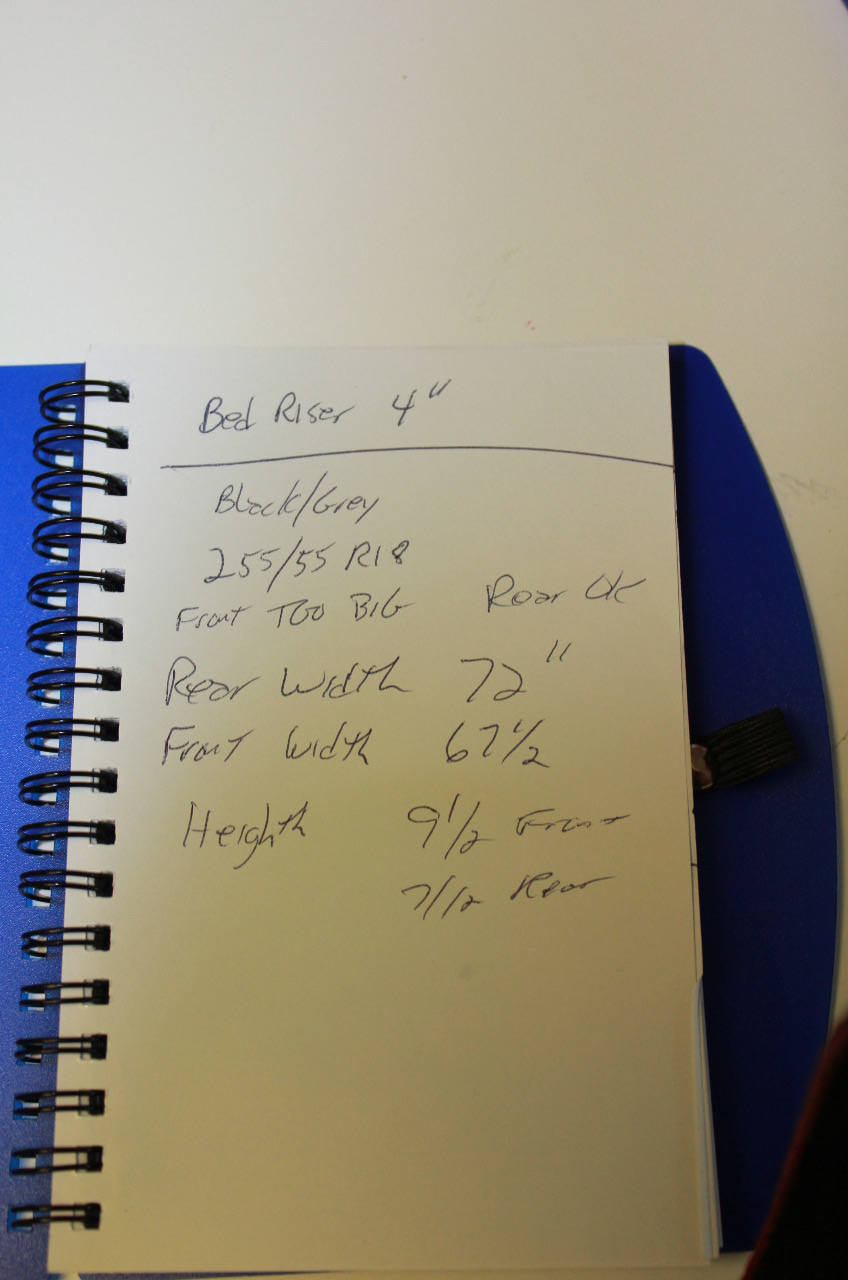
The AN-6 fittings for the fuel line came in today, so I finished up the fuel line plumbing. Everything is still going well, and I've started to make measurements for wheel and tire sizes.
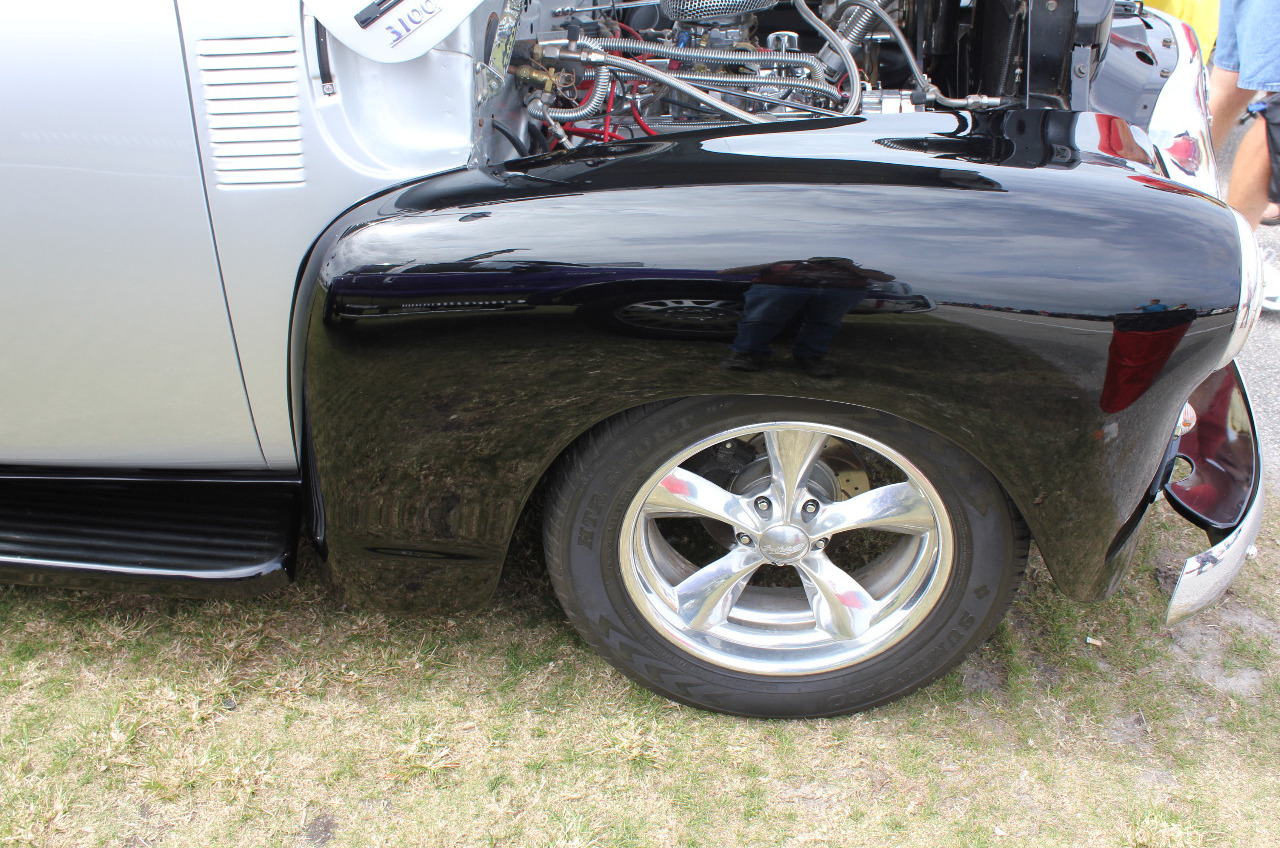
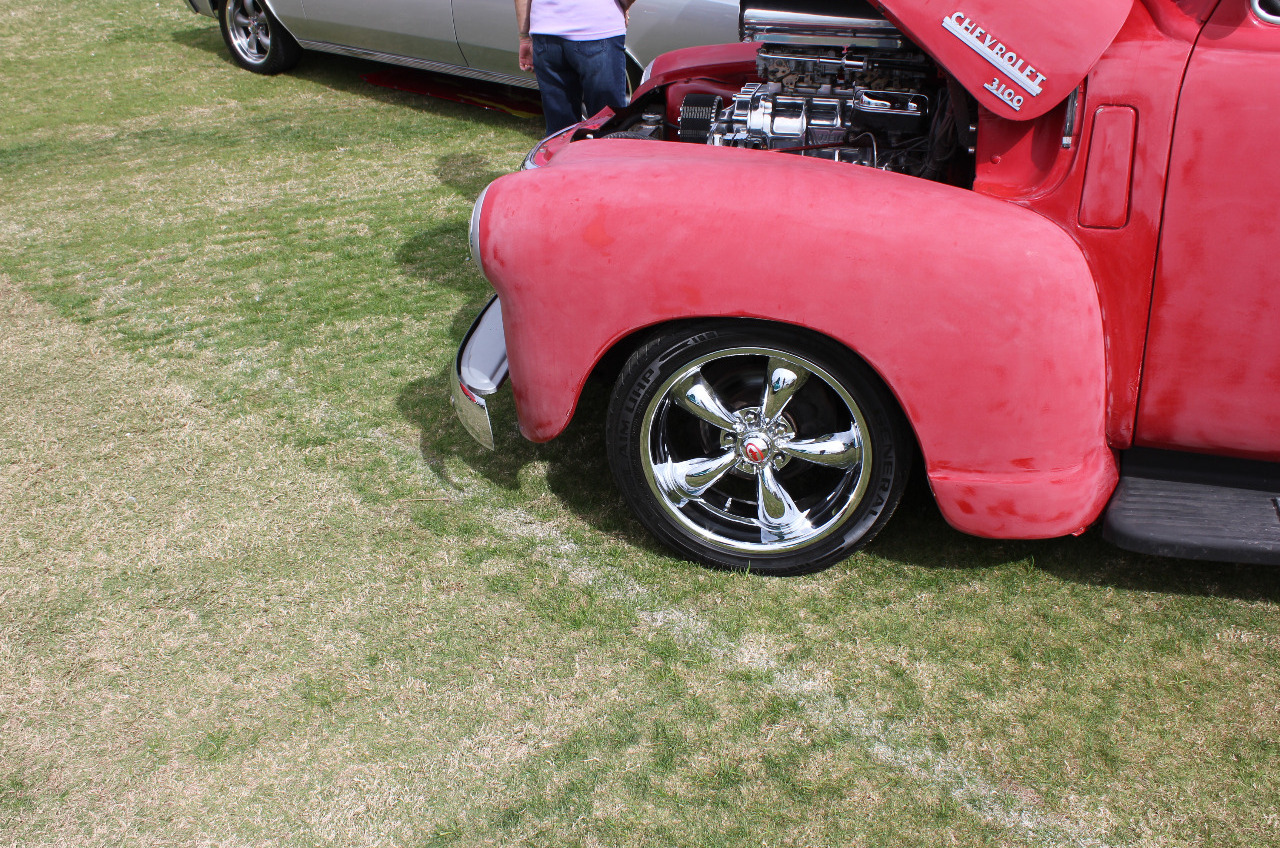
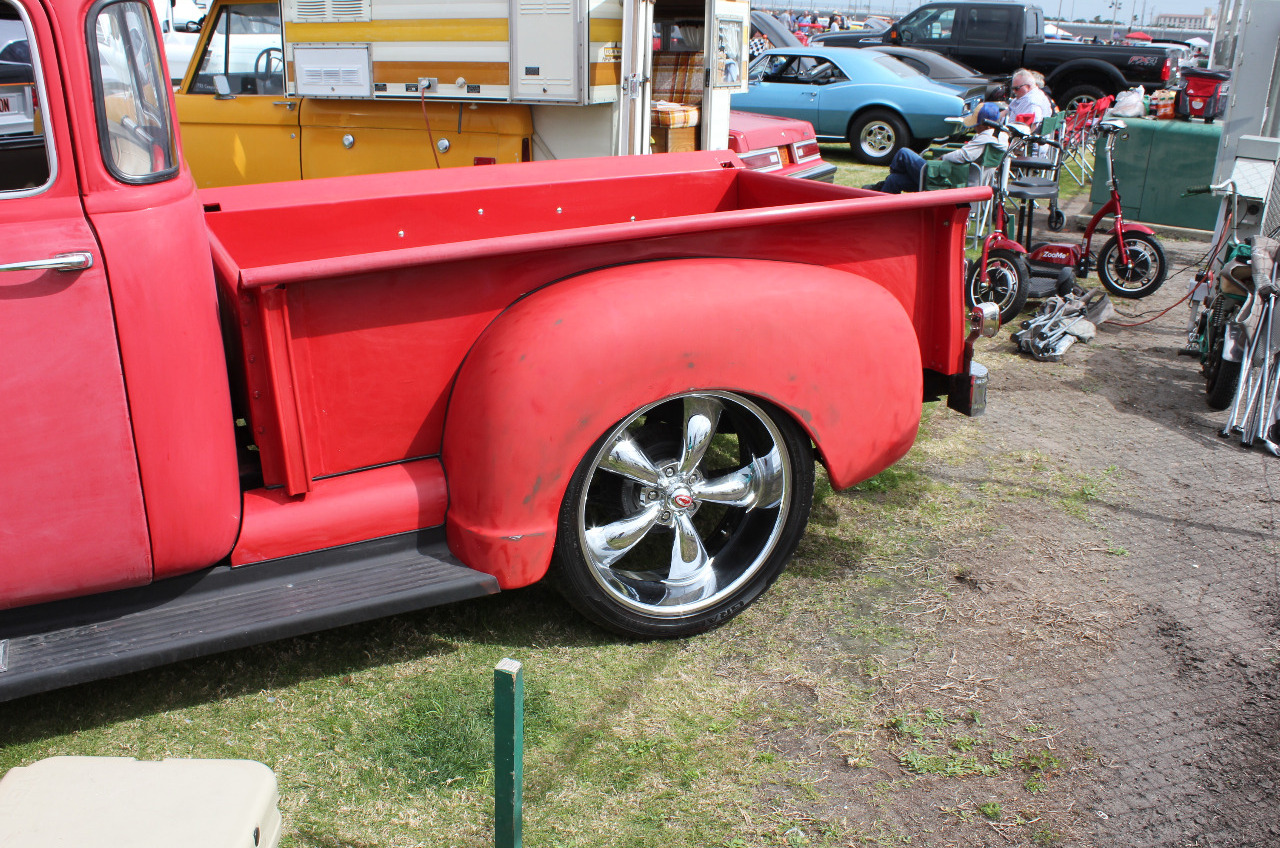
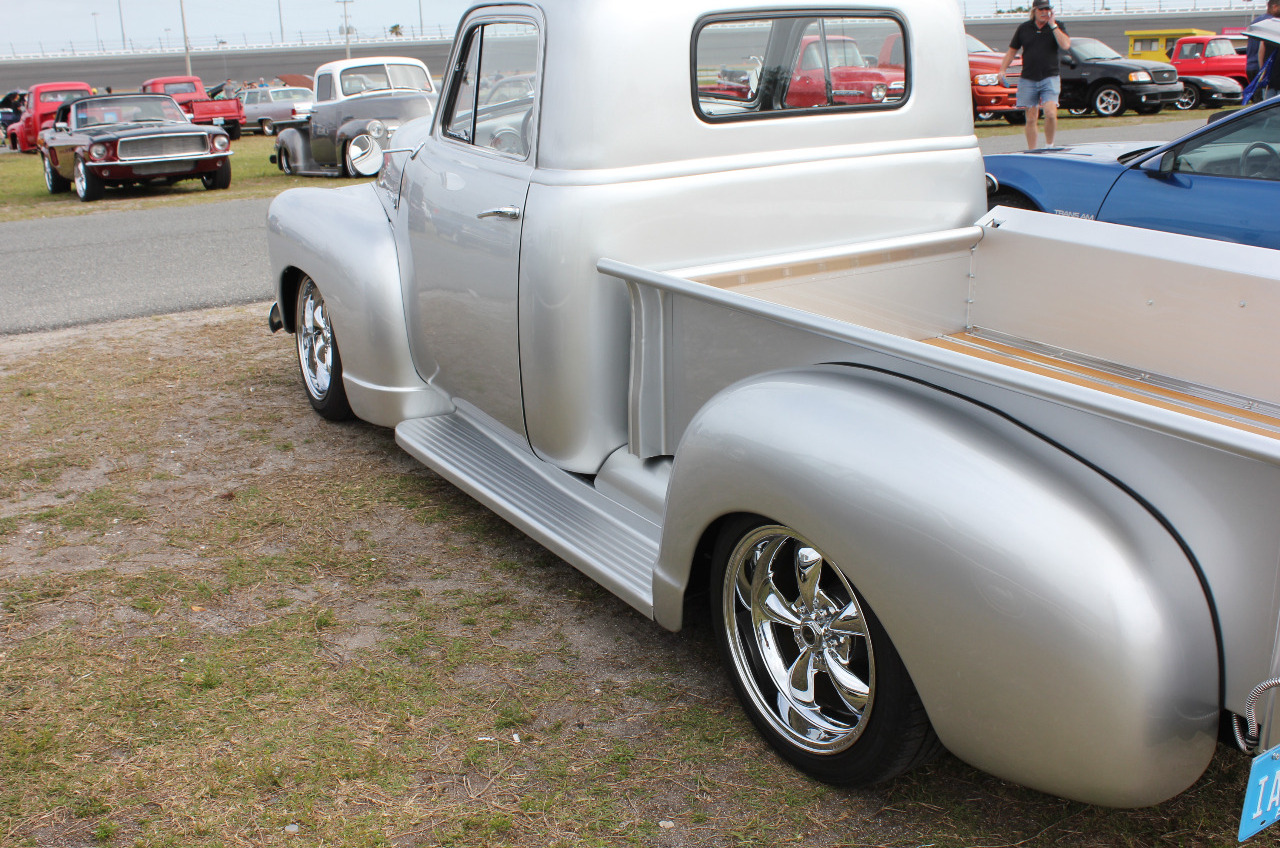
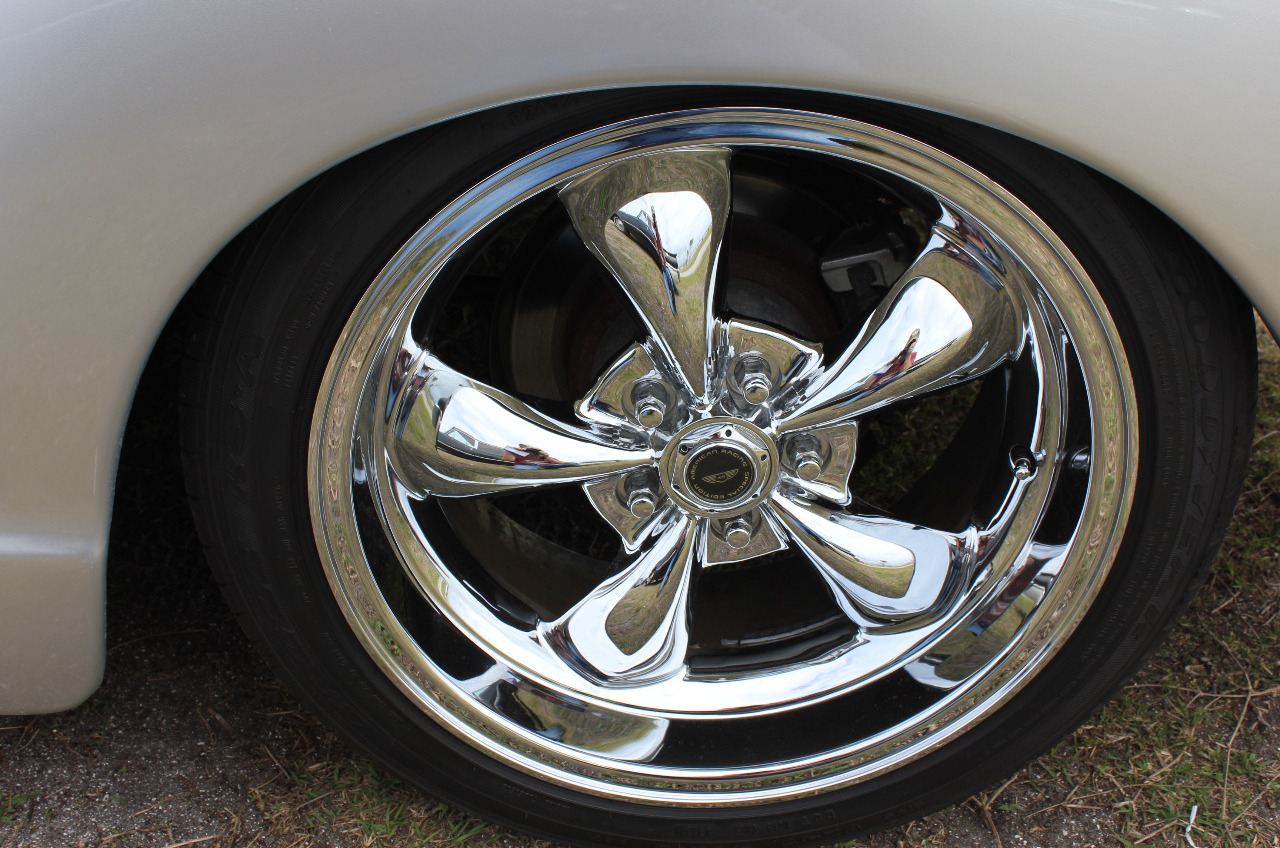
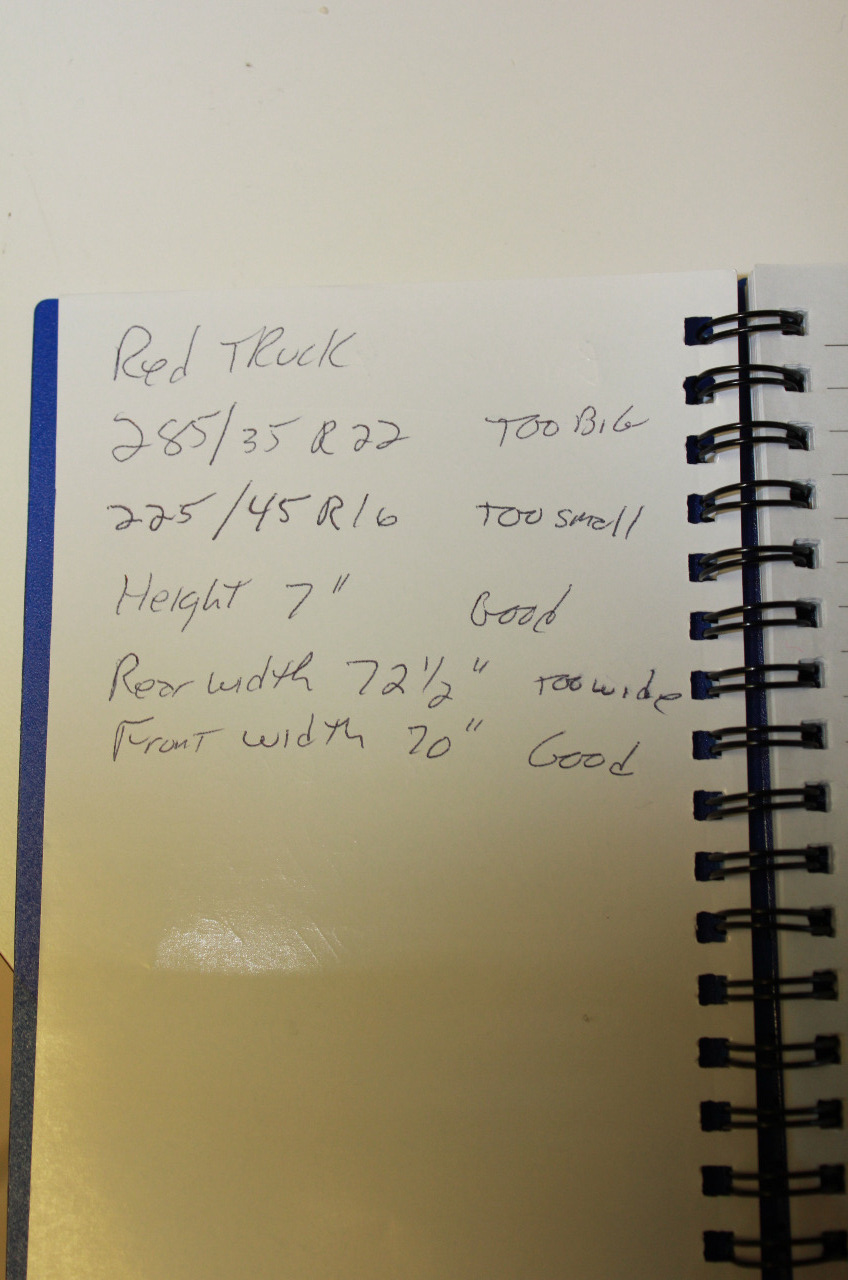
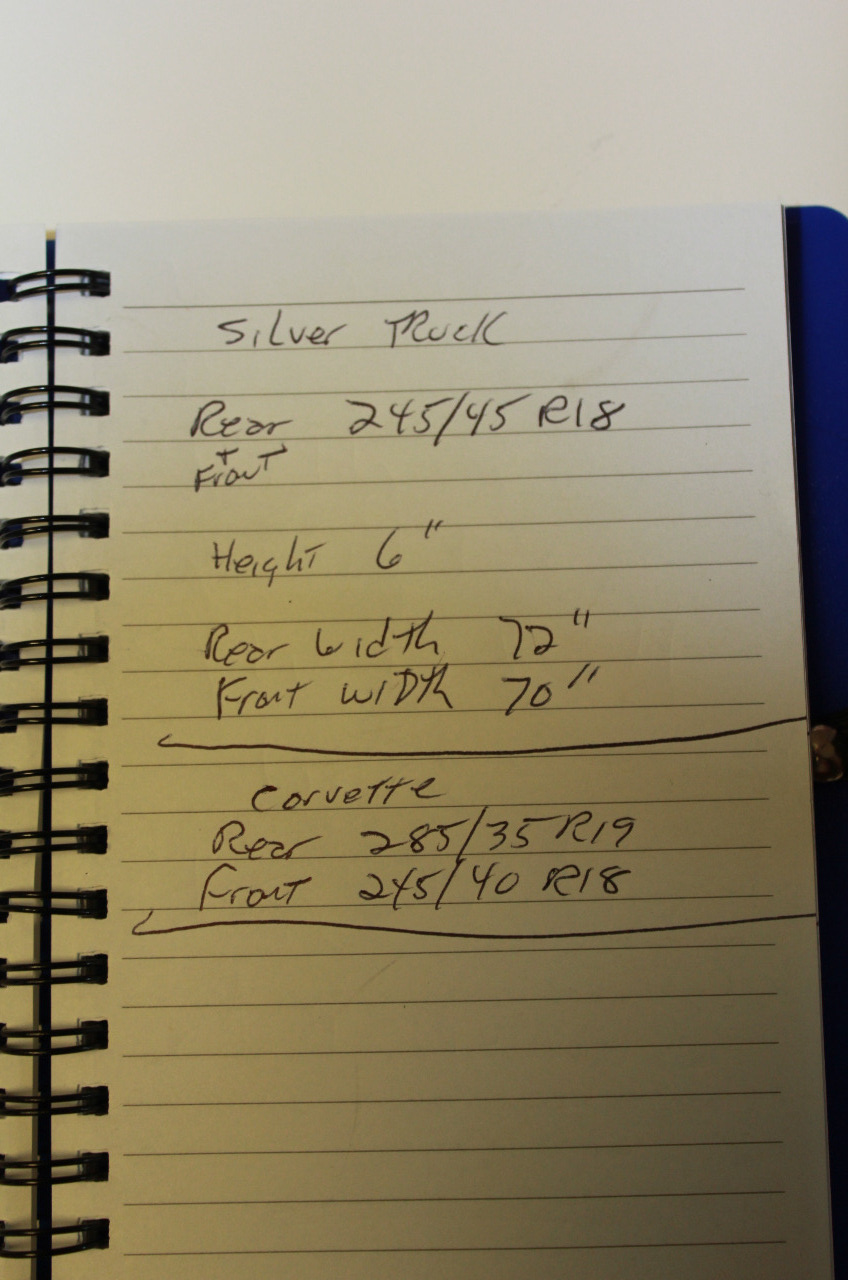
I've looked at a bunch of wheels and tires, and most of these trucks use a traditional Torque-Thrust 5-spoke wheel. I'm more interested in a Corvette style OEM replica wheel. It still needs to be 5-spoke and open enough to see the rotors and calipers. I went to the Daytona Spring Turkey Rod Run to look at other trucks and to make some measurements. I also looked at some Corvettes to check out wheels.
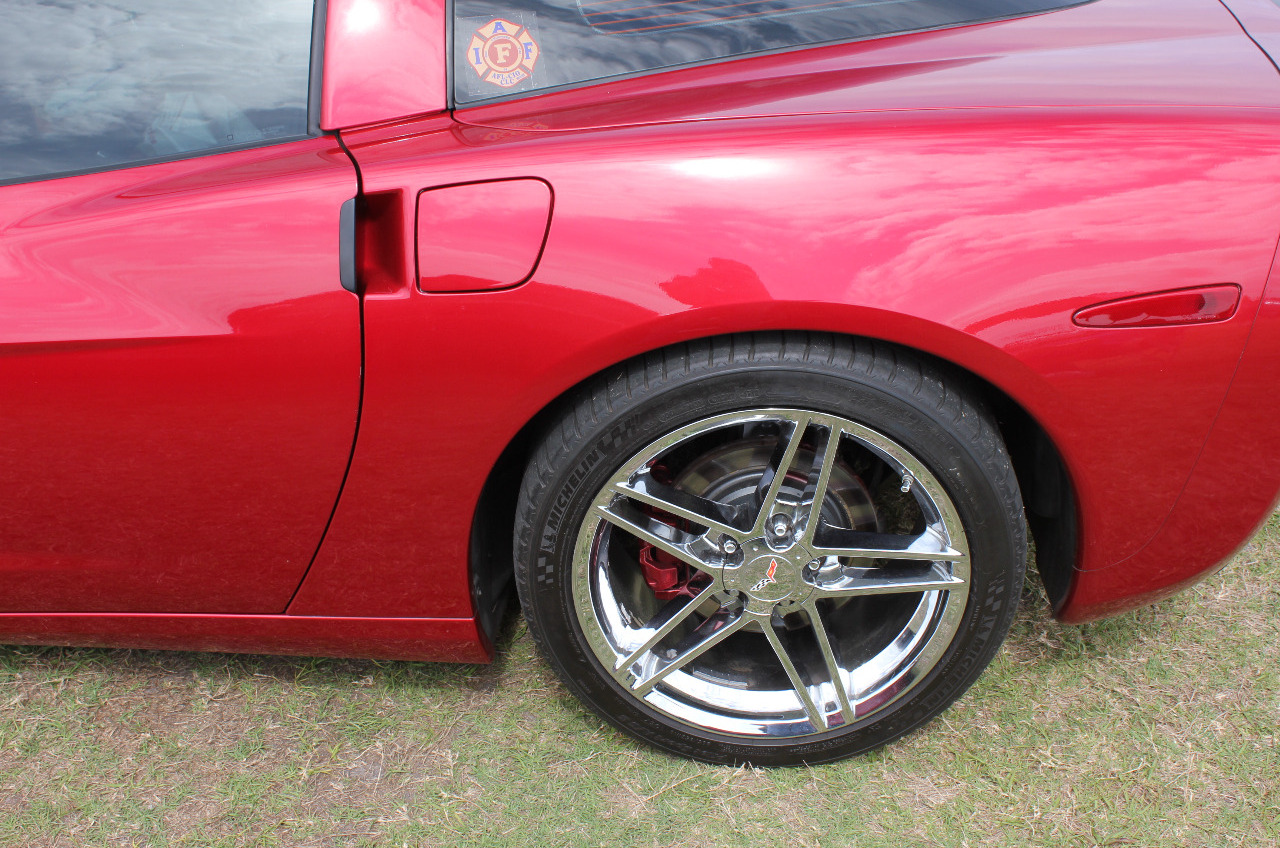
From what I saw, wheel size has to be 18" or greater. I like the stagger look with larger rear wheels than front. My favorite wheels are the C6 Z06 wheels on the truck in my cover photo. They're not particularly common and are only available in 17", 18", and 19" sizes. Originally, I was hoping to use 275/40R18 on 18x9.5 (+40mm offset) on the front and 305/35R19 on 19x11 (+64mm offset) on the rear. The front wheels and tires are easy. There are several manufacturers of wheels and many manufacturers of tires. The rear is more difficult. The 19x11 (+64mm offset) are rare but available and the tires are somewhat rare and expensive. Buying the expensive rear tires also increases the price for the matching front tires.
But the more I measure clearance in the rear, the more concern I have with the 305 size. It's tight, but may fit. The 295 size would be much better. But a 295/35R19 is really rare and really expensive. Dropping to a 285/35R19 is really easy. Wheel size drops to 19x10 (+56mm offset) and is easy to find. 285/35R19 is very common and much cheaper. So, while I would like to go to 295/35R19, it just doesn't justify the cost.
So next week, I will be pricing 275/40R18 on 18x9.5 (+40) for the front and 285/35R19 on 19x10 (+56) for the rear.


2025-05-22