 Orlando, Florida, United States
Up to this point, while it may appear that everything has
gone perfectly, it has not. It is now
time to go back and fix the mistakes that I know about. I’m sure I’ll uncover more, but for now, I
want to fix the things that will allow me to drive it around the neighborhood
more or less safely. First step is to
replace the defective master cylinder.
This should have been a simple replacement, just 2 nuts and 2 brake line
fittings. This time, I painted the new
master cylinder, and a couple of days later, placed it in the vice surrounded
by a couple of rags and followed the bench bleed procedure on the bench this
time. It’s actually much easier on the
bench than doing the bench bleed in the truck.
After bleeding the master cylinder, I installed it in the
truck and tried pumping up the brakes – no luck. I guess there’s just more air than I thought. I was going to have Jody help me bleed the
brakes, but since she’s not home, I decided to try the vacuum bleeder one more
time. This time I used it correctly, I
left the bleeder closed, attached the vacuum bleeder and pumped it up.
Then I cracked open the bleeder until it bled
off, then closed the bleeder again. I
repeated this procedure until bubble-free brake fluid came out, and then
repeated it on all 4 wheels. Everything
looked great, there wasn’t very much air in the lines, but when I tried the
pedal again, and it went straight to the floor.
No amount of pumping would bring up the pedal.
I went back and looked at the old master cylinder, when I
realized that the cutout for the plunger in the old master cylinder was much
shallower than the new one. A closer
inspection showed that there was a metal cylinder inserted into the plunger to
take up most of the depth. I popped it
out and realized that since the power brake booster had a short shaft, I needed
to install this cylinder into the new master cylinder. So I took it back apart, installed the metal cylinder
in the new master cylinder and rechecked the brake pedal. This time it worked perfectly! Checked for leaks, and it all looks
good! So I started it up, put it in gear
and tested the brakes.
They worked
perfectly!

I drove the truck back down the driveway so I could wash off
any residual brake fluid that had dripped on the frame or body. It all looks good now. As I moved the truck, there were a few
rubbing noises as it moved. The first
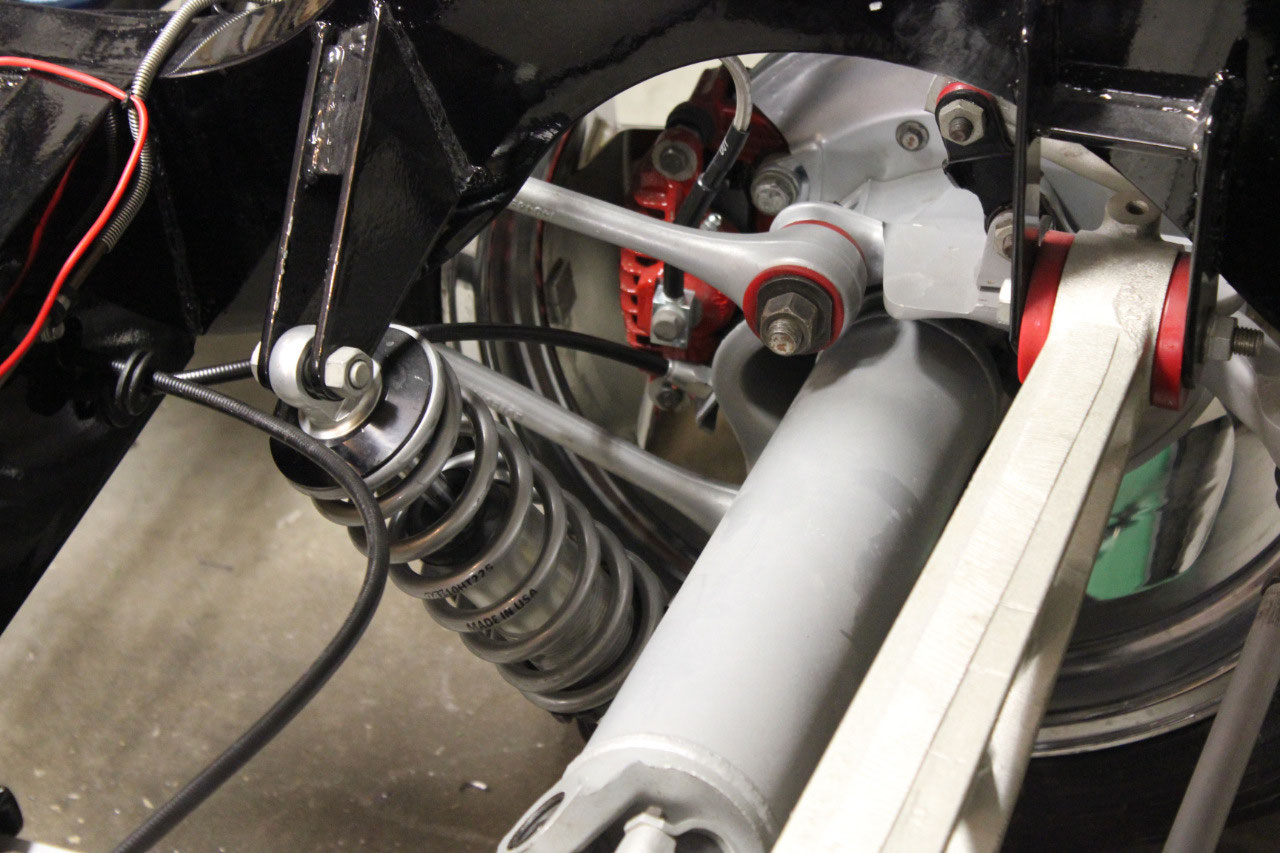
was the front tires rubbing on the fenders.
This I already knew about, and is my fault for measuring for the wheel
offset without weight on the front suspension.
When fully loaded, the front wheel track width was close to 72” and
should have been more like 69” to 70”. I
could jack up the front suspension and probably get some clearance, but the
right way to fix this is to replace the front Foose wheels with 34mm offset
wheels like the rear instead of the 1 mm offset that I have. This will move each wheel inward by 33mm or
about 1.25 inches. This should make the
track with about 69.5 inches which should be perfect. I ordered the replacement wheels from Summit
on 7/7, but it might take a few weeks to get them drop-shipped. Unfortunately, the reason for the 1mm wheel
selection in the first place was to have clearance for the front sway bar.
Now I will need to redesign the sway bar after
the new wheels are installed.
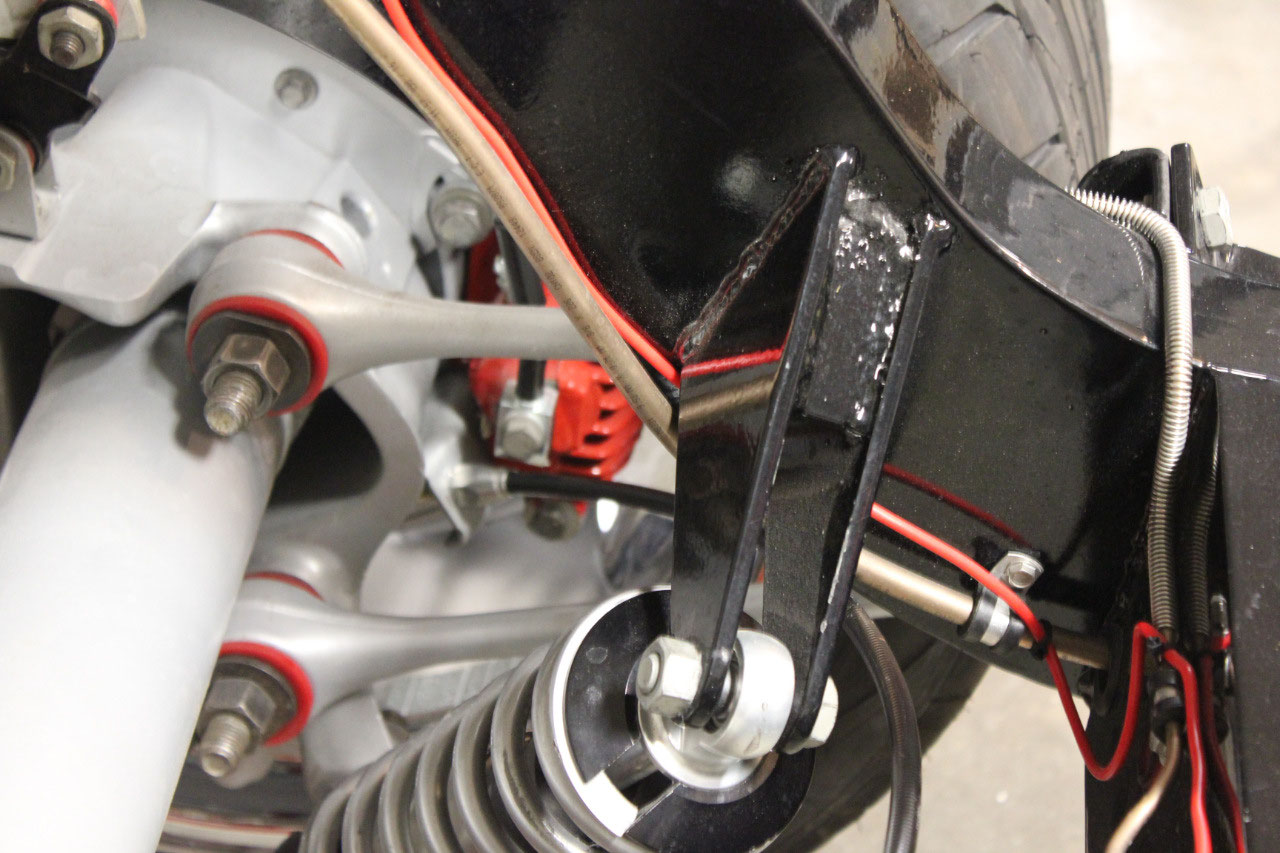
When listening for noises, I also noticed an additional
noise under the cab that sounded like drive shaft rubbing. Sure enough, I looked underneath and the
front u-joint area of the drive shaft was just rubbing on the floor of the
cab. A closer inspection showed that the
since the bottom of the seat is removable, there is a recessed area under the
seat for storage. This area drops a
couple of inches below the cab floor and interferes with the drive shaft. I decide that for now, I would just cut a 4”
wide strip in the floor above the drive shaft. Clearance looks good, but I’ll
need to clean up the opening and add some metal strips to close the opening
when the cab comes off next time.
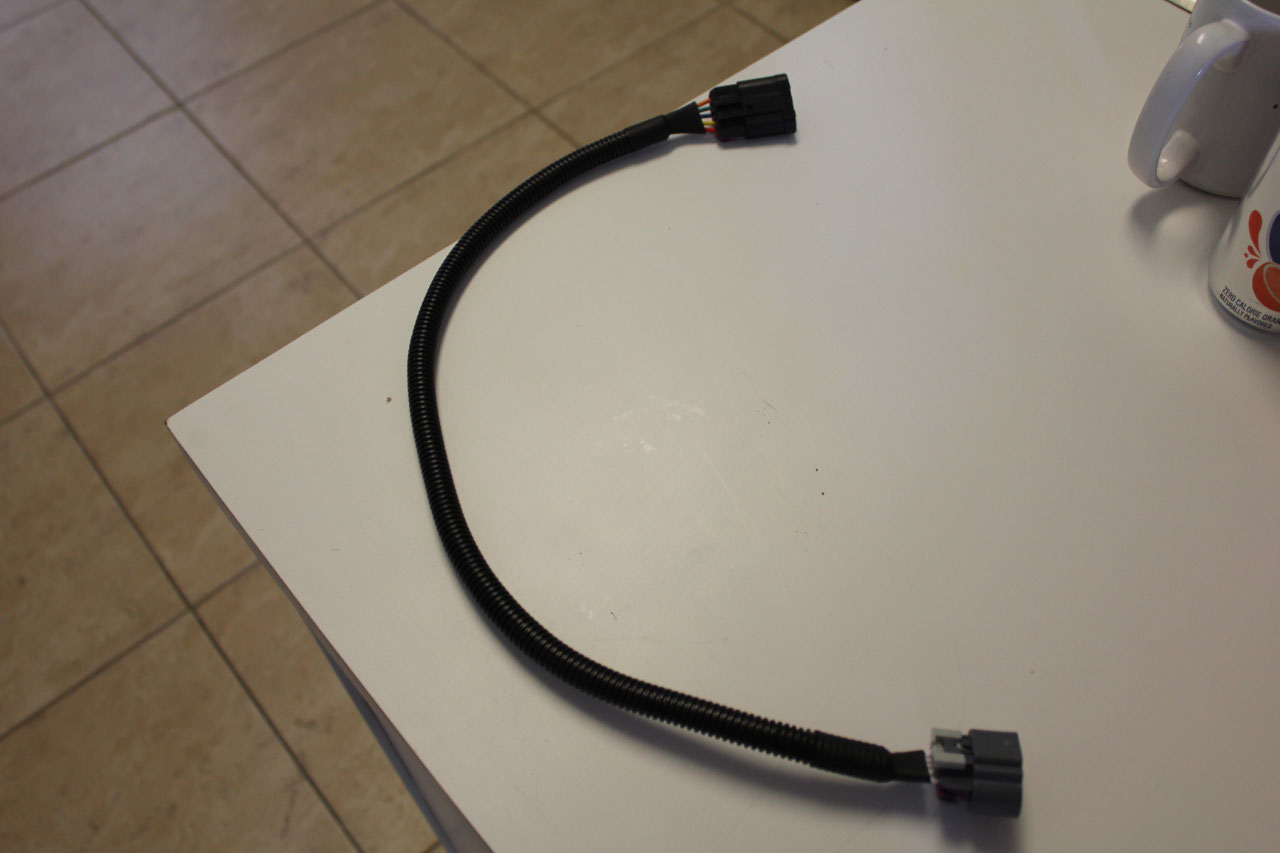
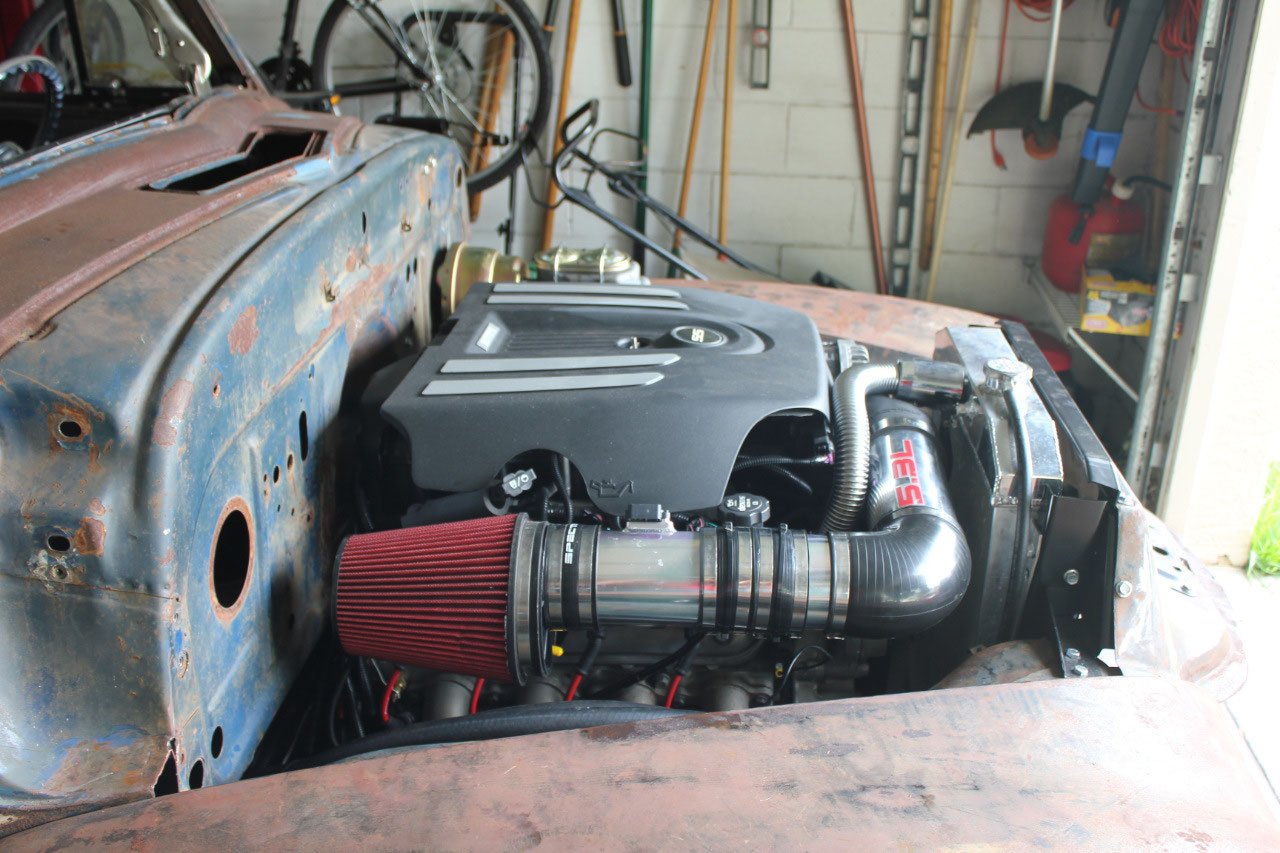
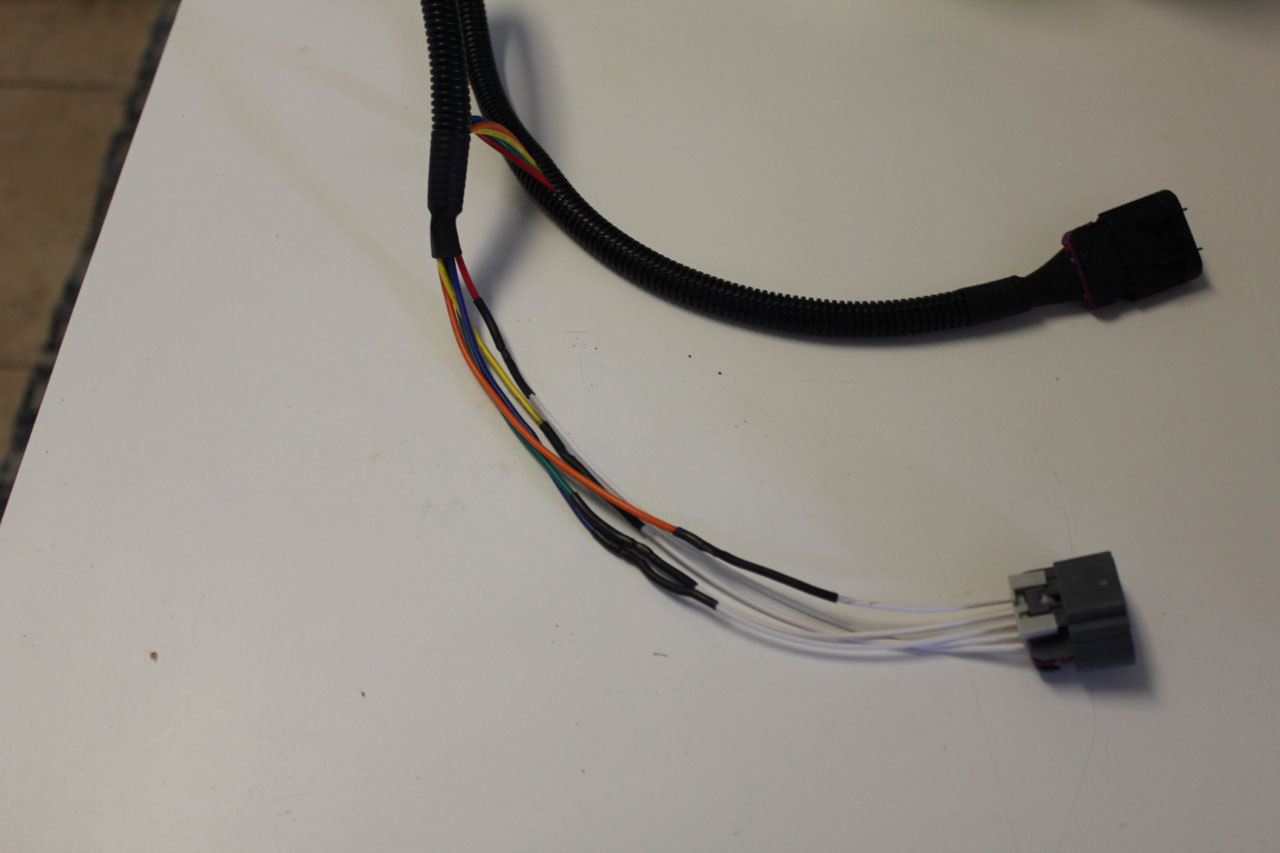
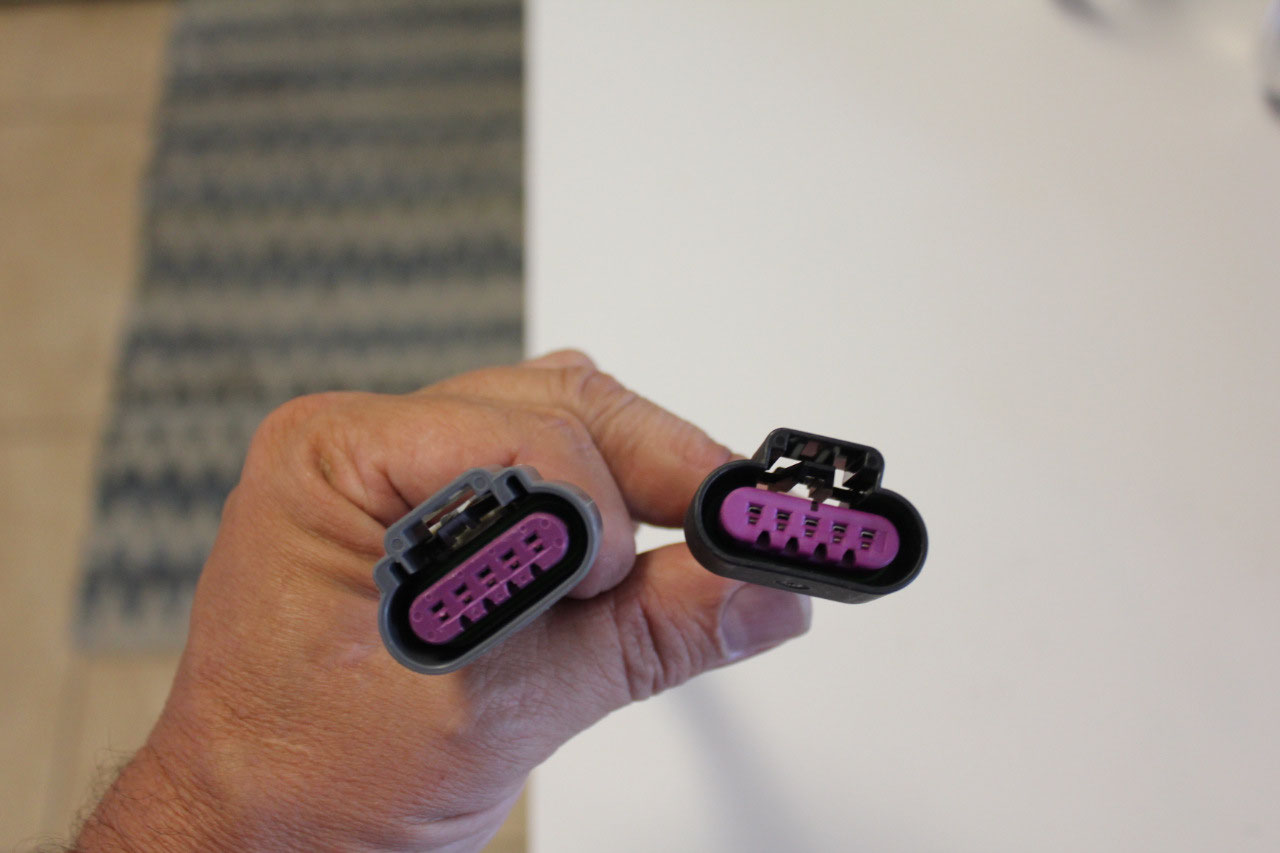
The MAF extension cable I ordered from eBay came in, and
while the pinout is correct, the keying is not quite right. The male pin end will work, but the female
pin end will not. I ordered a pigtail
connector from Amazon, and spliced it in place.
The cable now works great, and the truck starts every time.
I was hoping to get the new front wheels to check the
updated clearance, but the ship date is Aug 24 and I’m tired of waiting. So I decided it was time to get the cab and
doors media blasted. Unfortunately, over
the weekend, I was stung on the ankle by a hornet, and my leg and foot are
swollen. So I was only able to search
for a media blast place on the internet while I was recovering. In the end, I picked Blast Off Orlando (www.blastofforlando.com) they seemed
to have the equipment I was looking for, and had a background doing mostly cars
and restorations, and a lot of Corvettes.
So I drove down to West Grant St, near downtown Orlando to check the
place out. It was exactly what I was
looking for! Basically it’s a 1-man
operation, with a couple of helpers.
There were several cars around in various stages of restoration. Hanging on the wall were a couple of doors
and bed sides for a truck like mine. I
spoke to Art, told him what I had, and he said he had done many cabs like mine
as they are very popular.
I asked about
pricing, and it was $450 for the cab, $125 each for the doors for a total of
$700. If I wanted them primed, it was
50% more or $350, or $1000 total. He
said to bring it in whenever I was ready, and it would be done within a week.
Sounded good to me, and I asked him about primer, and he said
he always uses Southern Polyurethane Epoxy Gray Primer. This is a non-porous primer, so it both
primes and seals the metal. Most regular
primers are porous, and over time it will begin to rust through the
primer. He said he’s seen this primer 10
years later still with no rust. It
sounded good to me, so I will order some for my own use to finish priming after
I’ve finished the metalwork. By
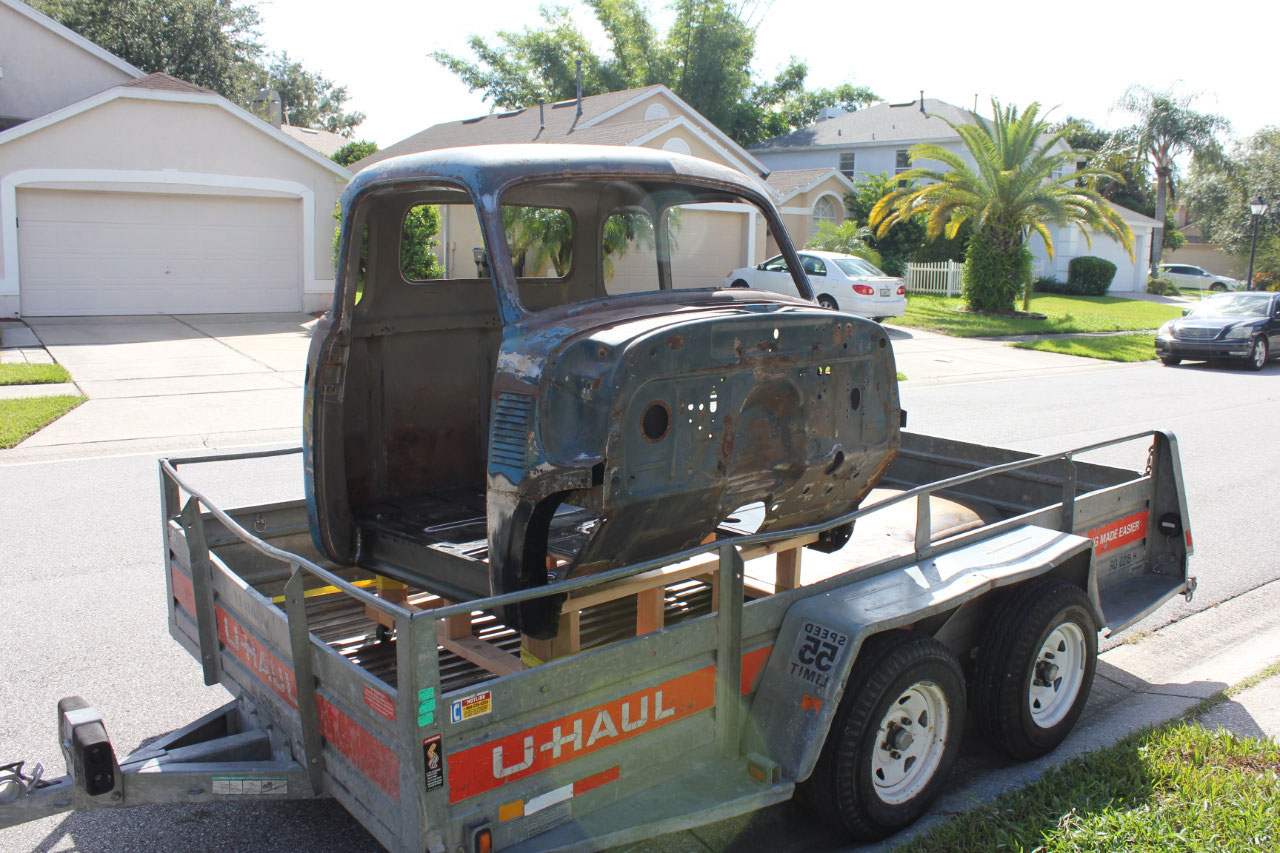
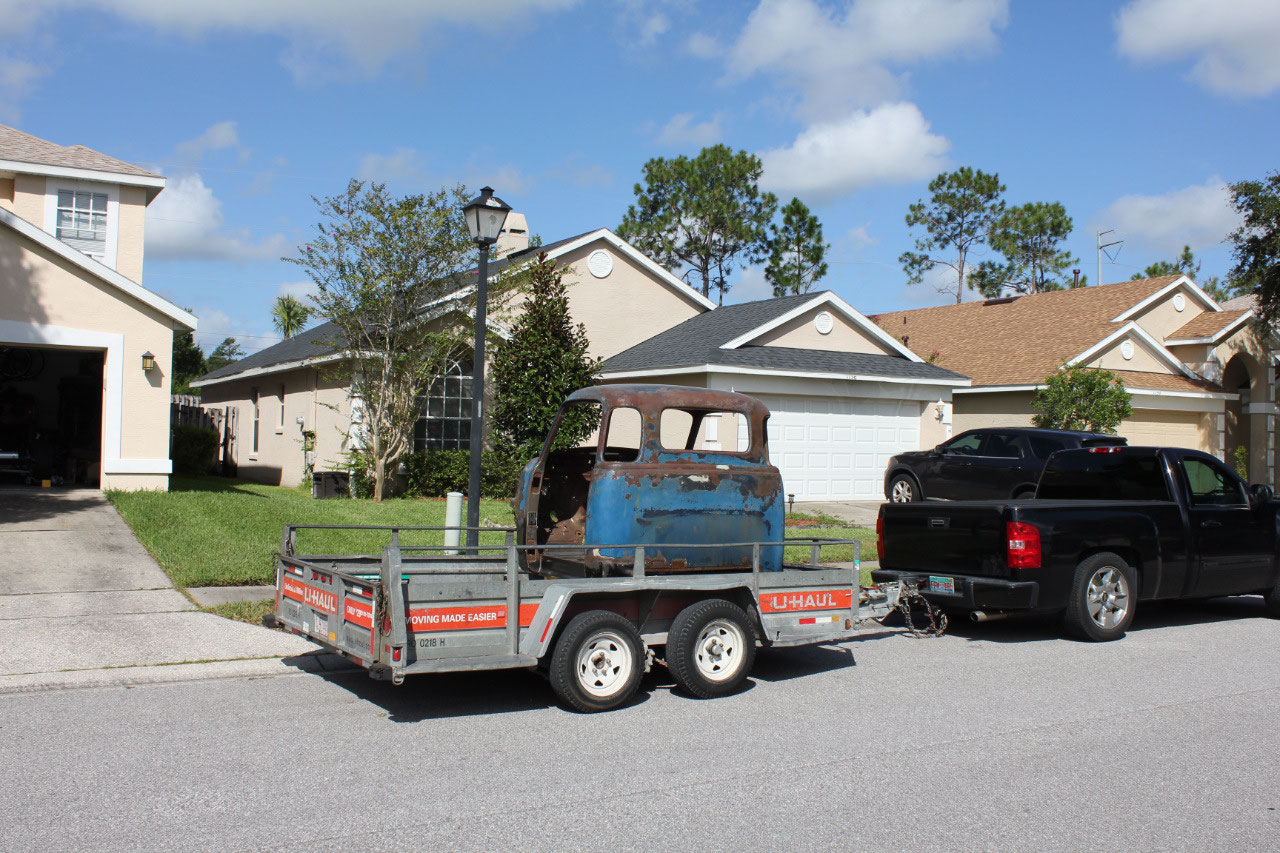
Wednesday, the swelling on my foot was back to normal, so I disassembled the
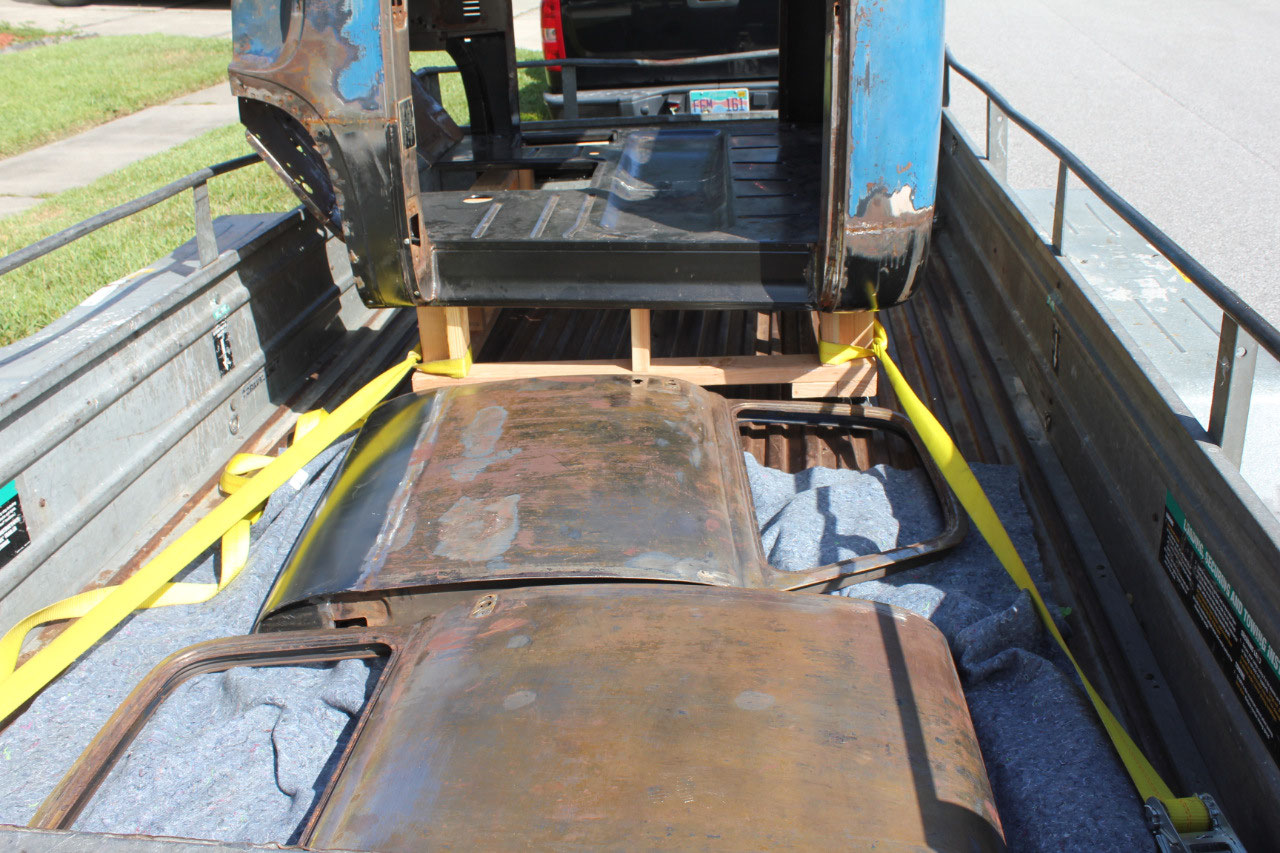
doors from the cab, and the cab from the chassis. On Thursday morning, I rented a U-Haul
trailer, loaded it up and headed over.
By Thursday afternoon, my baby was gone, hopefully to look much better
when it came back.
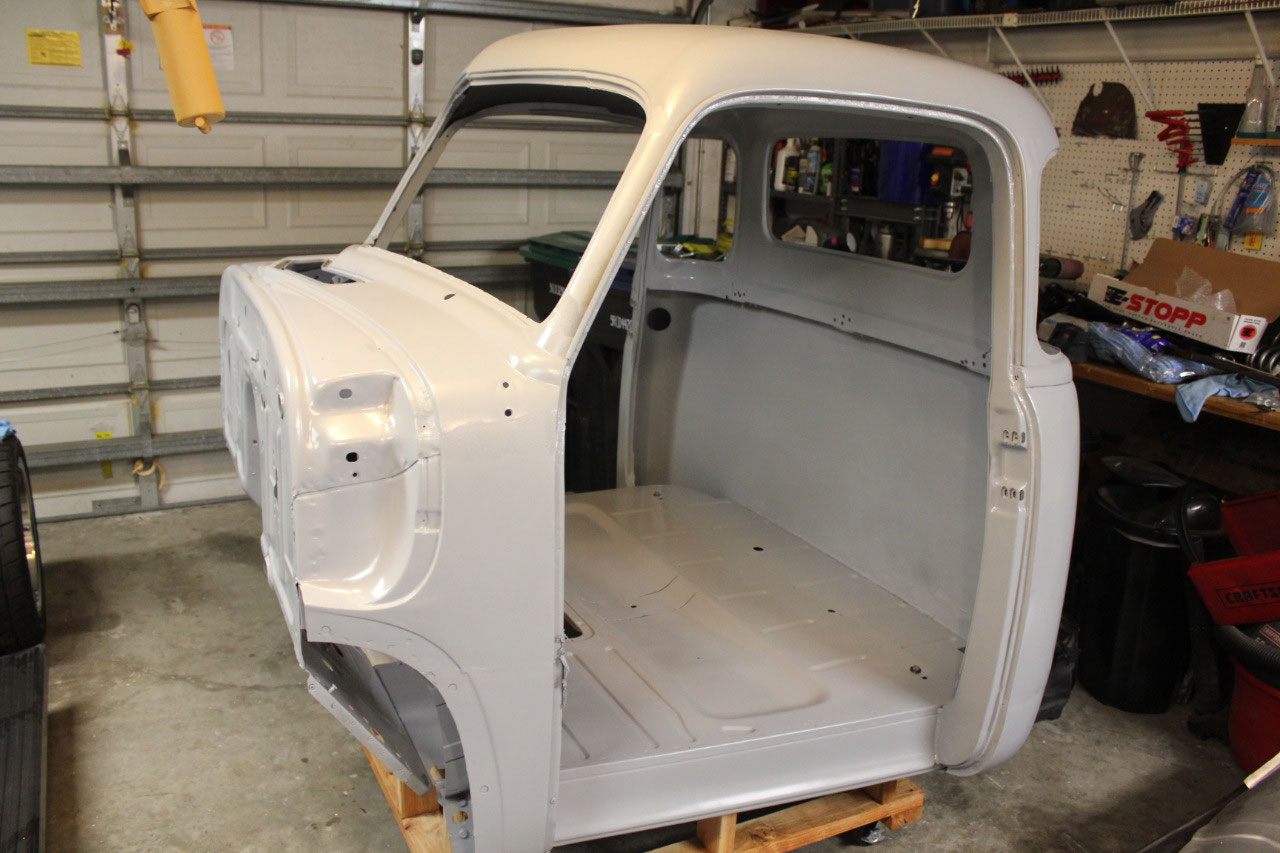
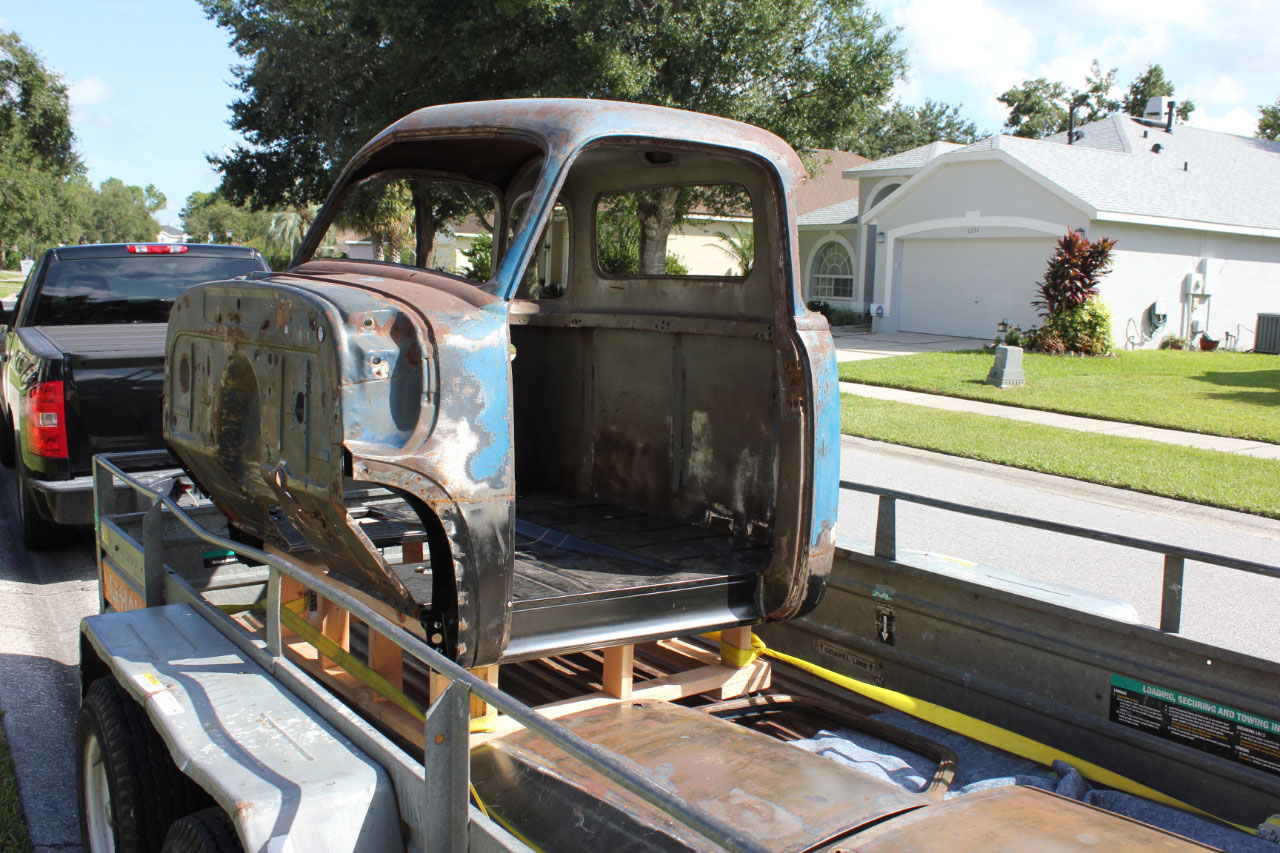
The following Wednesday morning, I got a text telling me my
truck was ready. I stopped at U-Haul,
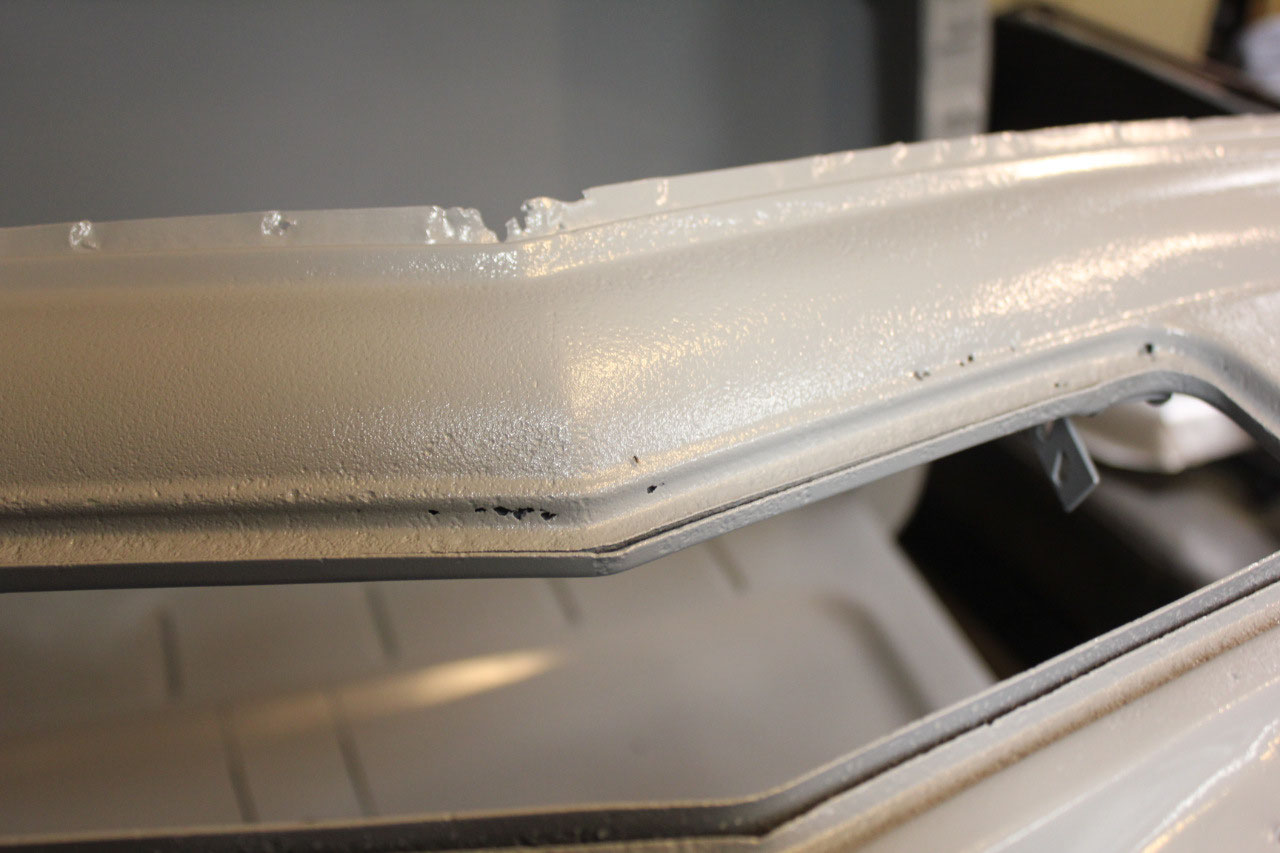
got the trailer again and headed over to pick it up. It looked great! He did an excellent job getting into all the
nooks and crannies with both the media blast and the primer. The primer actually has a slight gloss, and
it looks like it should hold up well. At
first glance, the cab looked good for pinhole rust, but I’ll do a closer
inspection when I get home. So we loaded
up the trailer and headed home. Of
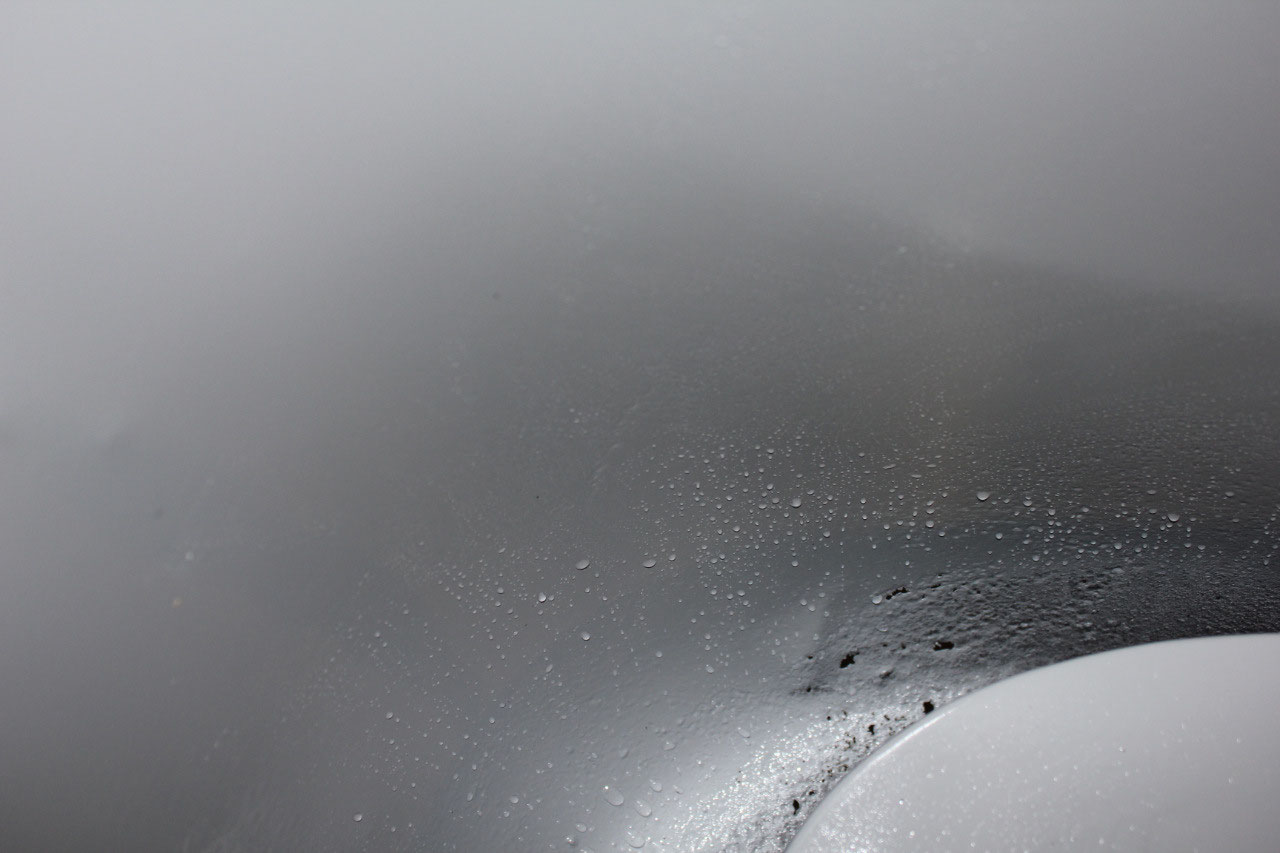
course, being Florida, it rained all the way home making me especially glad
that I had it epoxy primered before I took it home.
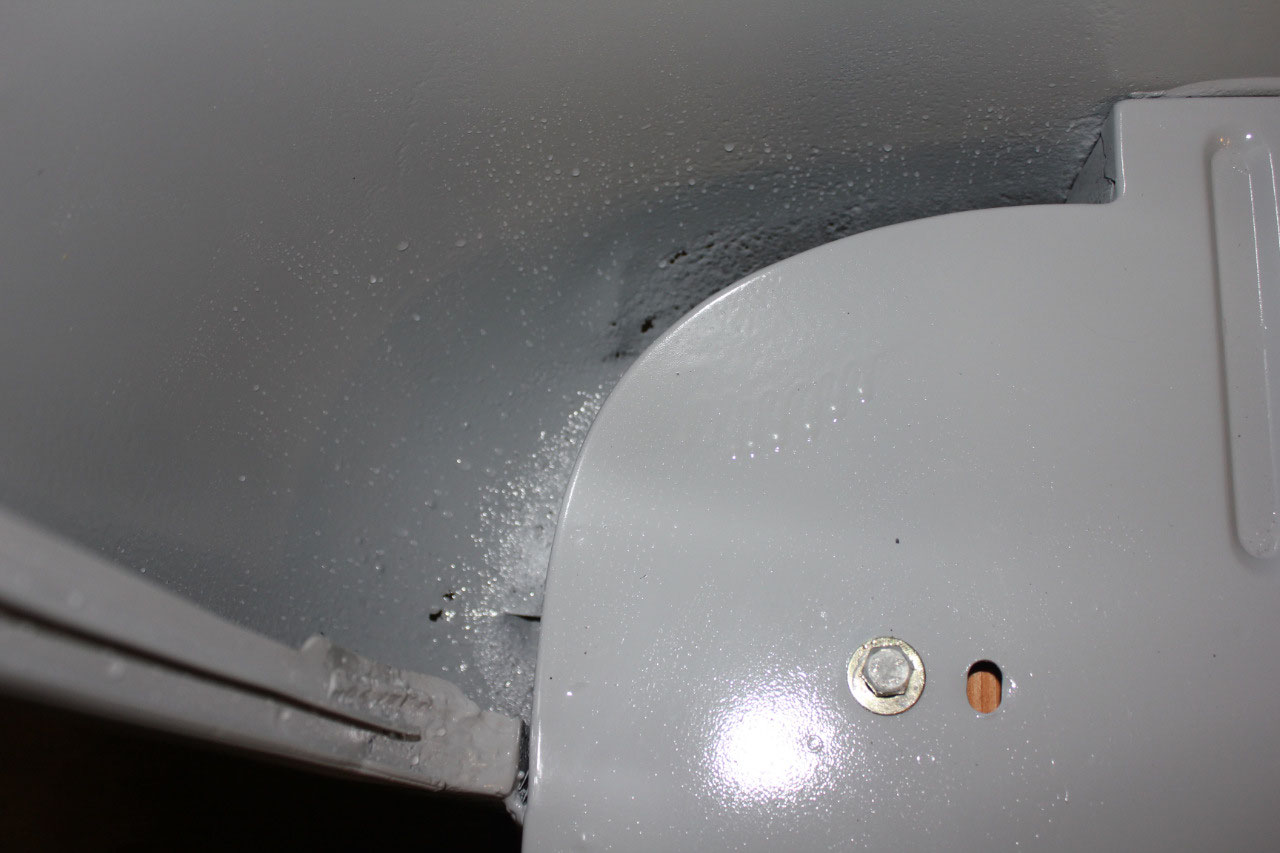
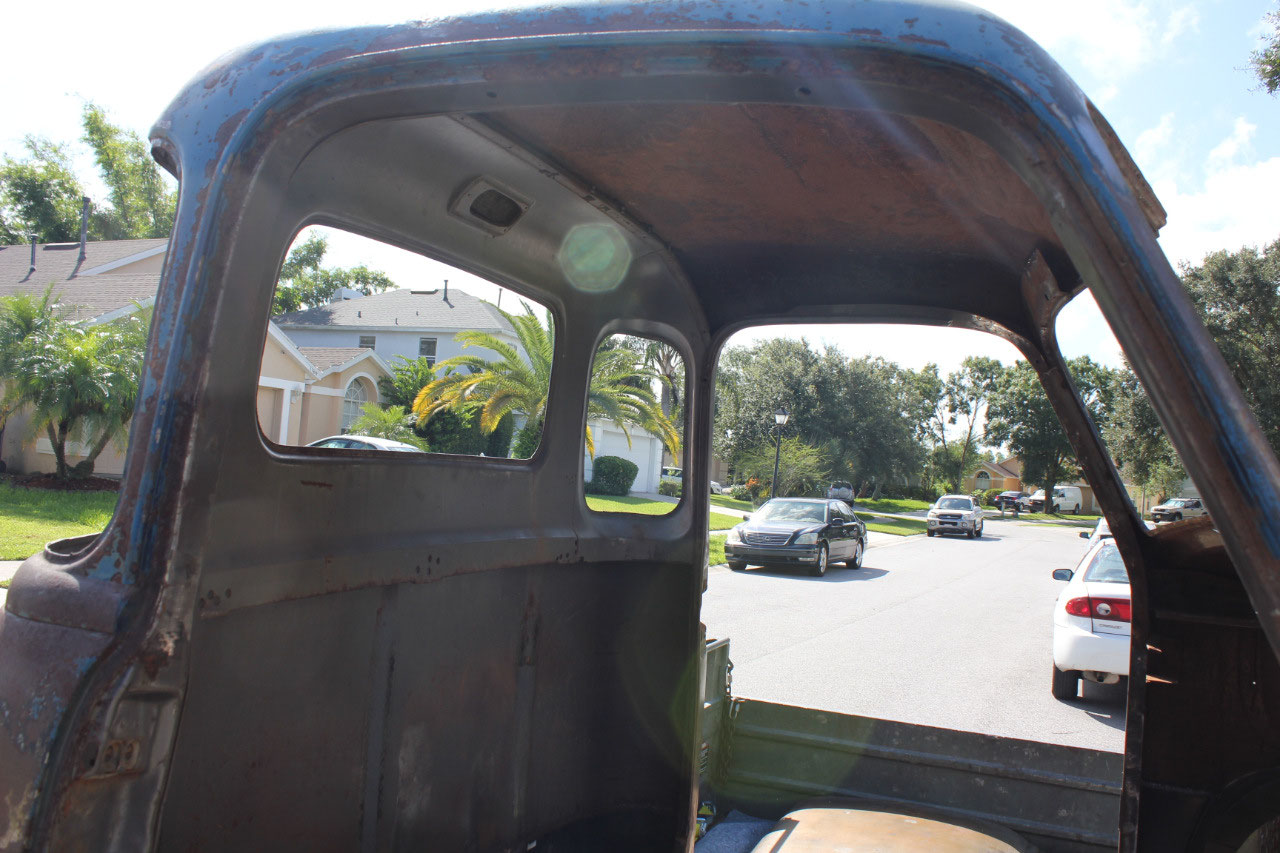
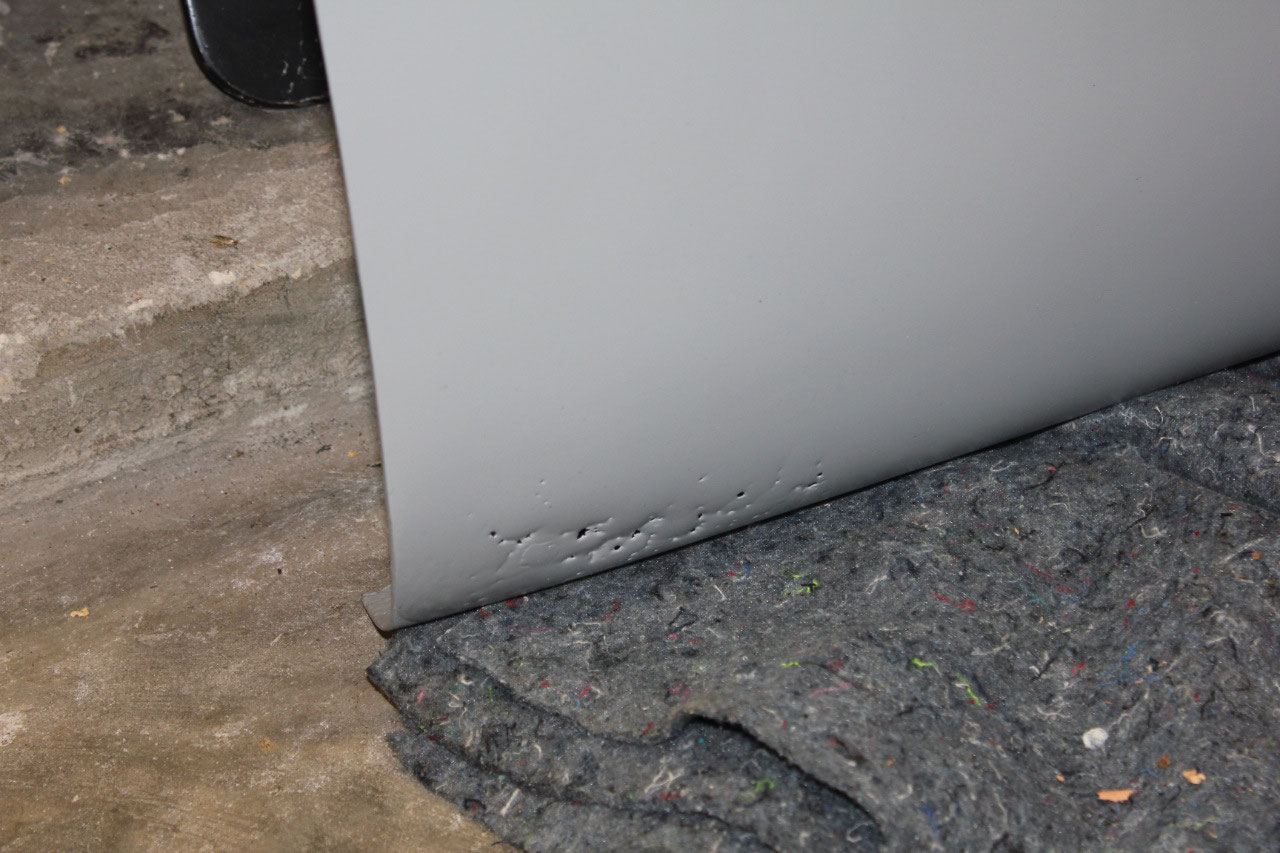
I did a close inspection of the metal and it’s almost all
good. There are a few minor pinholes
around the cowl vent, but I should be able to drill them out and weld them
shut. There are also a few small
pinholes at the back near the floor that I should also be able to weld
shut. The drivers cab corner had been
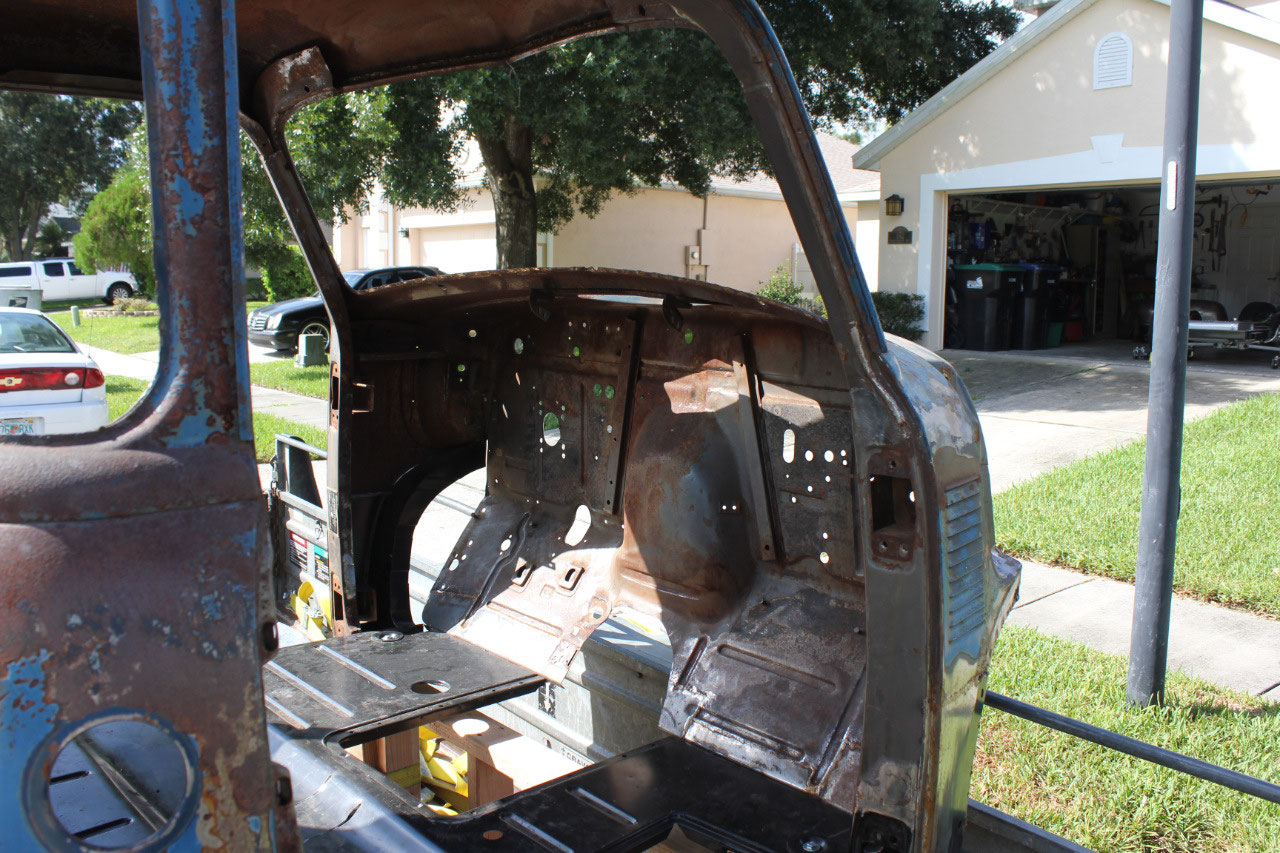
replaced, but the passengers cab corner didn’t look too bad.
After media blast, the passengers cab corner
will need to be replaced. Fortunately,
Matt included the replacement cab corner, so I will just need to weld it
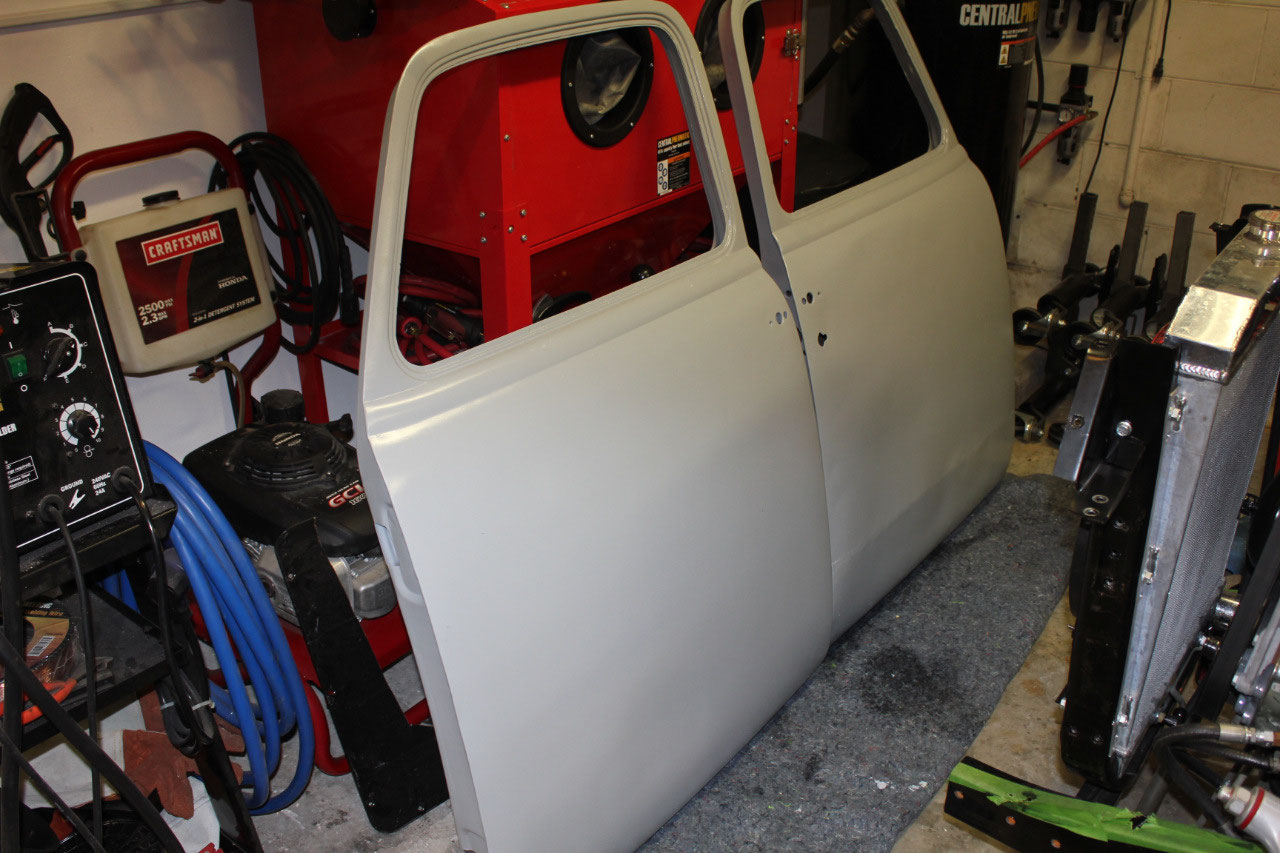
in. Matt had also replaced the lower
inner and outer skin of the passenger’s door.
It looks great, but the driver’s door will need these pieces replaced
also. I don’t have the parts, but
they’re no expensive. Hopefully I can do
as good of a job as Matt!
We’re getting ready for our trip to Hawaii, so I’m not ready
to tackle the metalwork until we return.
But now that the cab is off, I figured it was time to tackle the parking brake. I didn’t really want to use the factory
parking brake pedal as it’s huge and comes through the floor. So I looked at aftermarket under dash pedals
and handles, but by the time I bought all the parts and the intermediate
cables, it was looking pretty pricey.
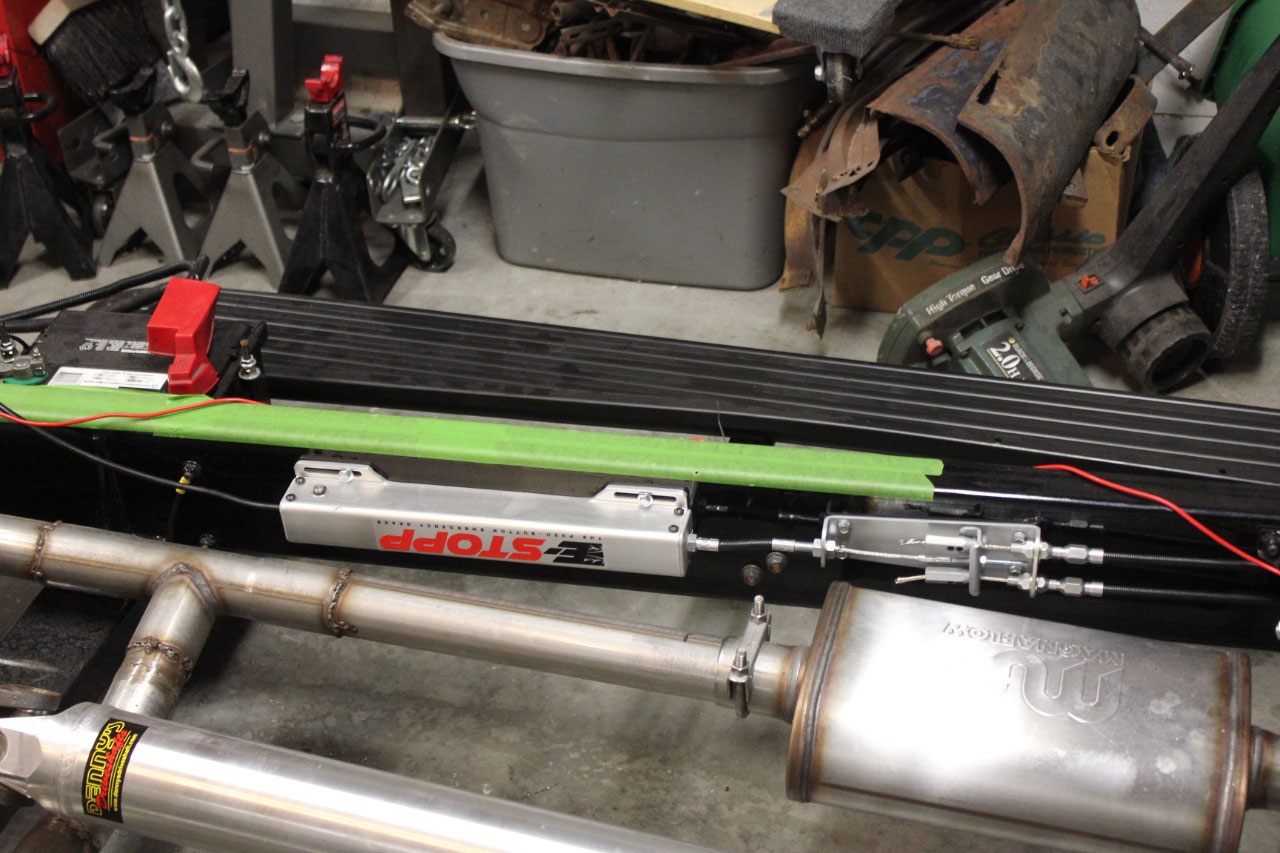
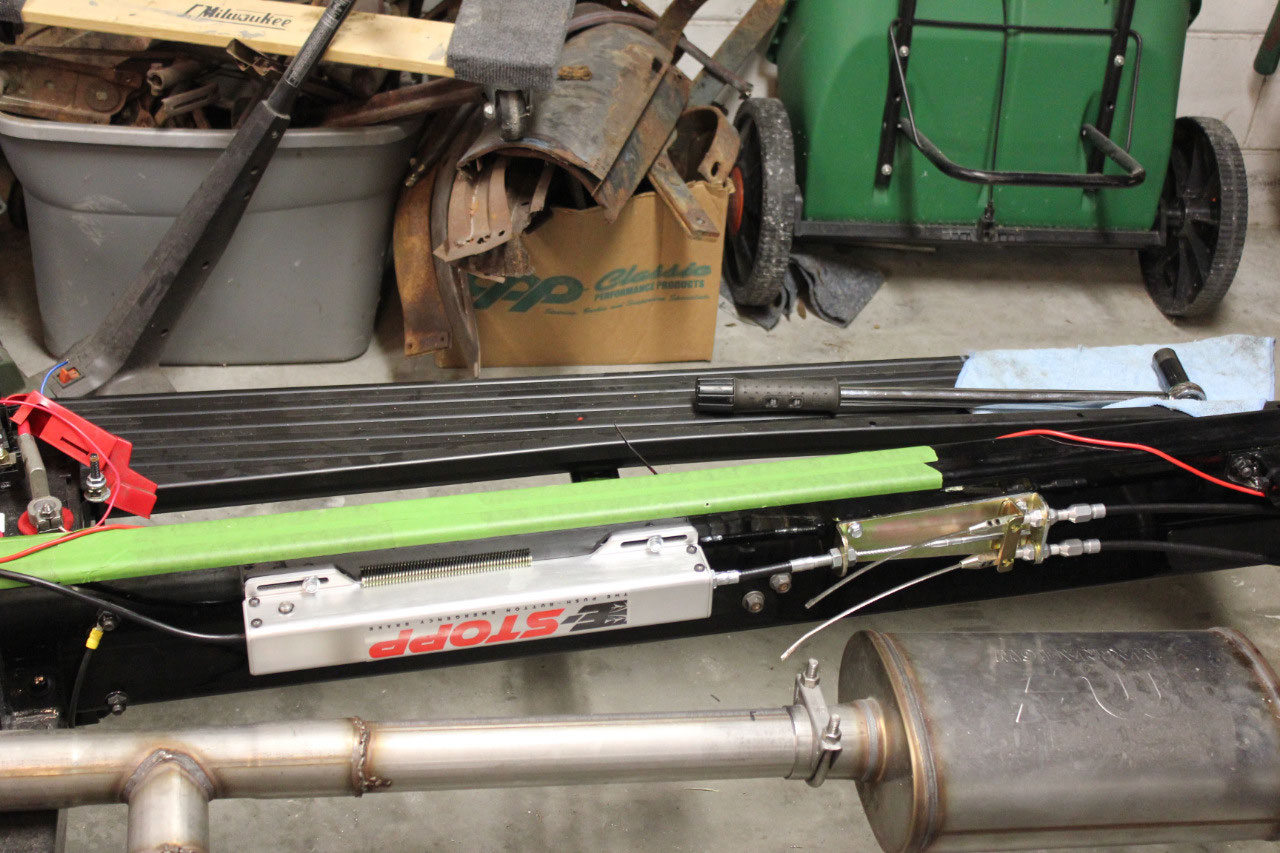
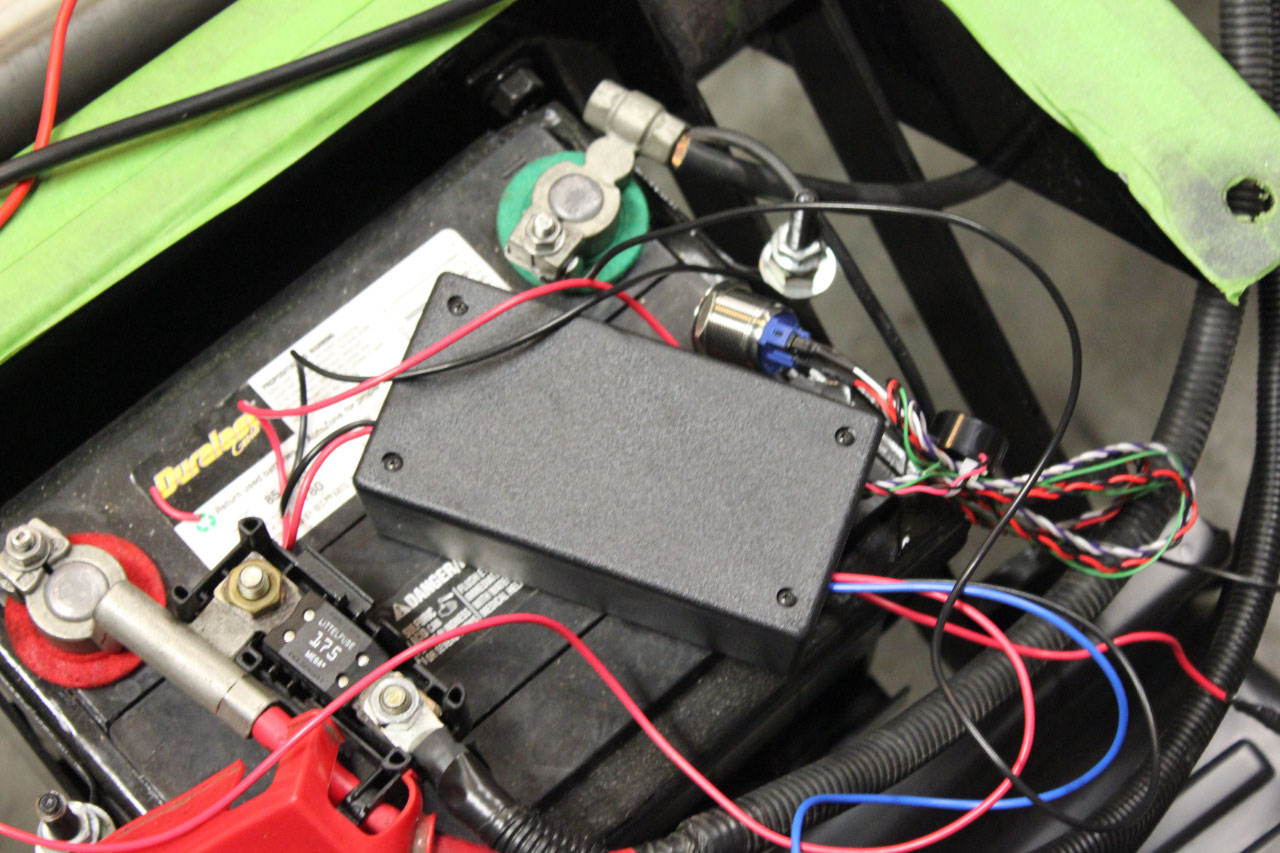
What I did find was a YouTube video about an eStopp electronic parking
brake that was essentially a linear motor and controller that essentially a
push button parking brake like on Jody’s Subaru.
Press the button and the motor pulls the
parking brake cables and shuts off at 600 lbs.
Press it again and the motor releases the parking brake cables. The unit is only about 18”x3” and should
mount easily on the inner frame rail.
They also have a nice bracket to mount the cables and pull bracket
making a really professional installation.
The biggest problem is that it costs $479, but when I did the math for
pedals, cables, etc. it’s actually a little cheaper. Also, Summit was having a $50 off coupon, so
I was able to get it for “only” $429.
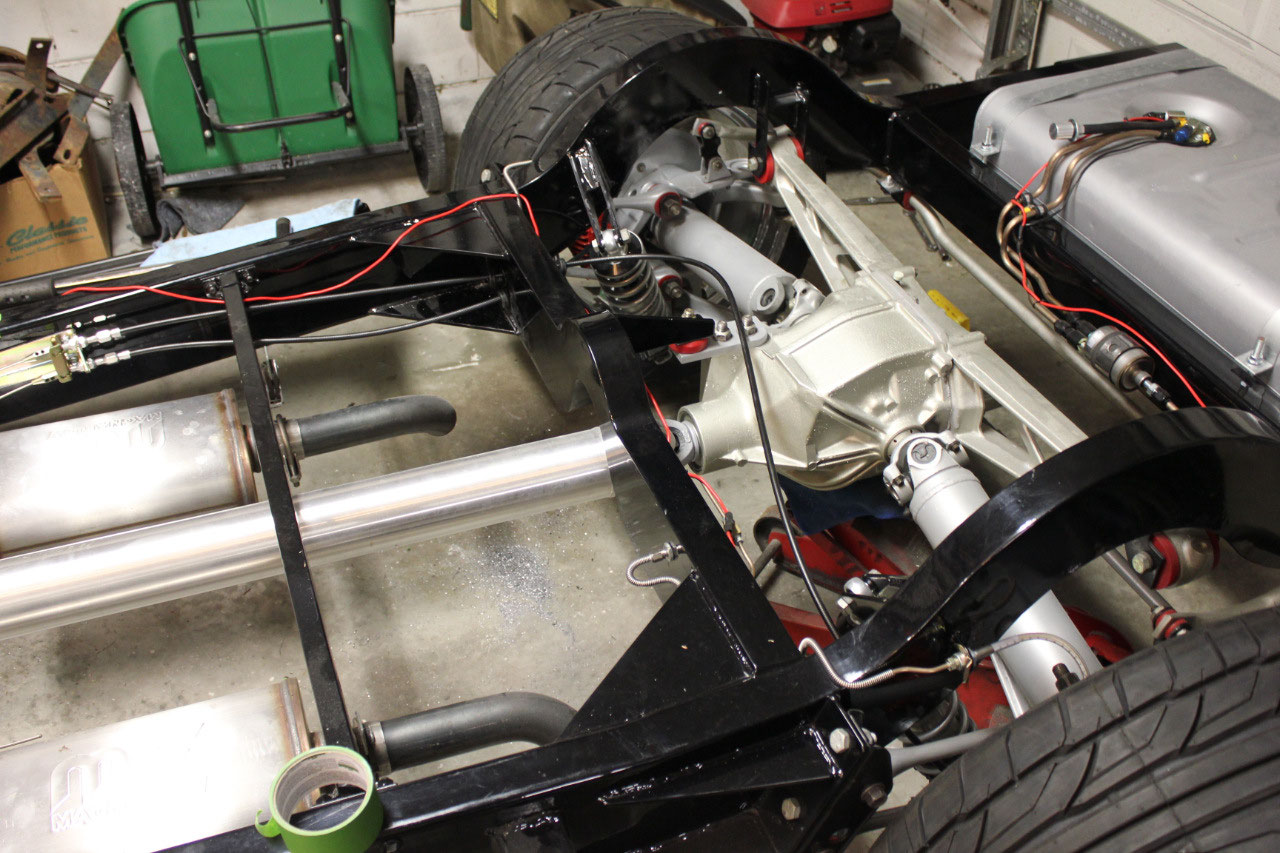
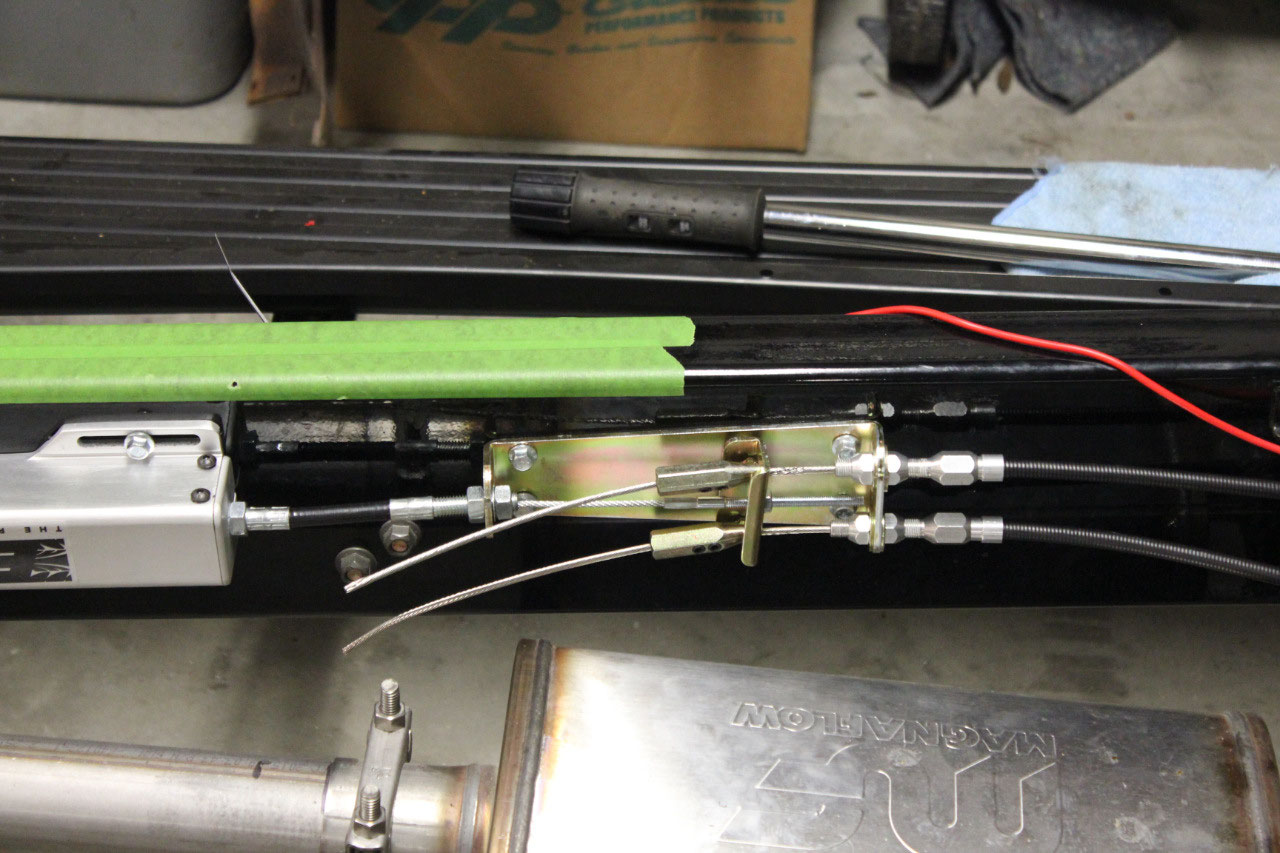
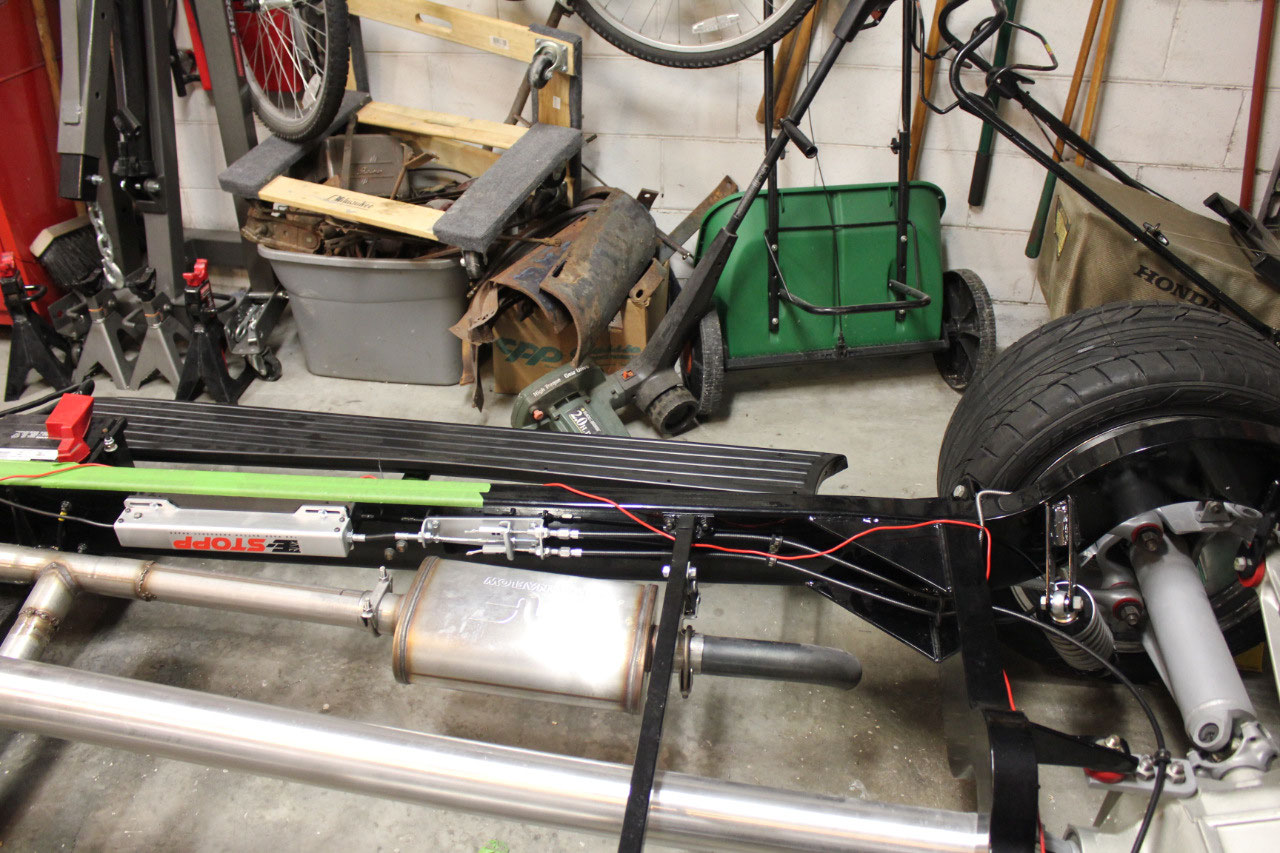
I mounted both the eStopp and the bracket to the inside
passengers frame rail, drilled a couple of 7/8” holes through the frame for
parking brake cable routing, and added a couple of 3/8” clamps to hold the
cables in place. After hooking it all
up, adjusting the cable length, and mounting the button to the control panel, I
pressed the button and it all worked perfectly!
It’s very impressive and so much easier than designing a complicated
system.
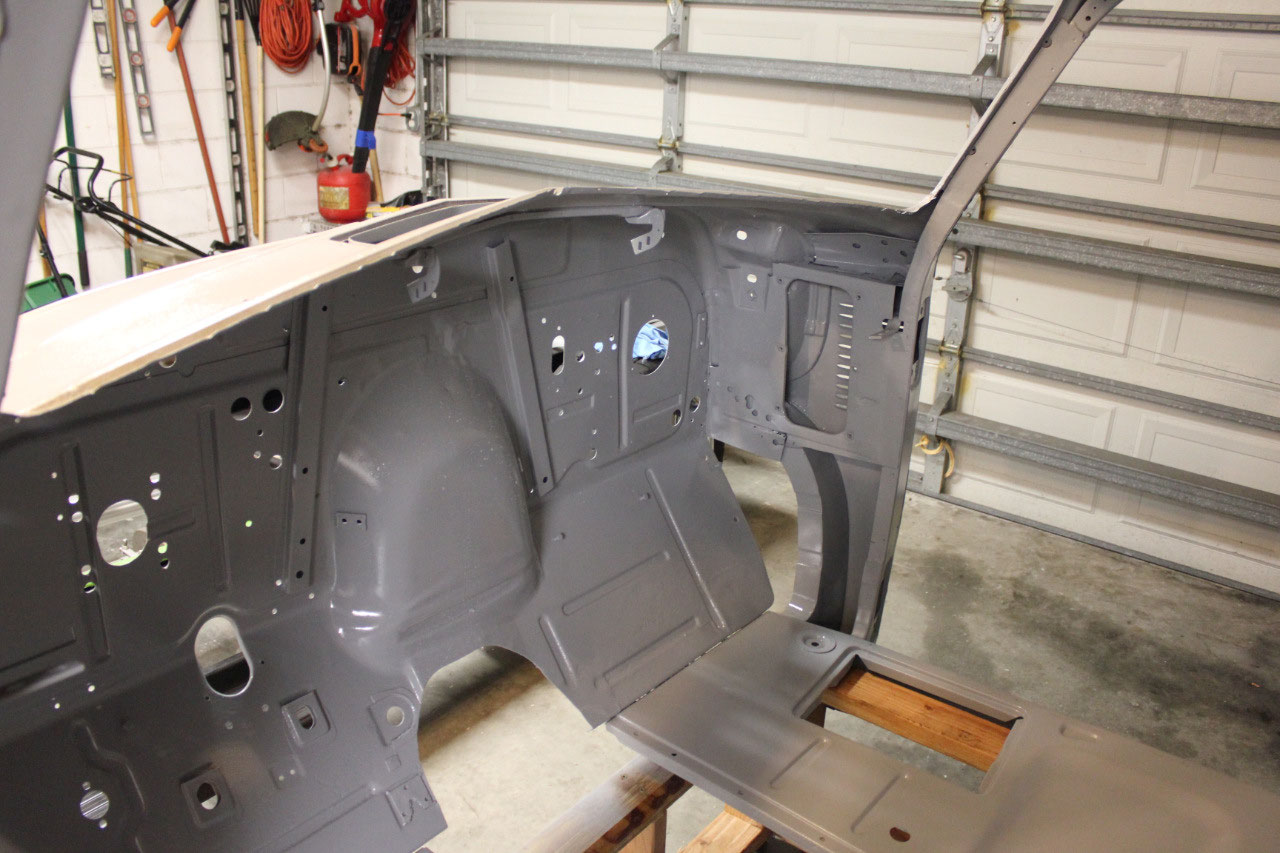
For now, I think we are at a break point. We leave next week for a trip to Hawaii, and
I hope to start the metalwork when I get back, I test fit the kick panels and
the braces, and it all looks promising. I’ll
just need to practice my plug welding, so that everything comes out looking
professional. Meanwhile, Hawaii is
calling!


2025-05-22